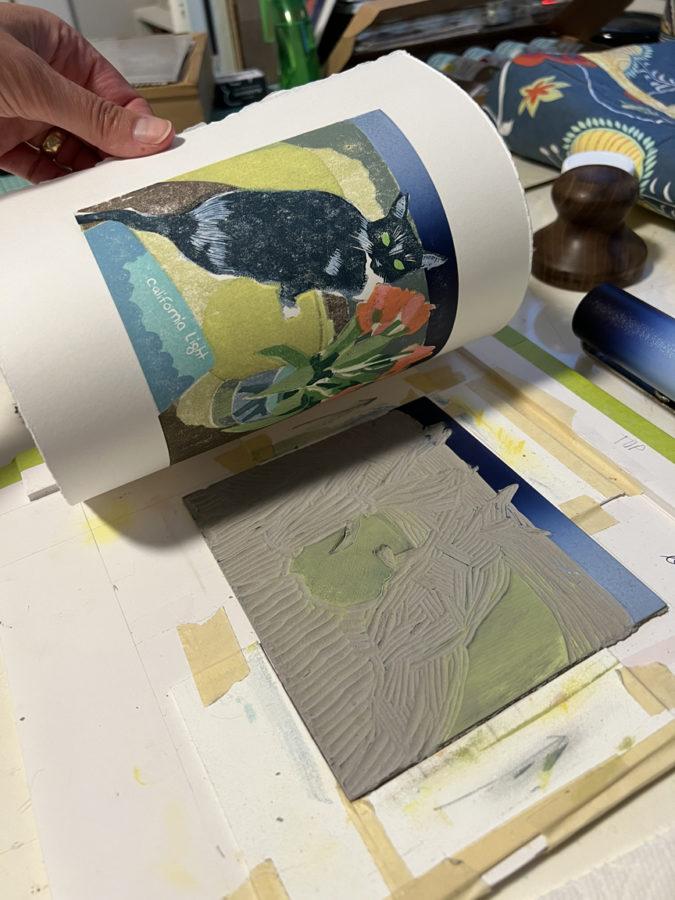
Print Day in May Reduction Linocut and Drypoint Combo
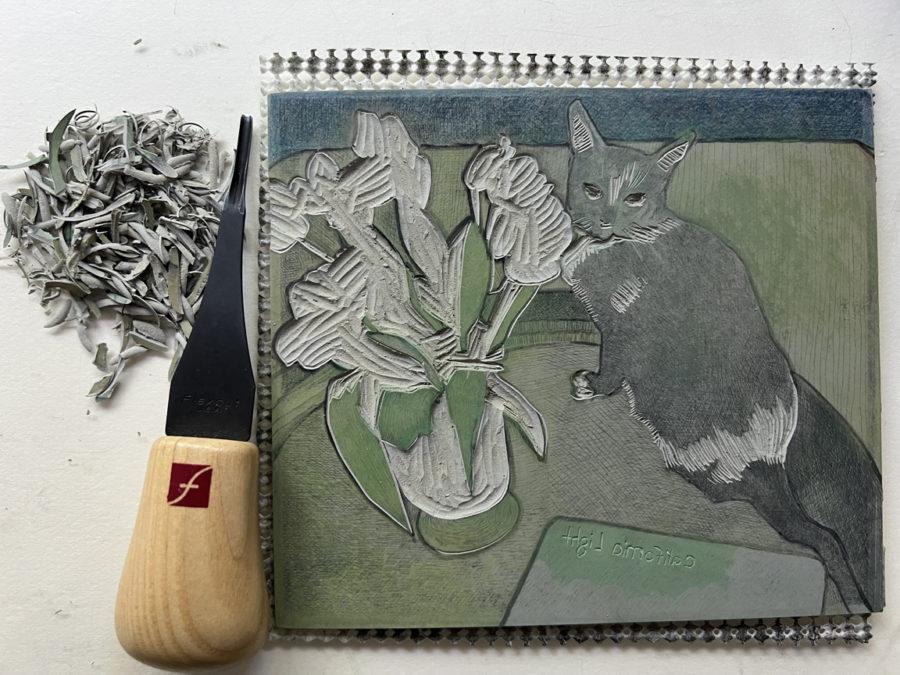
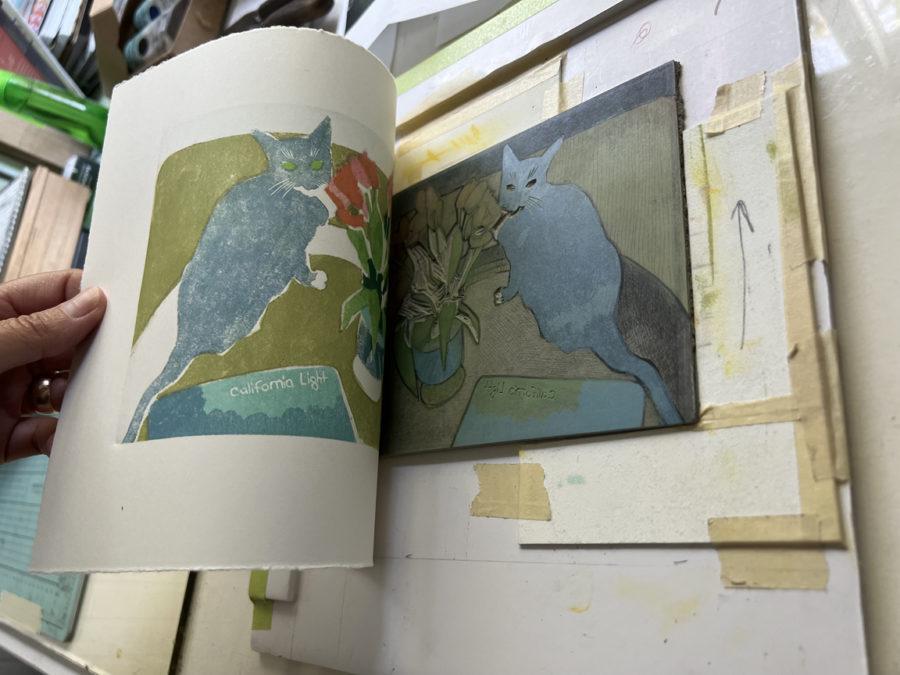
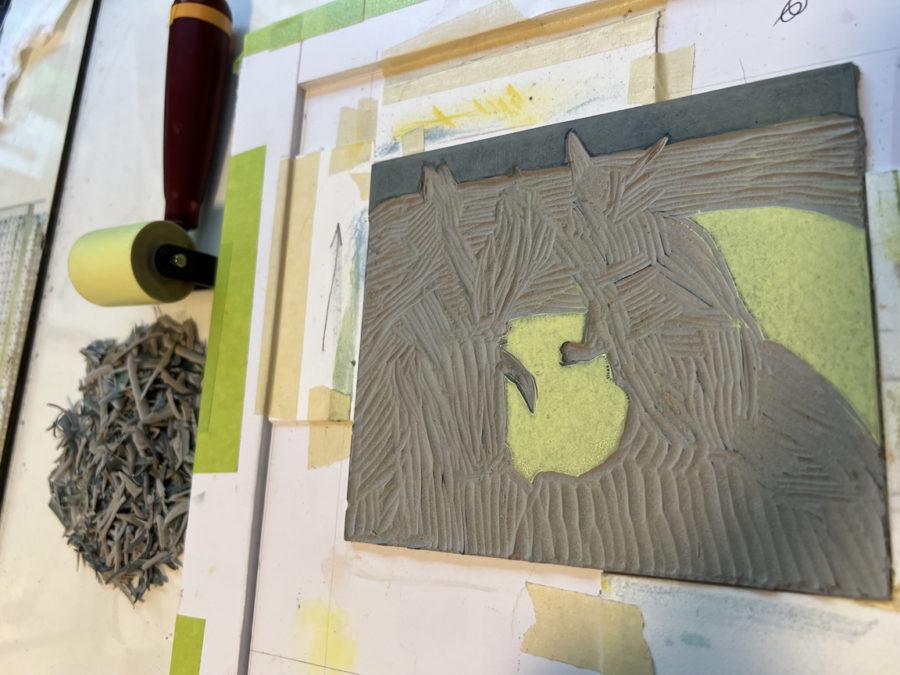
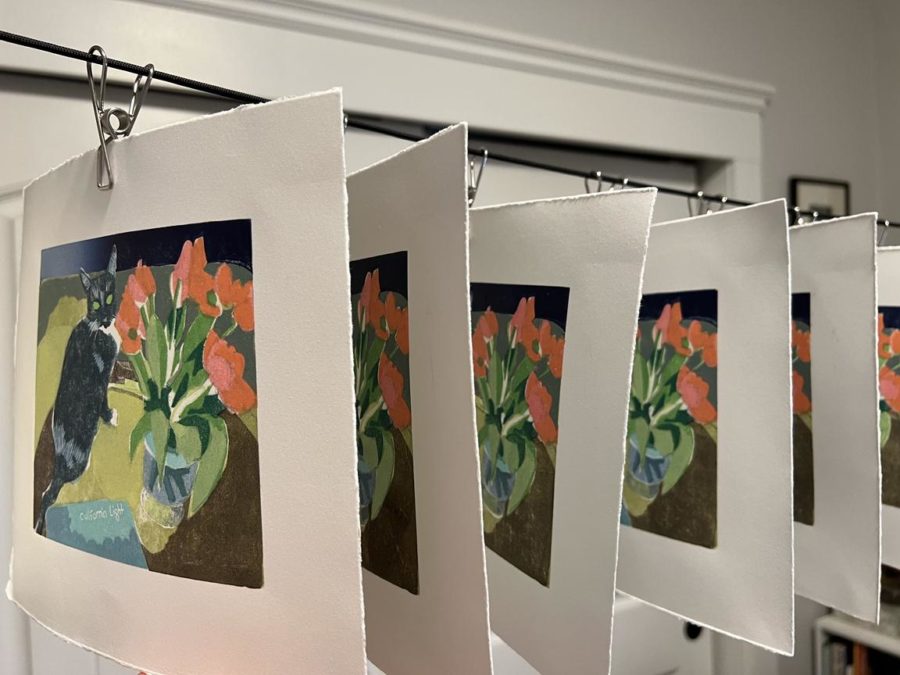
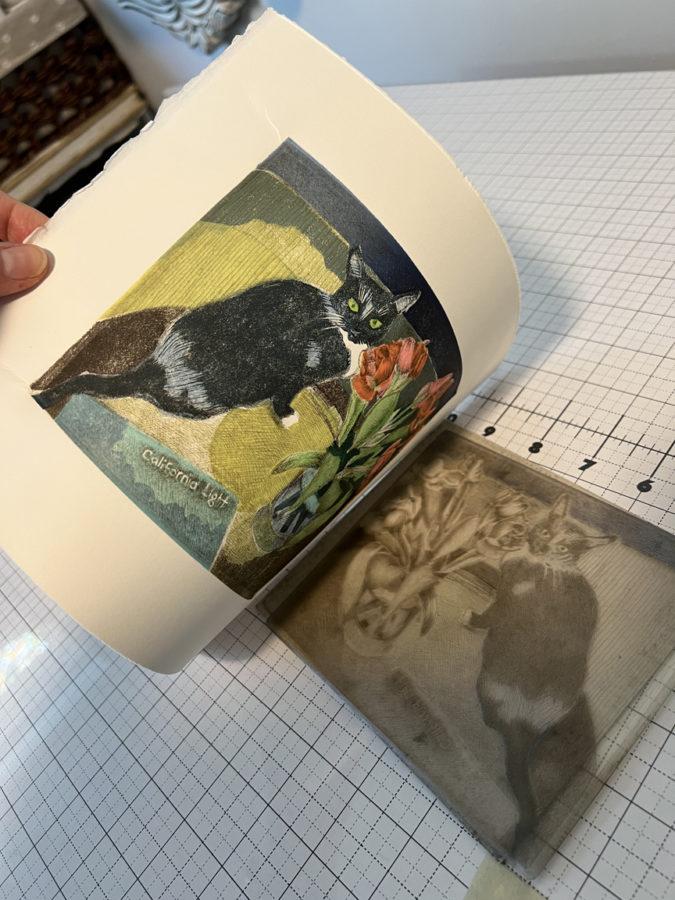
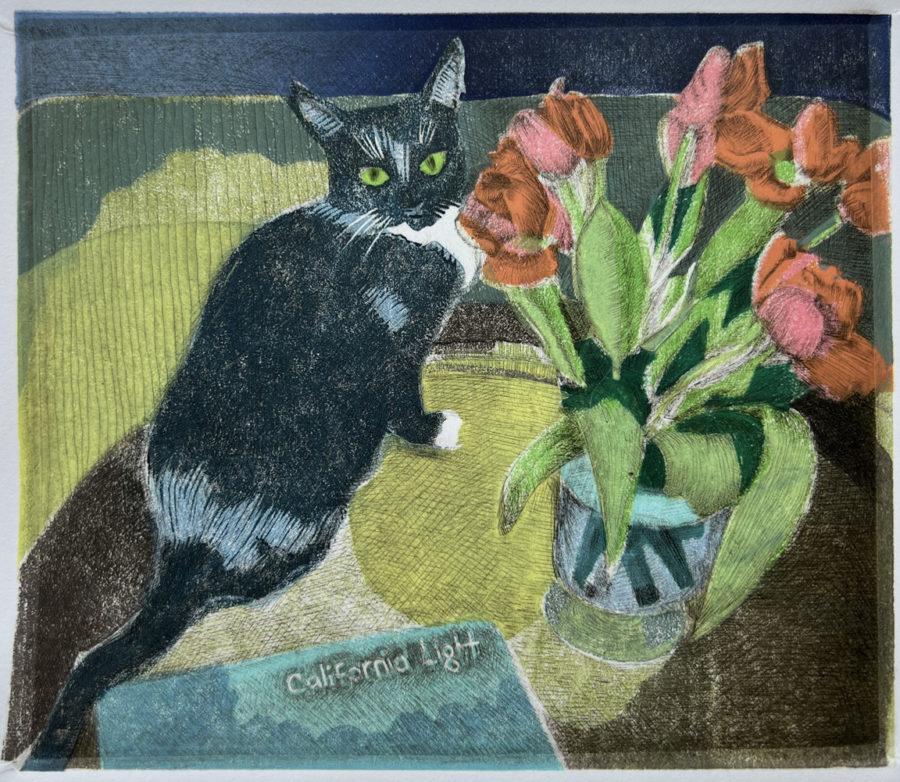
Tuxedo Corsage is a Reduction Linocut and Drypoint print combo still life of my studio pal Scout next to a vase of tulips created for Print Day in May. All the supplies to make this art are listed below.


Print Day in May
Print Day in May is an annual, worldwide jollification of printmaking celebrated on the first Saturday in May.
PDiM is open to everyone. This year, on May 7th, tens of thousands of printmakers around the globe will make prints and share them online with others. Sound fun? It is!


Linocut and Drypoint Combination Print Playlist
- Reduction Linocut and Drypoint Still Life Print (the first in this series)
- Linocut Print and Drypoint Etching Mashup of a Small Room Interior
- Mixed Printmaking – Color Linocut and Drypoint Engraving Portrait of a Girl and a Cat
- Drypoint Etching and Relief Print Mashup of a Windowsill Still Life
- Mixed Relief and Intaglio Printmaking Methods (a kitchen scene with charming clutter)


Getting Ideas for Linocuts
If you’re looking for resources to inspire your next foray into a linocut still life project, have a look at this post assembled to help conjure ideas for linocut designs.


Supply List (with links) to Make a Linocut and Drypoint Print
- Unmounted Linoleum
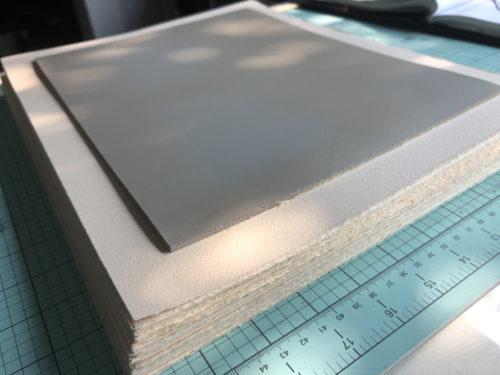
- Arches 88 Printmaking Paper
- BFK Rives Printmaking Paper
- Cork-backed metal ruler
- Extra Fine Sanding Block
- Vellum
- Akua Intaglio Ink
- Akua Transparent Base
- Plexiglass (for drypoint printing, and as ink slabs)
- Course and Fine Rasps
- Fine Point Sharpie
- Stainless Twisted Scribe
- Akua Wiping Fabric
- Ink Scrapers
- Takach Mini Brayers
- Speedball 4 inch Brayer
- Takach Etching Press
- Paracord and Stainless Clips


Linocut and Drypoint Print Experiments
Experiments in the art studio will polish your problem-solving skills. And deadlines to participate in a community printmaking event like Print Day in May can nudge you out of a slump. If you didn’t make a print for this year’s PDiM, I hope you’ll mark your calendar to hop in next year. Be sure to search social media for the hashtag #printdayinmay to see this year’s participants.
Stay tuned for more printmaking mashups in future posts. Each new print combo I start gives me up a stack of printmaking lessons. Learning new things is such good encouragement. I hope you’re stretching your skills with some art-related experiments too.
Thanks for stopping by, and I’ll see you in the next post –
Belinda
P.S. If you like printmaking, and you listen to podcasts, check out Hello Print Friend, and their interview with the founder of Print Day in May, Robynn Smith
Art Quote
The desire for safety stands against every great and noble enterprise.
Tacitus (c.56 AD – c. 120 AD)
Drypoint on Plexiglass or Recycled Plastic Printmaking Supplies
Here is a list of supplies to help you prepare to make a drypoint print from plexiglass, drafting film (mylar), or recycled plastic.
This is the ink I use in my studio when I want to clean things up with soap and water. There's no need for solvents to clean your plates and tools with this ink. Carbon Black intaglio ink is a nice, rich black for great line work. And you can use watercolor on the print after the ink dries - it will not re-wet!
This is a thickening agent to mix with Akua Intaglio Inks. If the ink on your plate wipes out of the grooves and incised lines you've engraved with the needle, it might help to thicken the ink. Mag Mix adds a little more "sticky" to the ink. The pigments stay embedded in your line work a bit better with this ink modifier. You can see how I use it in many of the intaglio and drypoint tutorial videos on my youtube channel.
Sizzix Big Shot Plus Embossing Machine (small printing press alternative)
This is an example of the embossing machine artists and printmakers are using to print lovely, small scale drypoint and intaglio prints, as well as linocut prints. Be sure to visit the Facebook group called Craft Press Printmakers. They are doing amazing things with small die cutter and stenciling machines transformed into small printing presses, just like this one.
There should always be a barrier between your skin and pigments. Wear rubber gloves (be sure to select the right size) when you mix ink, apply ink to the plate, wipe ink from the plate, and clean the ink up after you're finished printing.
Akua Wiping Fabric (Tarlatan) for Wiping ink from Intaglio Printmaking Plates prior to printing them
This is starched cheese cloth, or open-weave muslin fabric - also known as tarlatan. It's used to wipe ink from the uppermost surface of your intaglio drypoint or etching plate, before you print your image from the incised lines where ink emails embedded in the grooves.
The tip of this scribing pen will carve a narrow groove into plexiglass, chip board, card or recycled plastic.
This is the tool I use to pull ink from containers, and manipulate it on the slab to mix colors, or warm it up with the friction of smooshing and smearing before adding it to the plate. It's also used for scraping leftover ink together, and scooping it into little containers to use in later projects.
These spring clamps will hold your plexiglass plate steady while you score and snap it into smaller sheets. They also work perfectly for securing the plate without marring the surface while you bevel it, which you can see in a video tutorial on my YouTube channel.
This material works very well to hold your plate steady while you engrave your lines, or add cross hatching with the needle. It also works to steady any printmaking plate while you apply ink, wipe the plate, and clean it after you're finished printing. You can see it used throughout the relief and intaglio videos on my blog and on my youtube channel.
Utility Knife to score and snap your plexiglass material to the appropriate plate size
When your plexiglass arrives, you'll want to score and snap the sheet into smaller pieces to make multiple plates. This is a great tool for that process.
This 12 x 12 plate of opaque black plexiglass can be scored and snapped into smaller plates. Create four 6x6 plates from this sheet. See how to score and snap the plexiglass in the videos that are linked in this post.
This 8 inch rasp can be used to file the sharp edge of the plexiglass plate down to a 45 degree bevel. This is an important step to prepare the plate before you begin your design, if you plan to print on a press. One rasp will last you a lifetime.
If your hands get tired when doing repetitive motions like cross hatching, or pressing hard on narrow tools to incise lines in plexiglass, you can etch your plexiglass plate with this small electric Dremel.


Thank you for sharing. It has been awhile since I’ve done any printing and this was inspiring for me to begin again.
Hi Margie – I too had a long hiatus from printmaking and art in general, so I welcome you back to it. I hope your upcoming printmaking adventures are percolated with joy.