
Reduction Linocut and Drypoint Print Mix
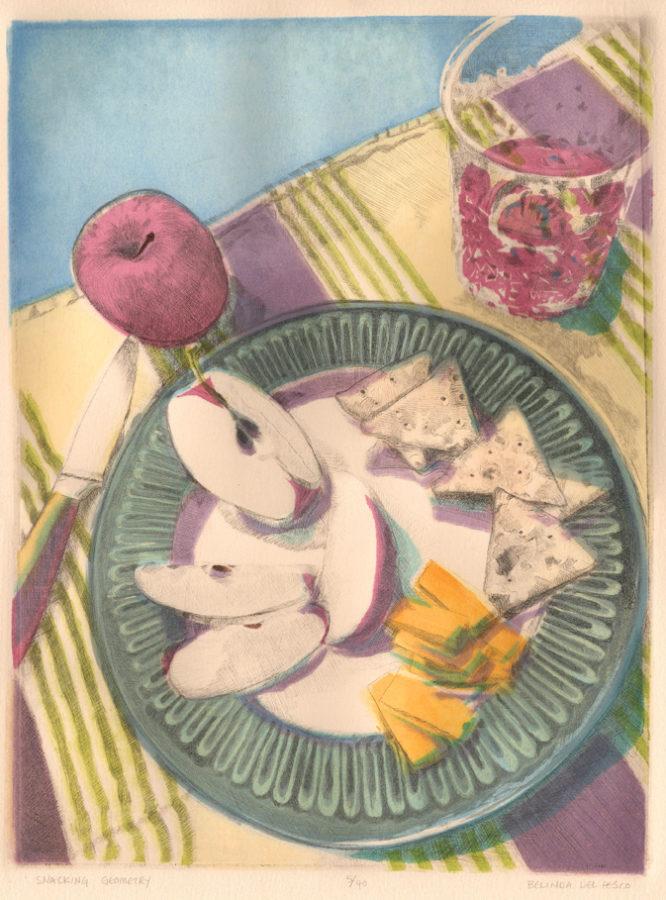
Snacking Geometry is a Reduction Linocut and Drypoint print still life, created for a print exchange. Printmakers Connect is a group that “meets” at 8:30am Pacific time every Thursday on the audio-only social app Clubhouse. Have you ever listened in?
Printmakers Connect attendees discuss all things print-related, and the group is moderated by printmaker Gregory Santos. There is also a Printmaker’s Connect Instagram account here, so follow along on Instagram for updates and news.
What is a Print Exchange? Printmakers sign up to create a print edition large enough to gift a print to each exchange contributor. The print theme might be based on a color palette, a particular printmaking method, or even a word. If twelve printmakers participate, you’ll each have twelve prints after the exchange is complete. Sound fun? It is!
Printmaking Print Exchange
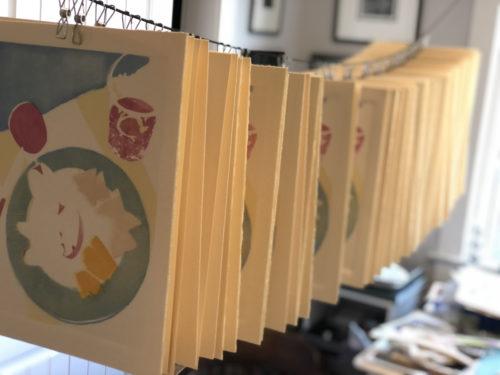
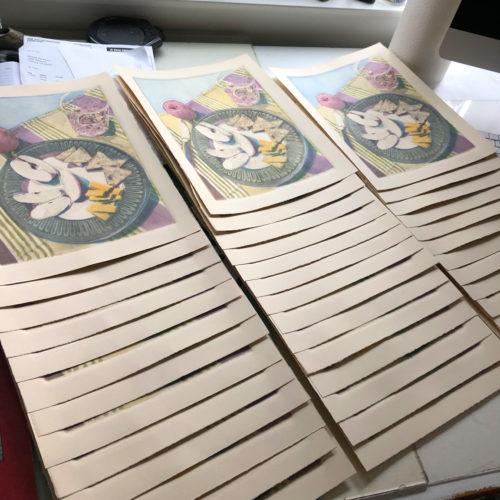
Thirty-Four printmakers from the weekly Printmakers Connect group on Clubhouse created editions for this print exchange.
David Wischer is an Assistant Professor from the University of Kentucky School of Art and Visual Studies. Each artist in the exchange sent their completed set of prints to him in Kentucky. David collated all the prints, assembled a colophon for the folio, and will ship a parcel of 34 prints to each of the participating artists.
David also arranged an exhibit of the prints at the University in Kentucky. He’s already busy teaching and making art, so taking this project on was very generous. He’s a good man.
Planning a Linocut and Drypoint Print Combination
There were no printmaking methods or theme restrictions for this exchange – but the paper had to measure 11×14. The title of the folio is Leave Quietly, which is a nod to the exit button on the Clubhouse app. While listening to a group conversation, the button you press to exit is labeled “leave quietly”.
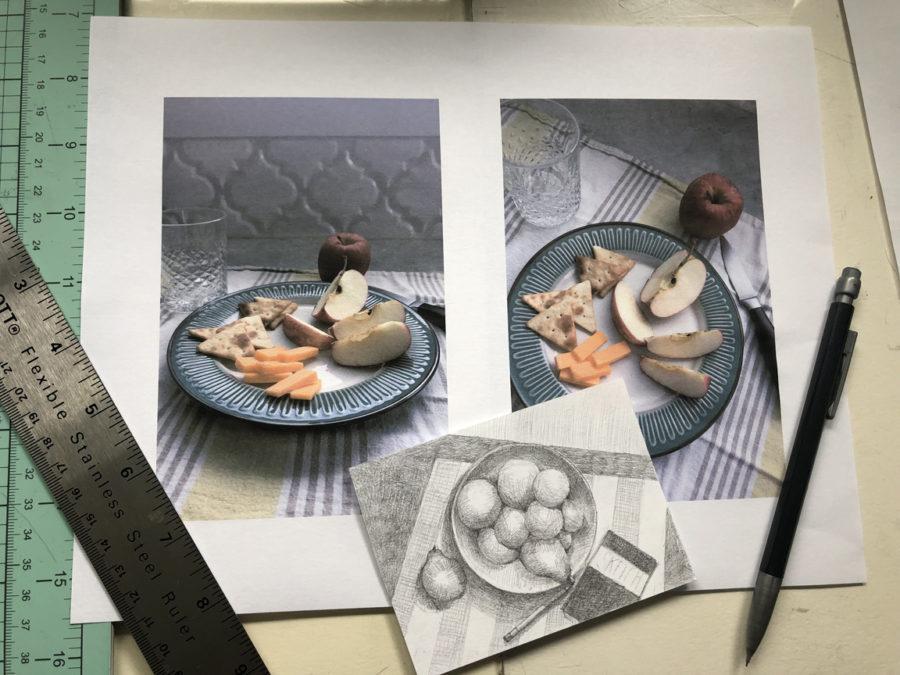
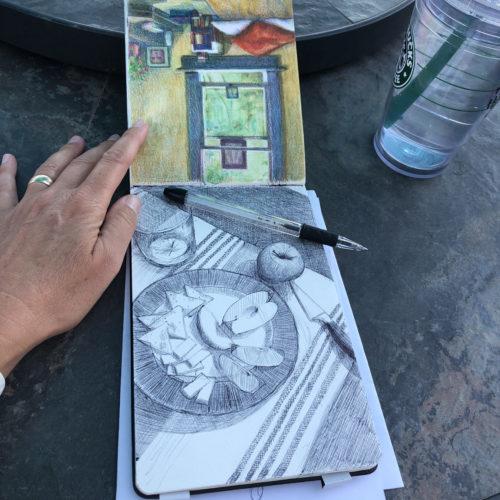
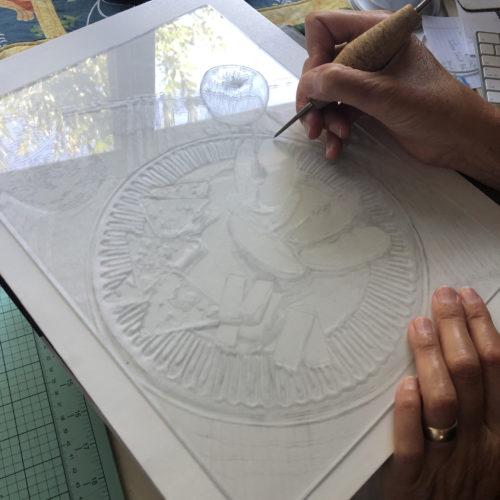
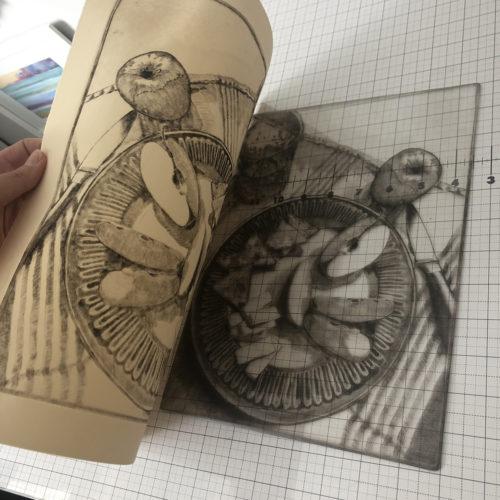
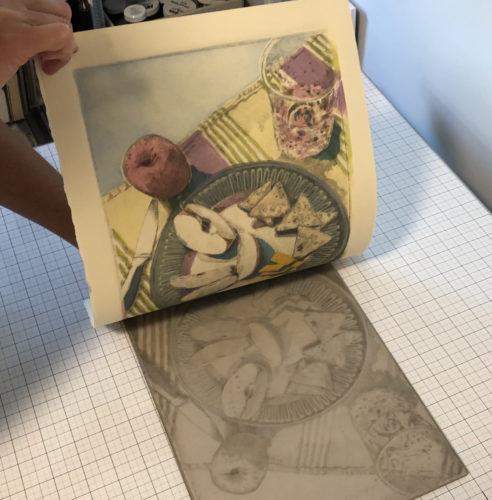
I’ve been thinking about a series of still life and interior scenes, so I sketched rough ideas for this first print in pencil. Next, I used the camera on my phone to take reference photos with a plate and some edible props in my kitchen (see above).
If you’re looking for resources to inspire your next foray into a linocut still life project, have a look at this post assembled to help conjure ideas for linocut designs. All the supplies used to make this print are listed below.
Supply List (with links) used on this Linocut Drypoint Print
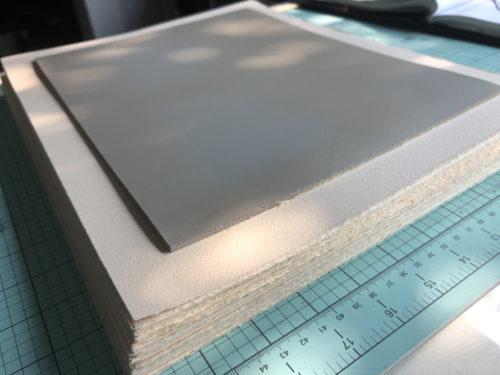
- Unmounted Linoleum
- BFK Rives Printmaking Paper
- Cork-backed metal ruler
- Extra Fine Sanding Block
- Vellum
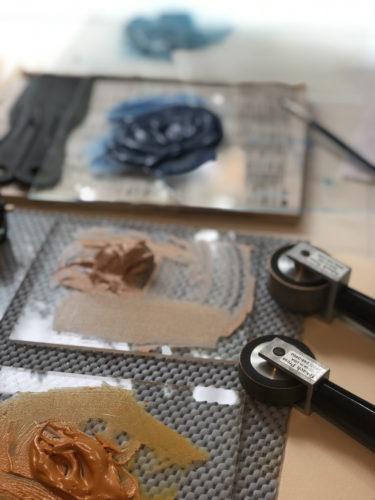
- Akua Intaglio Ink
- Akua Transparent Base
- Plexiglass (for drypoint printing, and as ink slabs)
- Course and Fine Rasps
- Fine Point Sharpie
- Stainless Twisted Scribe
- Akua Wiping Fabric
- Ink Scrapers
- Takach Mini Brayers
- Speedball 4 inch Brayer
- Takach Etching Press
- Paracord and Stainless Clips
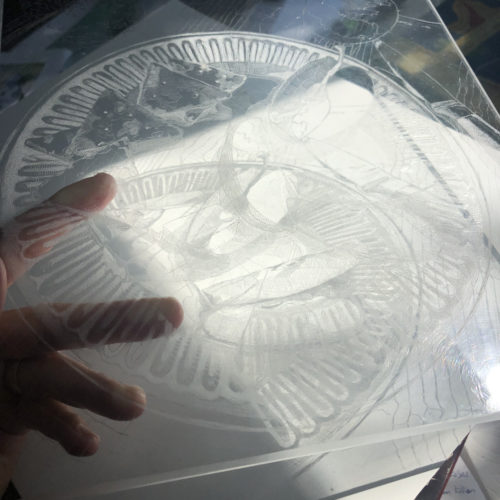
Linocut and Drypoint Printmaking
Experiments in the studio can be a fountain of good things. You learn about the expanded potential of your tools and art supplies. You feed your creative curiosity when you experiment with new combinations. And your problem-solving skills get polished, exerted, and brought to bear.
I’ve mixed collagraph and drypoint in previous projects (see the video above), but this was the first mix of linocut and drypoint.
This project was so much fun that I’ve got four more reduction linocuts and drypoint prints in process. One figurative, one still life, and two interior scenes.
Stay tuned for those printmaking mashups in future posts (you can subscribe to this blog here). Have you ever mixed your printmaking before? If so, please leave a link to your adventures in the comments.
Thanks for stopping by to visit today, and I’ll see you in the next post –
Belinda
P.S. If you like printmaking, and you listen to podcasts, check out Cammy York and Edie Overturf’s podcast News Print. They cover printmaking news, resources, opportunities, and interviews with printmakers.
These are wonderful! What great inspiration!! I’ve followed the link on Instagram. I’m sharing the techniques I’m developing to combine embossing paper with printing by making modified silyl polymer moulds of engravings I make of recycled plastic products… and then after making a mould of the mould and making an embossing folder out of the two moulds, pressing paper using devices like a laundry wringer or a die-cut embosser. From the very beginning I’ve been adding ink to the folders. Now I’m inspired to combine them all with perspex dry point etching. The thought of using this material was almost too delicious to believe was possible. I love it! I included my facebook page where I’m collecting my early experiments with embossing below.
I love these pages!
HI Belinda,
Thank you again for such an amazing post. You always inspire me. I hope you have a wonderful holiday season.
Hi Kathleen, Thanks for your visit, and the holiday wishes. Sending a secret handshake with a kaboom on the end for our shared love of art and inspiration. I hope the year ahead is chock full of creative adventure for you.
I love seeing your work – you inspire me to work on printmaking – Maybe after Christmas?
Thank you for your generosity in sharing.
Hi Jennifer, Thanks for the compliment, and for sharing your enthusiasm. I hope January is your very own printmaking month. Early mornings, late evenings, and weekends of inky fun.
Thanks so much for sharing this! I didn’t know you could get a good drypoint impression over the top of a linocut, and I’m keen to give it a try. Did you then soak the paper containing the linocut image before taking the drypoint impression?
Hi Sam, Yes! You can absolutely mix the two printmaking methods, as long as your inks work nicely together. I didn’t soak the paper for either the intaglio or the relief prints on this project. I did use an atomizer to very lightly “spritz” and blot the paper – just before pulling each color of the linocut. Happy printmaking to you!
Great video, thanks, Belinda. I’ve never tried that combination. Must give it a go some day.
Hello Nigel! Thanks very much for the feedback! I hope you have your own printmaking party, with outstanding success!
amazing!! LOVE this process and what you have created.
Hi Avah – Thank you so much, my friend! Bear hugs to you.
I like your perspectives, and the techniques make for attractive and intriguing pieces. It must be hard on the fingers I imagine.
Hi Elizabeth, Thanks for your compliments. The work (carving and engraving) is not hard on my fingers, yet. I imagine as I get older (I’m 62), that’s a possibility, but for now, it’s very pleasant and meditative. Have you ever tried to carve a block of linoleum?