
Experiments in the Art Studio
Experiments in the studio are important, because that’s what we should be doing with art supplies, right? We keep things fresh and full of wonder by pushing past our comfort zone in art-making. Testing new approaches shouldn’t scare you, because this is just art. If you mess up, you can start again. No one got hurt, and nobody knows but you.
G-R-O-W-I-N-G requires a certain amount of comfort with the idea of failing. Do you agree? Beyond discussions and theories of leaping past playing it safe, do you push your artistic skills all the way to failure, in order to expand your creative breadth? I do it all the time, and I’m here to tell you, it ain’t so bad.
Art Studio Bartender
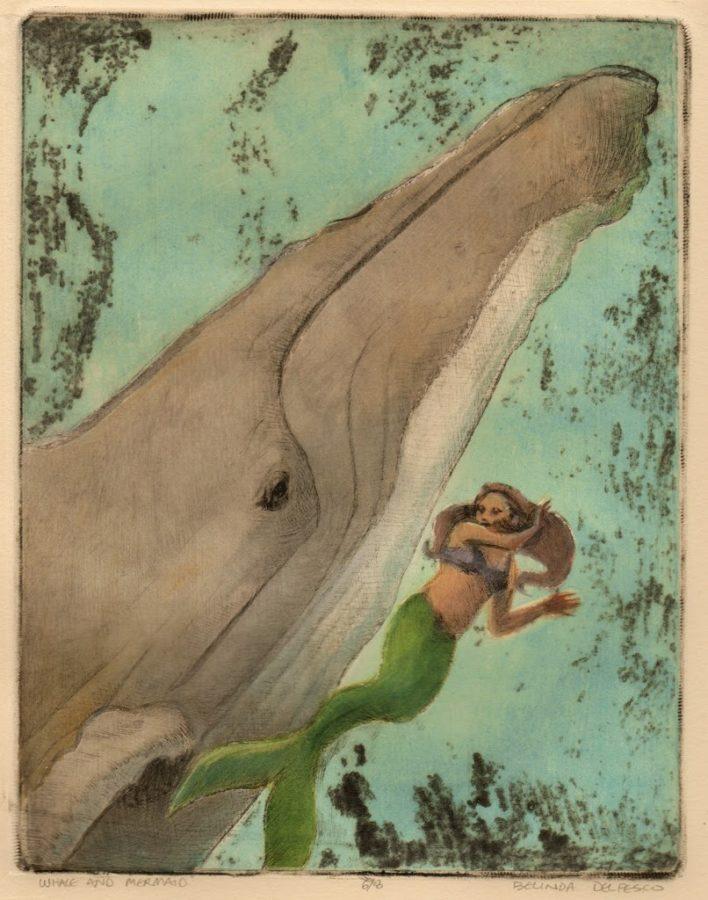
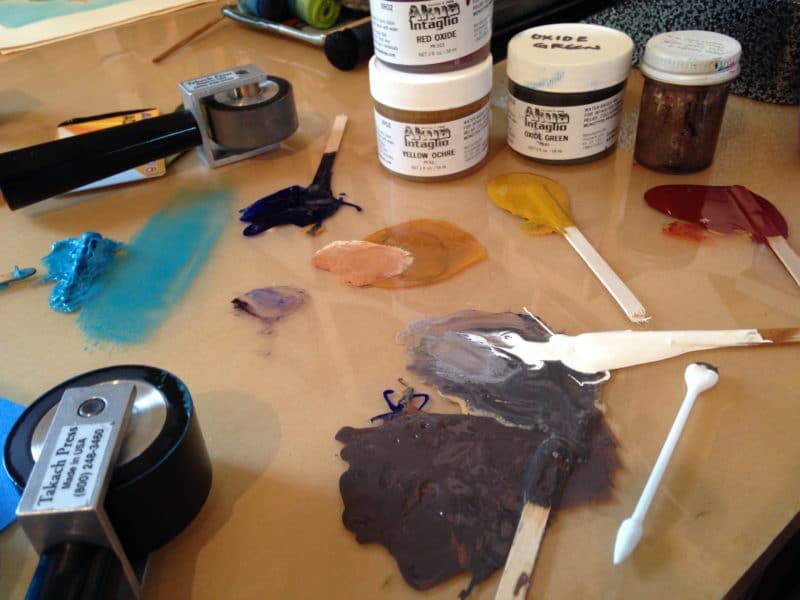
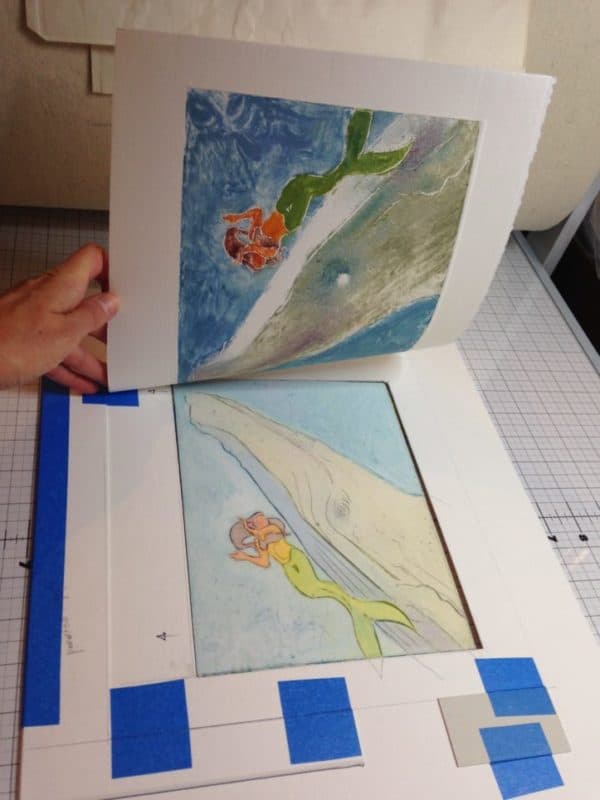
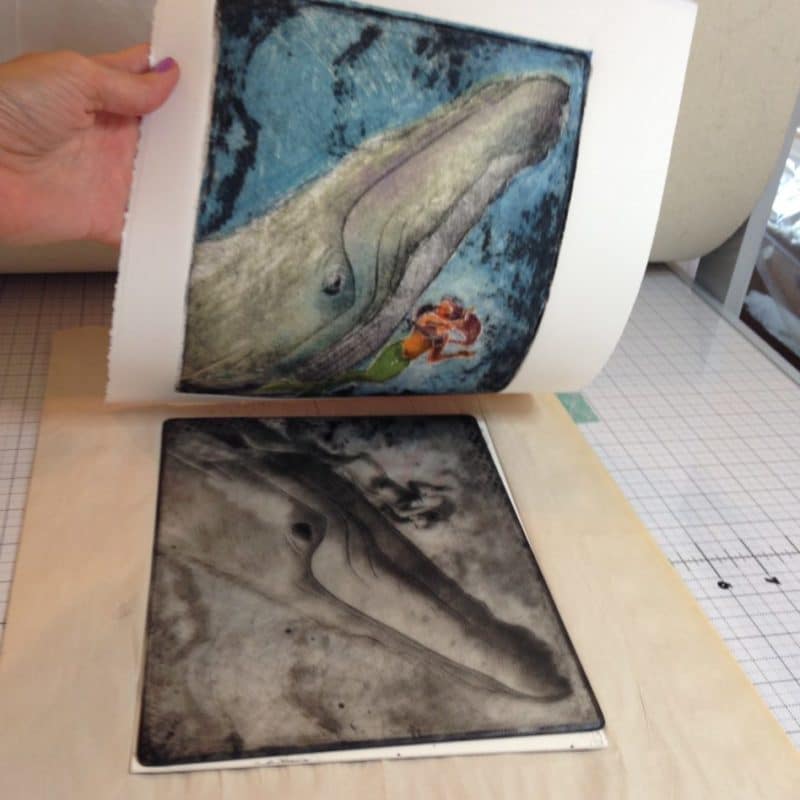
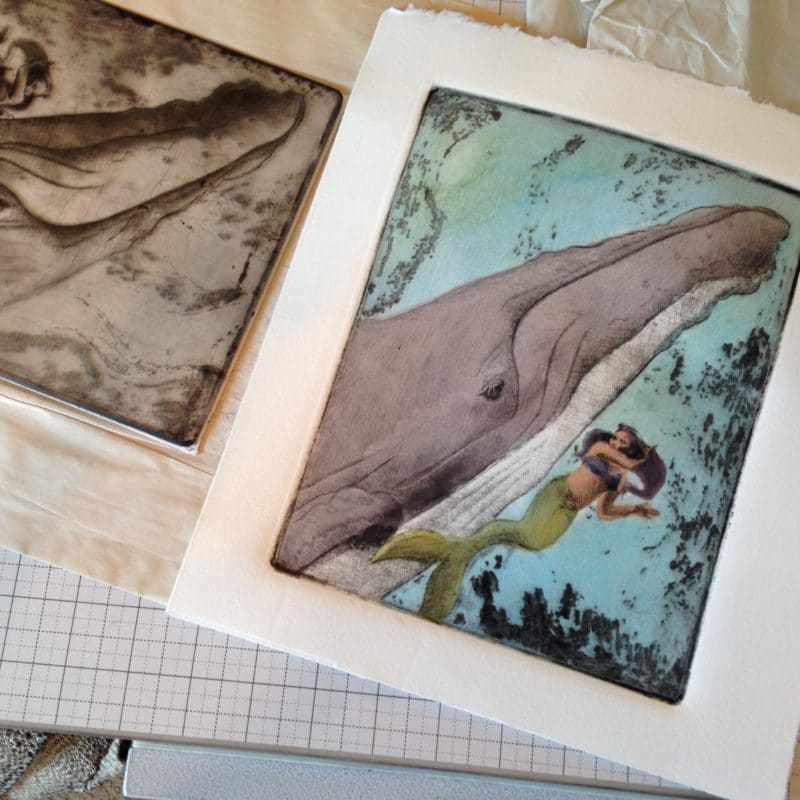
I’ve mixed intaglio and relief printing on the same print, like a bartender conjuring mysterious elixirs. I wanted a flat color background, and vintage, early 1900’s style illustration details.
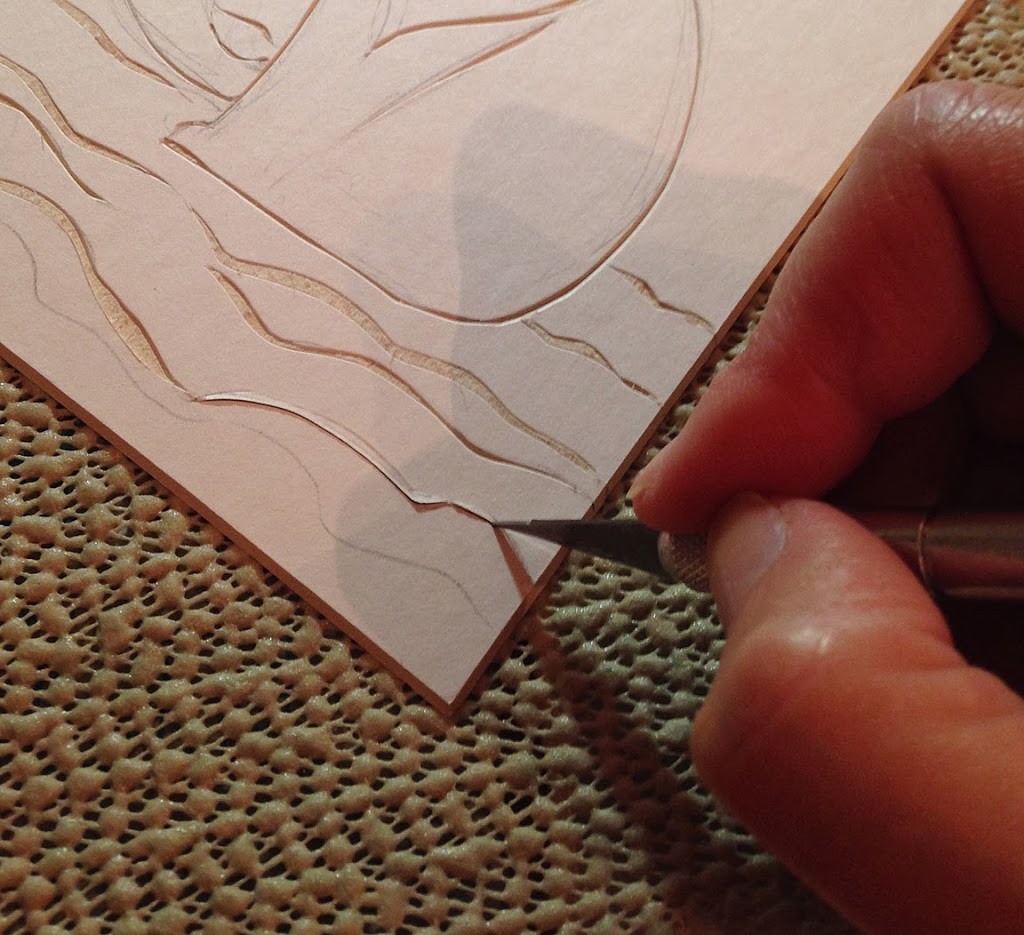
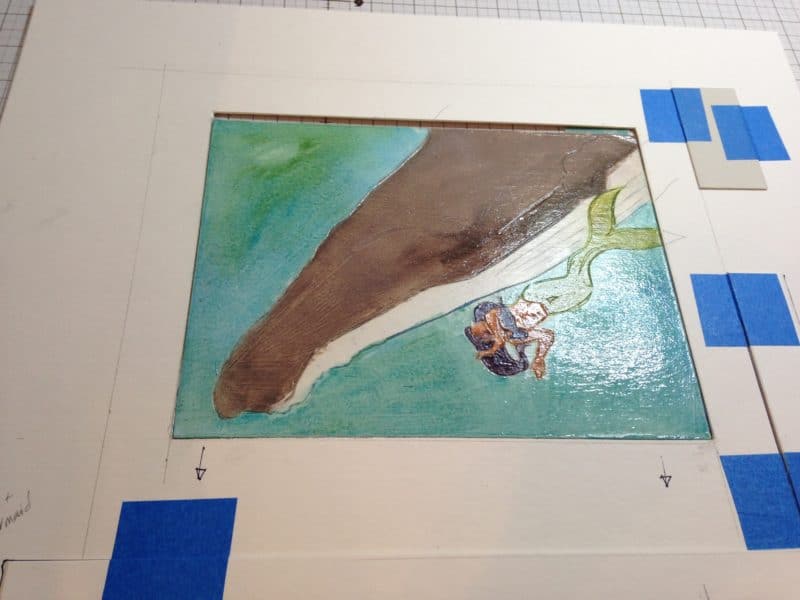
I didn’t want to hand paint the print with watercolor after the ink dried. So this is a mat board collagraph, and a drypoint engraving – one printed over the other. A printmaking torte.
Follow Along via Video
The collagraph and drypoint engraving combination of the whale and mermaid was my first investigation of this layering test, so if you’re a seasoned mixer of printmaking methods, please leave any tips and tricks you can share with links in the comments.
I documented this process on a video (below) in case you’d like to give it a whirl. The petite edition of eight prints is available in my Etsy Shop.
Make Something
What are your plans for tying up the loose strands in your artwork this season? Are you cleaning out the desk where you make art? Fluffing the corners of your sense of wonder with short walks in nature? Jotting down hurried notes about new art projects to brew and sip from in the next few weeks?
Whatever is on your schedule, I hope there is a scaffolding of possibility and a fountain of fresh starts on your next page.
I’m high fiving you on our collective plans, and appreciation for artistic truth, beauty and light.
Thanks for stopping in, and I’ll see you in the next post!
Belinda
P.S. You can subscribe to get each new post via email as soon as it’s published. Sign up here.

Art Quote
You must have a room, or a certain hour or so a day, where you don’t know what was in the newspapers that morning, you don’t know who your friends are, you don’t know what you owe anybody, you don’t know what anybody owes to you. This is a place where you can simply experience and bring forth what you are and what you might be. This is the place of creative incubation. At first you may find that nothing happens there. But if you have a sacred place and use it, something eventually will happen.
Joseph Campbell
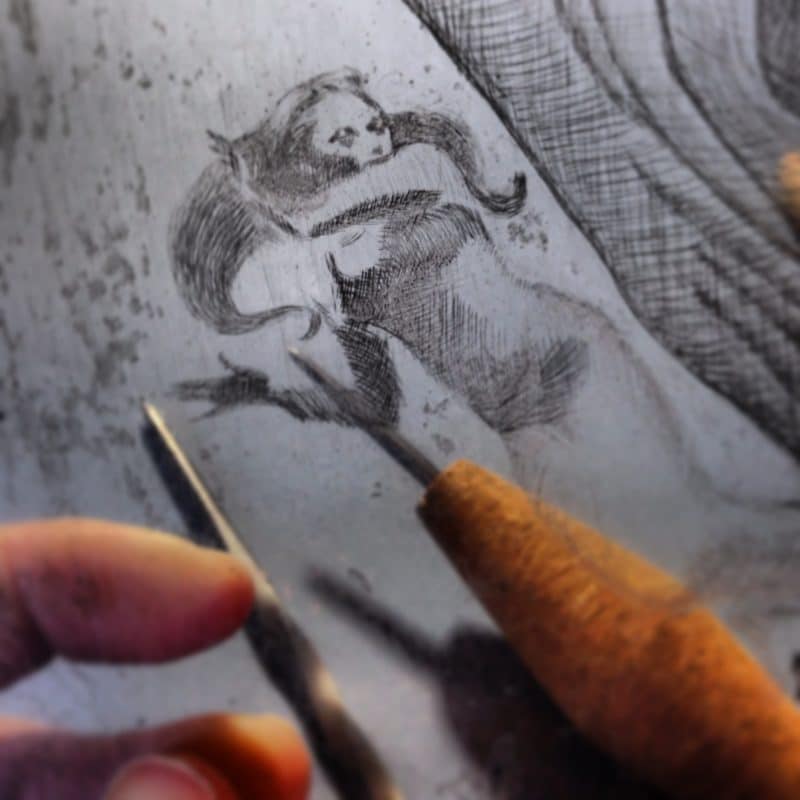
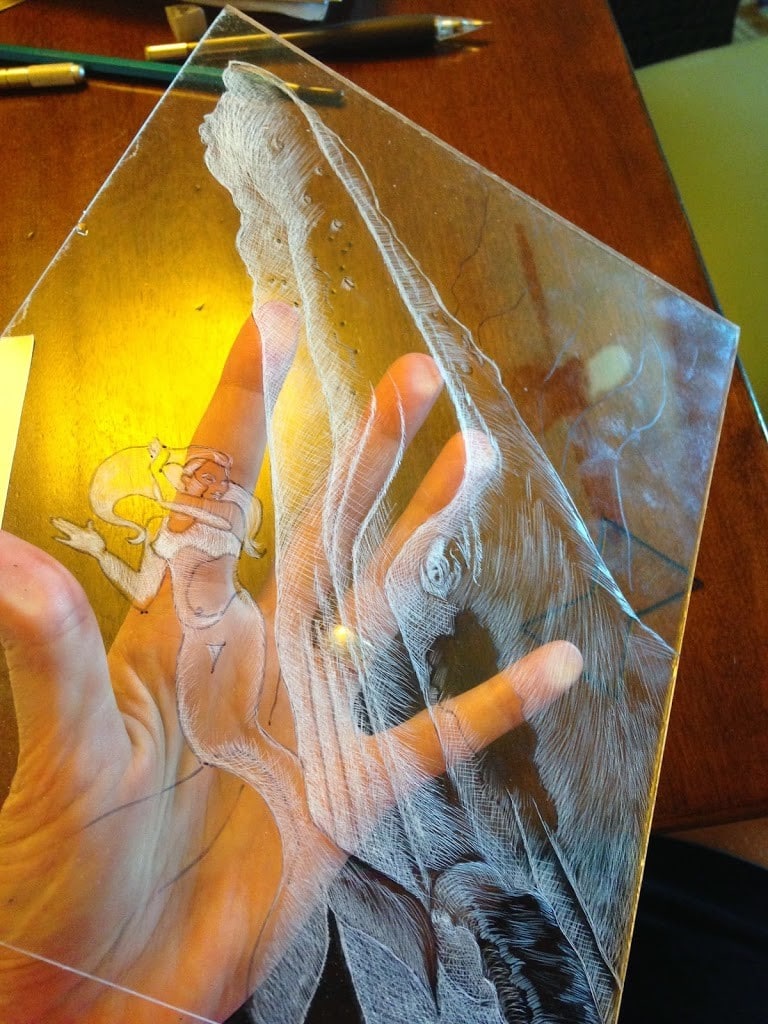
Backwards???! Just kidding, I learned that lesson many etchings ago! Scribing type and numbers in reverse are a real pain, but the see-through plate keeps me on track.
When doing dry point, I’m always reminded that Rembrandt wrote backwards right on the copper with no see-through helper.
I’ve printed backwards more then once, so you clearly learned the flip sooner than I did. But you have an engineer’s mind as an advantage! And as for Rembrandt, I have always wondered if he – or one of his many helpers – actually scribed those letters. 🙂
I have been scratching away at a 3″ x 1.5″ plexiglass plate of our lovely Town of Oxford (MD) town clock. I was going to give the prints the watercolor treatment, but now you’ve inspired me to experiment. It could be tricky at so small a scale, but I like the plate mark that collagraphs produce. I’ll let you know what happens.
Ohhh, that sounds fun! And challenging! I can’t imagine scribing all those numbers, and backwards! I hope you are using a loop or a magnifier headset?
Amazing work!
I wish you a Merry Christmas and a blessed New Year full of art and beauty!
Hi Cristiane! Thanks for the good wishes, and I boomerang them back to you, all the same! 🙂
Great looking print, Belinda!
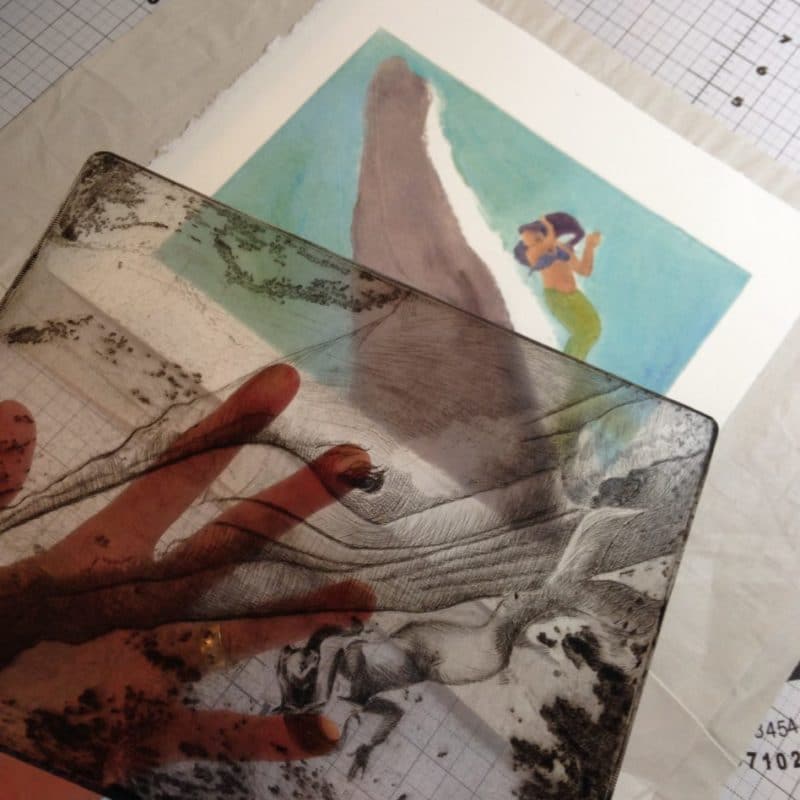
On your dry point plate, how did you get the blotchy textures that look like bubbles, kelp, or shoals of fish?
Thanks for sharing your knowledge through your website and videos!
-John
Hi John,
Thanks for the kind words. The under-sea textures on the plate were made by mixing #120 grit carborundum with acrylic gloss medium & varnish 40/60 and painting the mixture onto the plexiglass plate. Are you going to give this method of printmaking a try?
This is amazing Belinda! Now I want to come back from holidays ASAP to start the experiment! 😀 Thank you for sharing. I love your art, posts, videos, quotes… All your work rocks!! 😀 Happy end of the year <3 <3
Thanks, Marissa! I hope you get a chance to try it. The effect of details over blocks of color reminds me of the old magazine cover art from the 1900’s, and I love the nostalgic feel and incredible skills of the work they created at that time in art history. Have so much fun, and Happy end of the year to you too!