
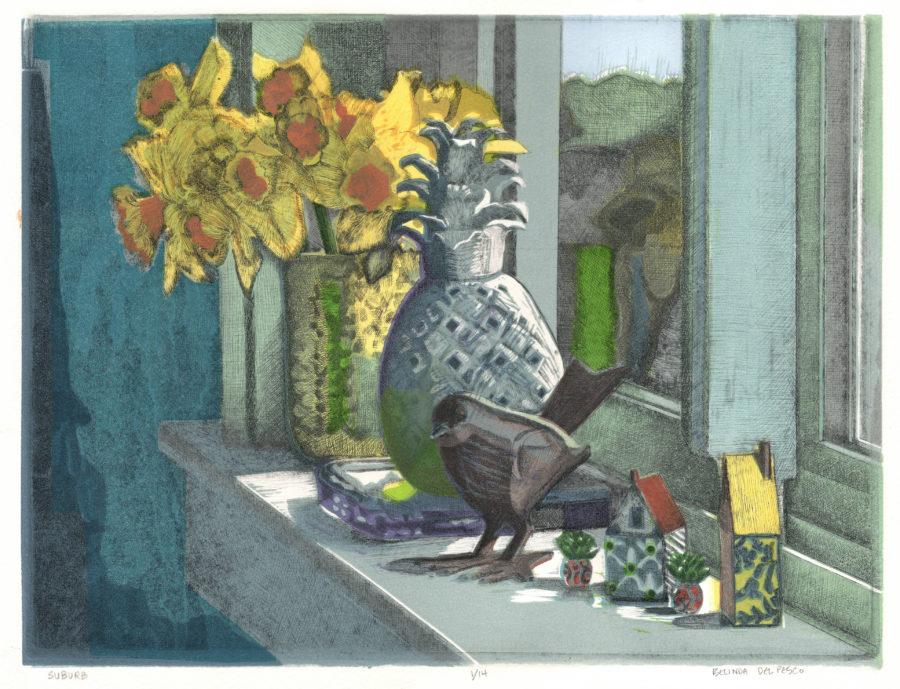
Drypoint Etching and Relief Print Mash Up
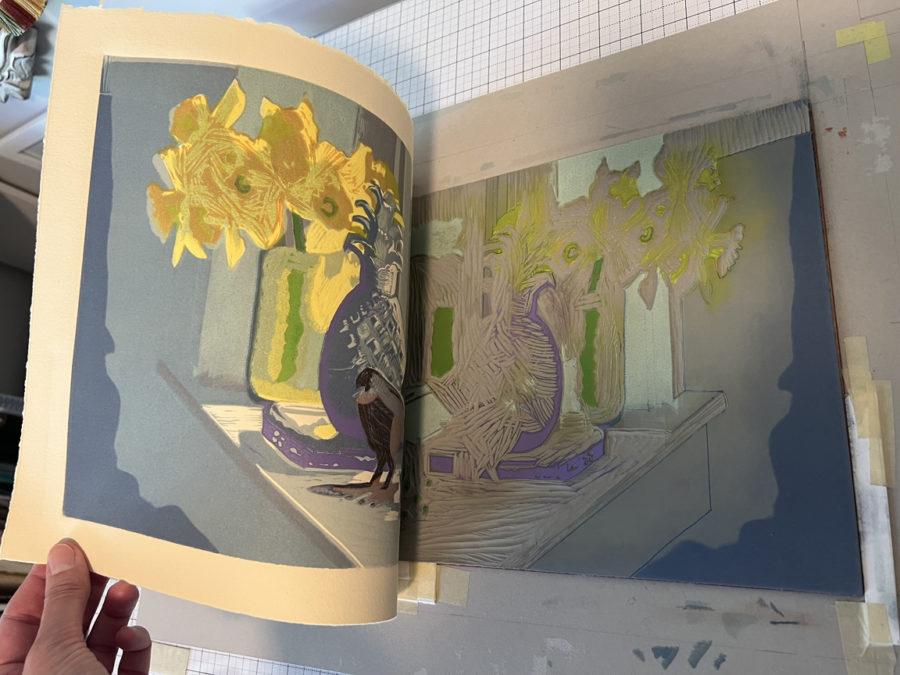
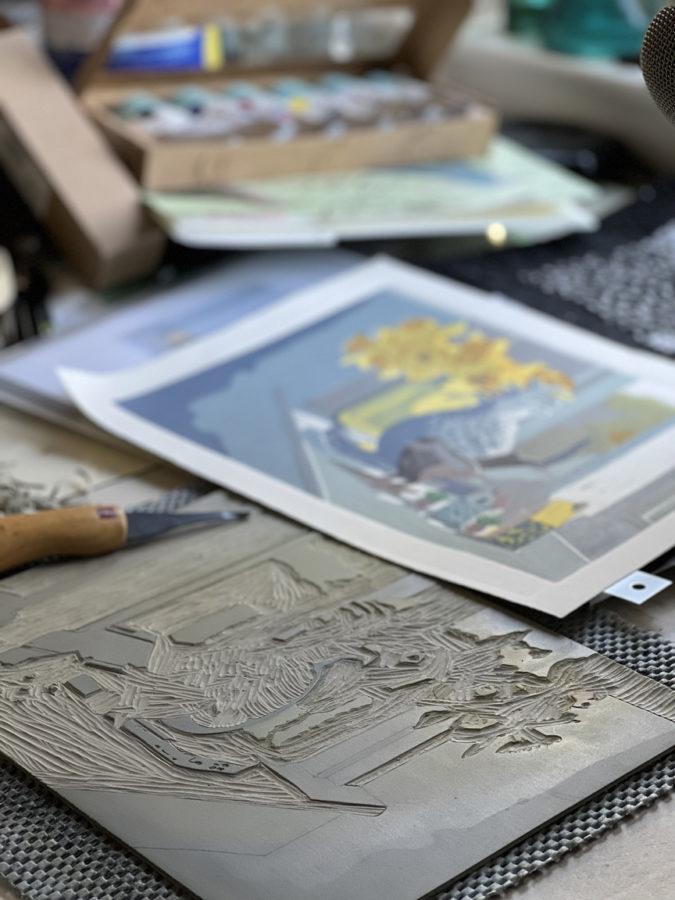
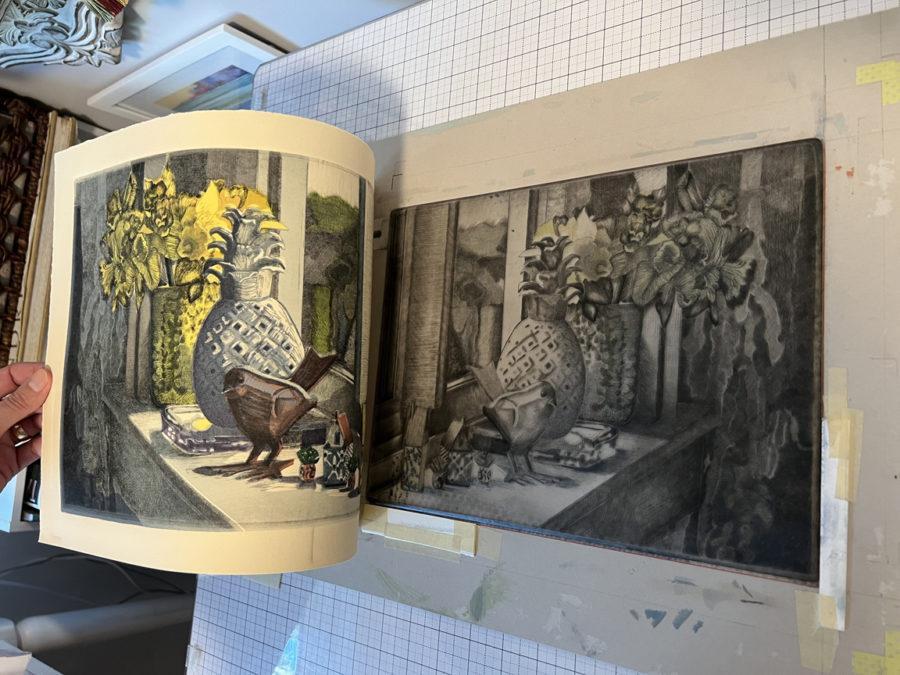
This is my fourth mash-up of reduction linocut print and dry point etching. I worked on it intermittently through the Fall and Winter months. The deep dive into process was a blessed respite from my panicked obsessing over the looming loss of a family member to cancer.
I think artists sometimes get too consumed with racing towards Finishing a project. We lose sight of the joy in the making.
Working on art slowly, and deliberately till a project is finished is not easy for me. But in tough times, I think it’s wise to barricade art-making to a simple, single task. Focus will naturally block out less-than-pleasant mental meanderings and worries.
The partially finished projects stacked in my studio are a testimonial to my perpetual distractions. But staying with this fourth print mash up – exclusively – made it easier for me to sink into Creative Time when I needed it most.
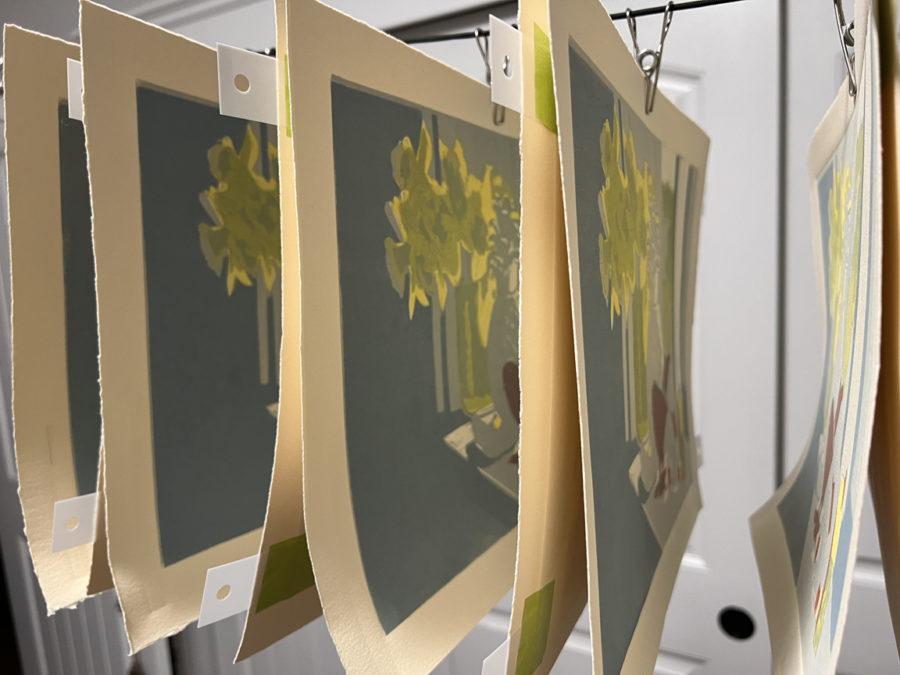
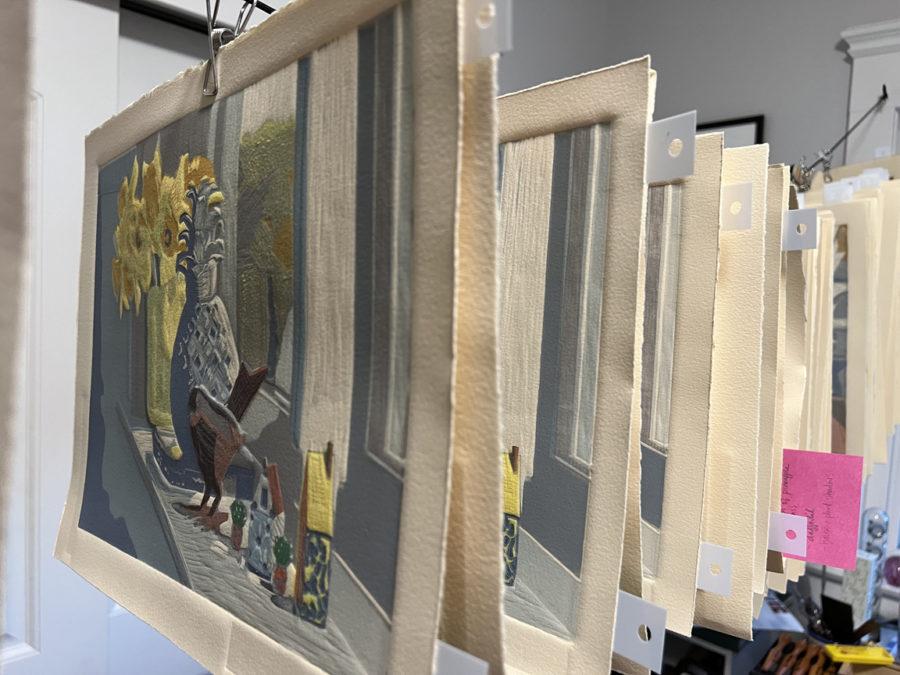
By committing to this project, I removed the quandry of deciding: what to make, or which media to reach for… The prints for this design stayed hanging in my studio on a drying line for months, waiting for me to dive back in, and take a mental rest.

Iterative Learning
Each of the past four mash up prints I’ve posted had a steep learning curve. I’m not an expert, but I love to try new things. Even if the results suck, I’m usually compelled to try again. Perhaps the path to Expertise is paved with Experimentation? What do you think?
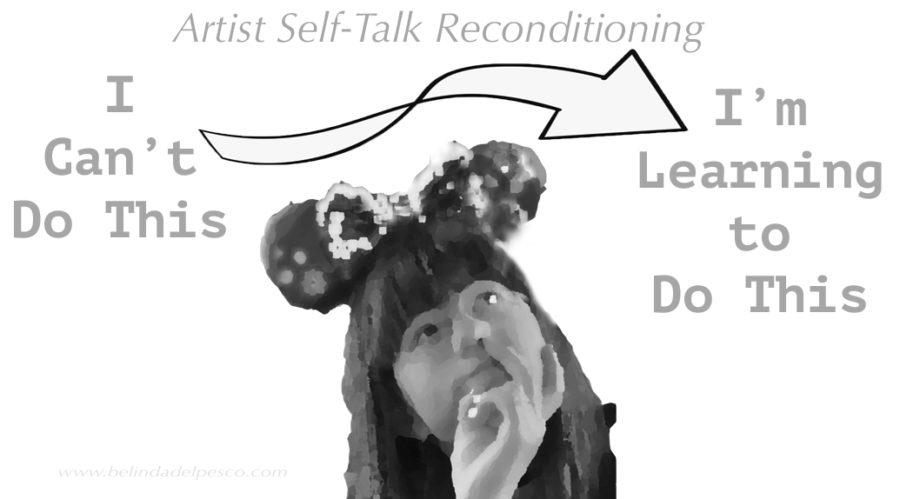
As artists, I feel strongly that we should get cozy with the notion of the Re-Do. If failure deflates your inspiration balloon, re-inflate that baby with smart self-talk.
Most of us will make improvements while learning a new process only by DOING. Reading and Thinking about art will not magically transform our skills. Studying can inform, but I believe it takes hands-on to really transform a skill set.
Creativite Expression is a hands-on endeavor. Pick up your art supplies. You’ll get better with practice, especially if you re-direct your inner-critic (with a Bossy voice) towards more positive messaging, and Get Busy.
Swap out and replace your ‘I can’t Do This’ mantra with a repeated message of ‘I’m learning to do this.’ Encourage yourself. You’ve got this.
Thanks for stopping by, and I’ll see you in the next post –
Belinda
P.S. Thank you – from my heart – for all of the supportive comments, sweet condolence emails, and loving messages you sent after reading about our loss of Melanie. I felt comforted and held by your kindness, and I’m so grateful.
Art Quote
You may grow old and trembling in your anatomies, you may lie awake at night listening to the disorder of your veins, you may miss your only love, you may see the world about you devastated by evil lunatics, or know your honour trampled in the sewers of baser minds. There is only one thing for it then — to learn. Learn why the world wags and what wags it. That is the only thing which the mind can never exhaust, never alienate, never be tortured by, never fear or distrust, and never dream of regretting. Learning is the only thing for you. Look what a lot of things there are to learn.
T. H. White, The Once and Future King
Thanks for sharing these. I do have a question: do you wet the paper when you are printing the drypoint over the reduction relief prints? I started a mash-up before I read this, and printed the drypoint first on wet paper. Once it dried, I moved on to relief printing over it, but the drypoint disappeared. I’m wondering if you can wet the paper once the relief print dries.
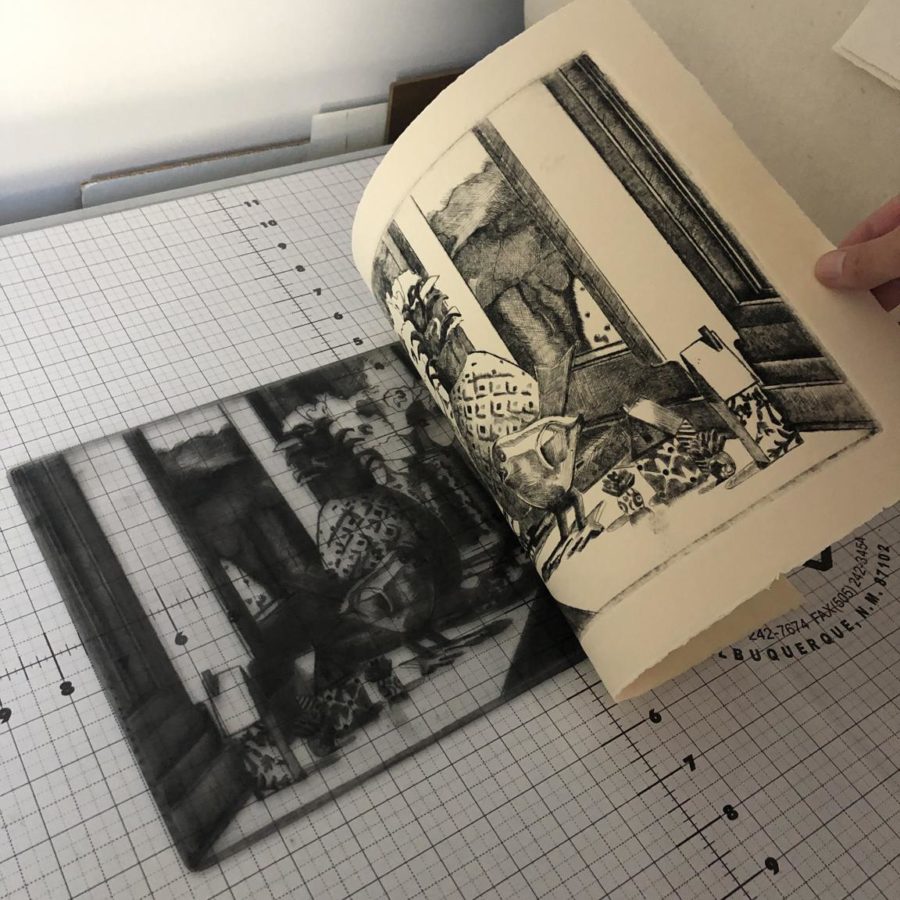
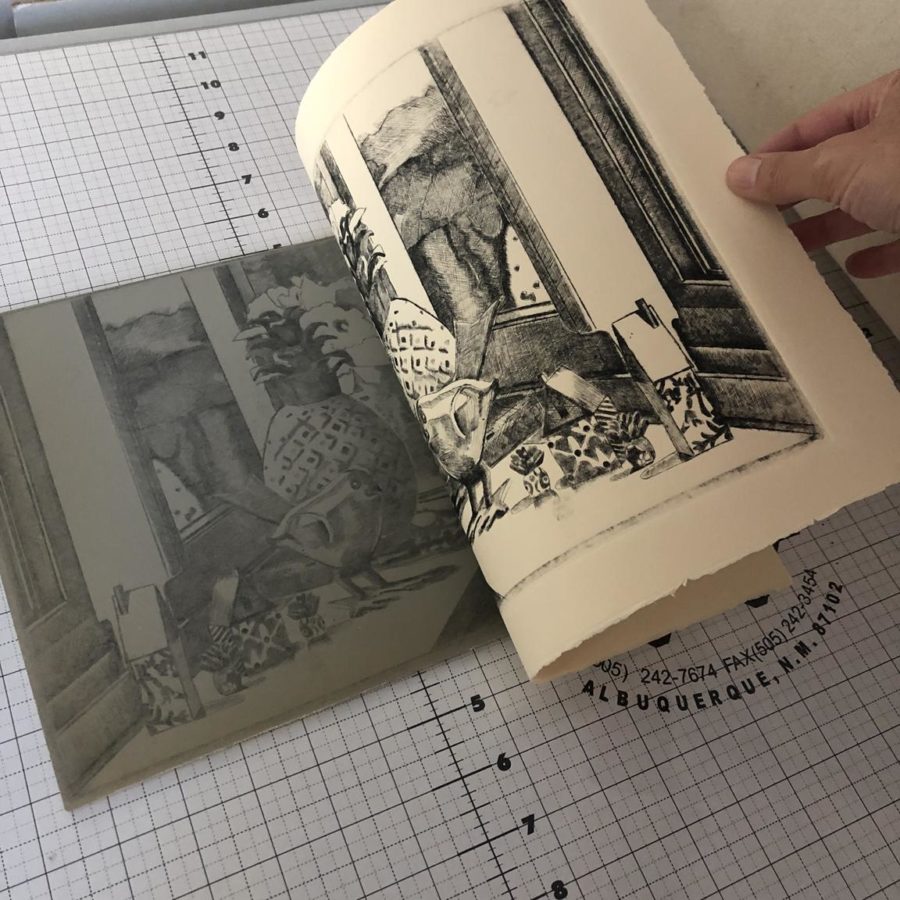
Hi Pam, Choosing to wet the paper will depend on what sort of paper, and what kind of relief and intaglio ink you use, among other things. I’m using BFK Rives heavyweight printmaking paper, and inks (both relief and intaglio) that dry permanently.
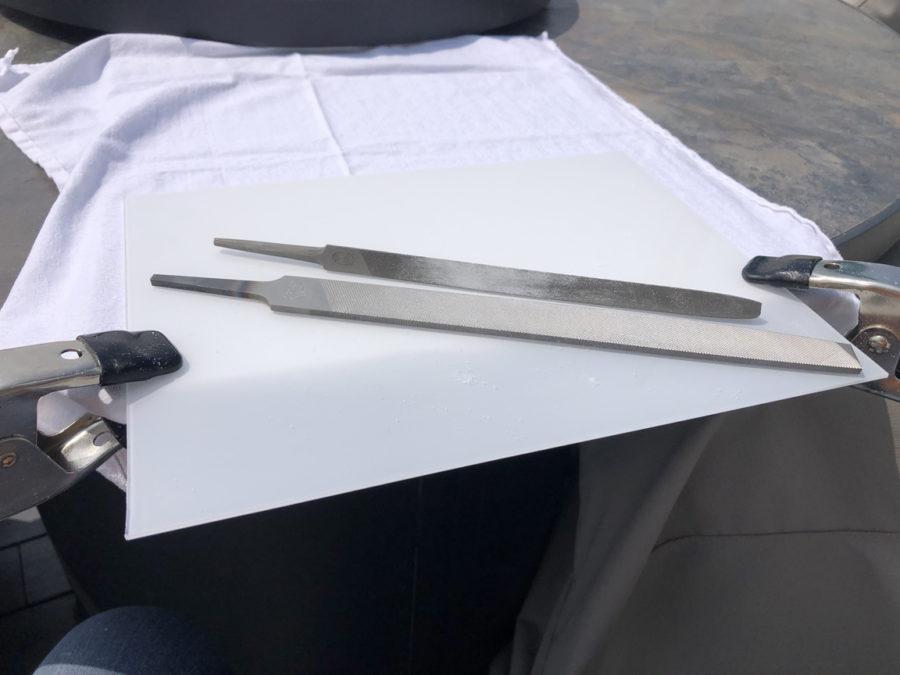
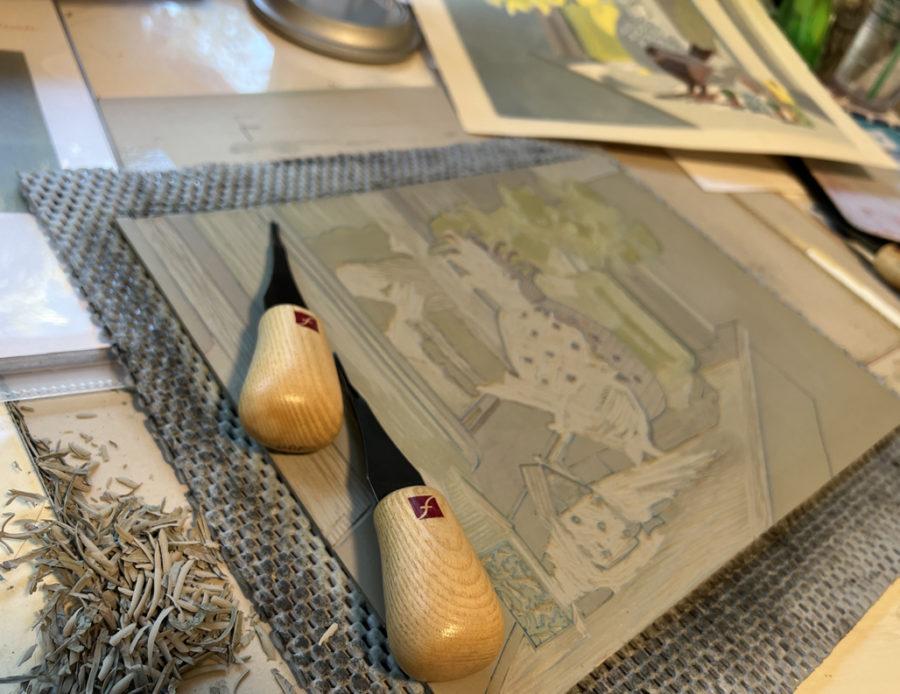
Also, print your drypoint AFTER you finish printing the relief/color background. Drypoint is the last step.
With this particular print, I spritzed the paper surface with a fine mist of cool water and then blotted it immediately before I laid on each color of the relief print, and did the same for the last step – the drypoint.
Matching the moisture content in the prep of your paper should be consistent for both the relief and the intaglio printing process in a mash-up if you want registration. Soaked, wet paper stretches (a lot). So if you soak and blot for one part of your process, and you only spritz and blot for other parts, it’ll be hard to get decent registration.
Tudo muito novo pra mim. Gosto de coisas assim. obrigado
Obrigado pelo elogio!
Beautiful image. Thanks for all the great ideas about making art accessible.
As a long time Akua ink user I’m wondering how you’re finding the Caligo inks in comparison? I echo the previous writers’ appreciation of your generous advice and also send the deepest condolence.
Once again you gave so much. Not just the wonderful mashup, which I just might try but your take on learning. Yes, I believe you have to get your hands in there to really learn. I love the quote too and once again be comforted by your wonderful memories and work out the grief in your beautiful art. Thank you .
Dear Belinda,
Thank you again for sharing so much of yourself and your process with all of us through hard times.
Diana 💜
Hello Belinda,
There’s always a spark of joy and anticipation when I see a notification of a new blog post from you. 🙂
Condolences on your loss. I hope that your wonderful memories of Melanie bring you some joy and comfort now and in the years to come.
Sharing your process and thoughts and hard fought for art wisdom is very generous of you and much appreciated. It’s so interesting to see how universal art struggles are and how if we only just let ourselves be in the work in front of us, now, we can find the next step and get back into the flow.
Wonderful quote you shared too.
Peace and happy spring to you.
-Sally
Merci Belinda, beautiful picture for La printemps, and encouraging thoughtful wording, too. Thank you.