Why use the watercolor glazing technique?
Watercolor glazing is a technique in watercolor painting that gives painters – especially beginners – more control. The white of the paper in watercolors is equivalent to a light source, illuminating the pigments from underneath.
To avoid muddy watercolor paintings, the paper’s brightness has to be preserved under your paint to “shine through” in the lighter passages of your painting’s design.
You can do this by layering transparent washes, one at a time.
Layering allows you to gauge when to stop adding more color. Watercolors are different from opaque paints like oils and acrylics because you can’t fix a dark color by adding a lighter color. The pigments are sheer, so the dark color underneath dominates any lighter layers you try to cover them with.
Imagine transparent, colored cellophane: If you have a sheet of transparent black, and you tried to lighten it by laying a sheet of transparent pink on top, you’d still have a very dark color. Make sense? Can you picture it?

This full-length, real-time, narrated demonstration (below) of a watercolor portrait of a house will help you learn how to use Watercolor Glazing Techniques.
Watercolor Glazing Technique Process
When you approach painting a watercolor with the glazing technique, colors are applied in thin, transparent layers, one at a time, letting each one dry before adding another layer.
Note: While an area is drying, you can paint other areas of your watercolor. So, the “pause” to let a passage of color dry doesn’t mean you stop painting altogether. (Staring at the color, humming a tune, waiting for it to look dry….) You simply move here and there on your painting, adding sheer color, and by the time you circle around to the passage you glazed a few minutes ago, it’s dry!
The thin washes of transparent pigment are ‘glazes’ of color, so it’s called Watercolor Glazing. Each additional layer of pigment darkens that passage, and the more layers you add – even in different colors – the darker that area will become. (You’ll see a demo of that in the 4-minute video below.)
These glazed layers will increase saturation, and they’ll help you get more accurate values. Waiting for each layer of added pigment to dry helps create accurate values because watercolor dries much lighter than it looks when it’s wet. You’ll be able to avoid the challenge of knowing when to stop adding more color because you’ll see your values as each layer dries.
Watercolor Glazing Technique Demonstration Videos
Here is a brief tutorial video (above) introducing the process to show you watercolor glazing techniques. I use this method frequently, and I find many folks new to watercolor aren’t familiar with it.
The loosey-juicy, spill-it-on-the-paper method of watercolor painting leaves many beginners frustrated with the lack of control. That can be discouraging, and may even push a beginner to move away from watercolor.
But if you try watercolor glazing techniques, you’re really in the driver’s seat. You’ll have less frustration and more of a slow and deliberate accumulation towards your goals for color and saturation in your watercolor paintings.

Round Up of Watercolor Glazing Technique posts
- Here is a watercolor portrait painted in transparent glazes, using the sight-size method of drawing
- See if you can paint this small still life of fruit in a bowl in transparent glazes
- Get some inspiration from this simple interior with windows and a chair done in graphite and then transparent watercolor glazes
- Have a look at this petite portrait, inspired by the art of Pierre Bonnard – done in graphite with layers of watercolor glazing
What have you tried so far in this technique? A portrait, still life, or landscape painting? What did you think?

Get More Control of Your Watercolors
Controlling your application of watercolor on your paper will build a bridge between your reference photo, and the way your completed painting comes out. If frustration with your final painting sounds familiar, maybe glazing is worth exploring on your next painting project.
The introduction to watercolor glazing video (below) is more in-depth than the demo near the top of this post.
I hope the voiceover in each video demonstration that explains the basic premise of watercolor glazing technique is helpful. You can also watch the video and others like it on my YouTube channel here.
Helpful Watercolor Resources for you
Subscribe to this blog to get each new post via email by signing up (it’s free) here.
- If you’re uncertain about which watercolor paper to buy, I’ve written a three-page watercolor paper introduction. This is something I looked for and never found when I first started painting, so I made one for you. You can download it (free) right here. The primer explains the weights of paper, surfaces (hot press, cold press and rough, etc.). How to avoid rippled paper, which manufacturers of watercolor paper are out there, and student vs. professional grade papers, etc.
- Are you having trouble making time to paint? Have a look at this free mini-course. It’s called Six Tips to Painting More Often. Share the link with friends and family who could use a little nudge to get back to their art supplies.
- Titles for your art – beyond subject-based painting titles (for example, titling a painting of a red barn ‘The Red Barn’) can be challenging. The viewer already knows it’s a red barn. Imaginative art titles add depth to the art and help patrons connect to your work. Check out this class: How to Title Your Art. It’s a step-by-step course relaying a solid, works-every-time system, in three flavors. After you’ve completed the course, you can roll out the method that works best for you. Pinky-Promise!

Watercolor Supplies on the Go
Watercolor is a beautiful medium. It’s also very accessible, in that you don’t need solvents, thinners, or canvas mounted to wooden frames in order to paint.
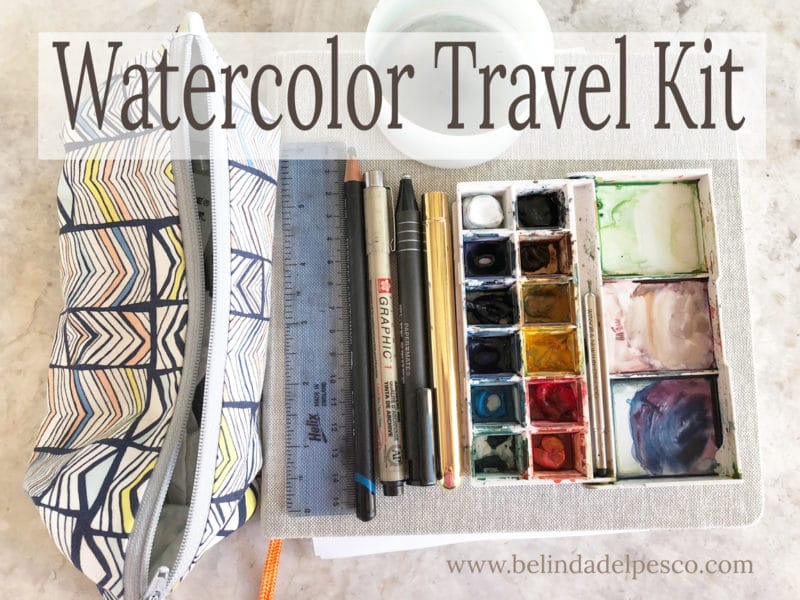
A small travel palette, a block of watercolor paper, a few brushes, a pencil, and a shallow cup will all fit in a zippered pouch. You can take it with you on walks, or out in the garden, or to a friend’s house for art night.
You can travel to far-off places with a simple setup like this to practice your newfound skills with watercolor glazing too!


Got a Question?
Do you have questions about Watercolor Glazing techniques? Have you ever tried painting with glazes in watercolor? You’re welcome to get in touch if you’re looking for more details that aren’t covered here.
Thanks for stopping by today, and I’ll see you in the next post!
Belinda


Hi Belinda, love your paintings. I am having a lot of trouble with perspective. It is so important when doing scenes with buildings. Is it possible to just draw it without perspective shapes? I guess it matters if you want it to look correct.
Is there an easy way?
Thanks
Barb Jerry
Hi Barb, Perspective is important if you want your paintings to look realistic. If you’re okay with wonky objects, concave surfaces, and curves where there arent really curves, then ignore it, and paint whimsically. If you decide it *is* important in your work, *practice* will train your eye to spot and correct the wonkiness. You can start by tracing your drawing, using graphite paper to transfer your drawing to watercolor paper, or use the grid method to render one cube of your drawing at a time. Each of those approaches – used over and over again – will help you “see” better when something is off in a freehand drawing. Thanks for your compliment. 🙂
Hello Belinda
Thank you for this lesson on Glazing. I am doing a Watercolour Painting Diploma and I am on module 3 which covers layering and glazing, so your tutorial is perfect, just what I needed. Even your beautiful cat.. my Siamese do exactly the same, they sit right where I want to draw or paint, as I move the brush they try to push it away!! 😊 I have created some fascinating washes this way 😀. I am pleased I found you and looking forward to viewing more of your tutorials. Happy Painting Belinda and pussy cat. 🐈⬛
Best wishes
Diane
Isle of Wight UK
Hello Diane! Thanks so much for your note, and your feedback on the glazing tutorial! I’m glad it was helpful, and I hope the rest of your watercolor studies are fruitful and fun. Many folks say that watercolor is one of the hardest mediums to work with, but I think it’s accessible, fun, and tackle-able as long as you approach it with curiosity. I hope your journey in watercolor keeps your sense of wonder and curiosity in a state of full sails ahead. Scout the cat sends a hello to your vocal whiskered babies.
I was not familiar with the term “glazing”. Your explanation and demo was very instructive. Thank you!
Hi Janet! I’m so glad the glazing demonstration made sense! I hope you have fun experimenting and testing its usefulness in your watercolor paintings! Thanks for leaving nice feedback. 🙂