
Figurative Collagraph Prints
Traditional mat board (known as mount board or pressboard in other parts of the world) is a wonderful material to make a figurative Collagraph Print. In this post, we’ll go over some of the particulars to build a plate in a subtractive process, and how you can ink your plate in both intaglio and relief methods, at the same time!
What is Mat Board?
Mat Board was designed to be an aesthetic boundary – like a tuxedo – between art and frame (see above). Also, and perhaps more important, mat board is meant to be a support for glass so it doesn’t come into contact with the art.
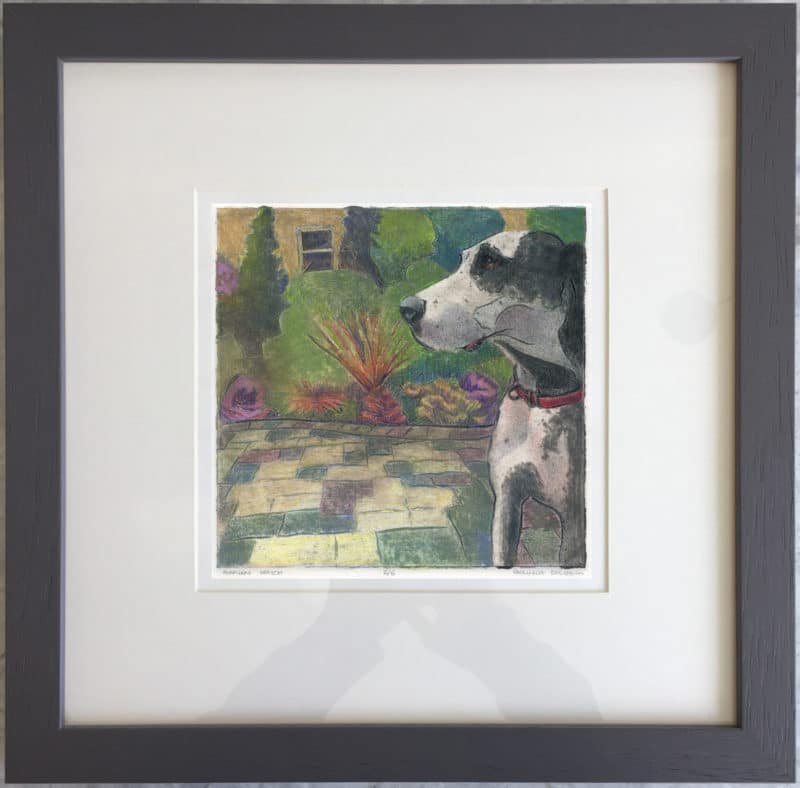
When using mat board to build a collagraph plate, I use the reverse side or the back, since it’s smooth, and the lack of texture releases ink more efficiently. The great dane image above is a mat board collagraph print.
Mat Board comes in all different colors and textures, dictated by the tastes and trends of the framing industry. When you buy it, the colors on the front won’t matter, because it’s easier to use the back of the sheets to print from.
You can purchase mat board on Amazon in packets of 10, 20, or 100 sheets in various sizes. With a ruler and a utility knife, you can cut large mat board down to smaller plate sizes.
Collagraph Plate Making
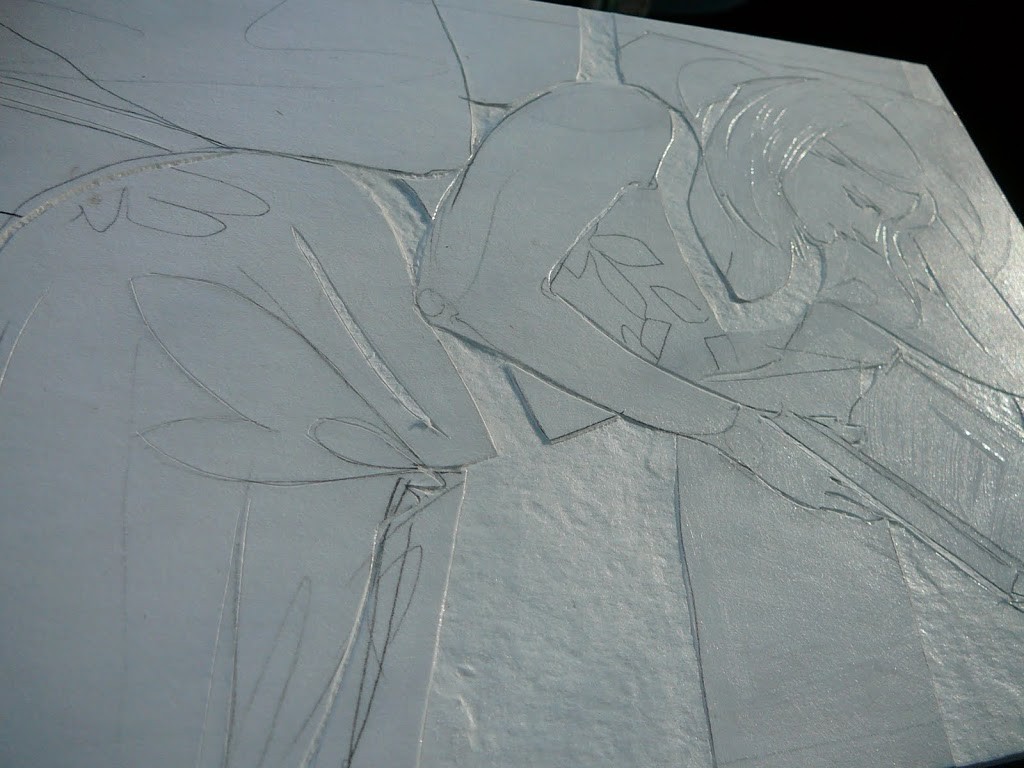
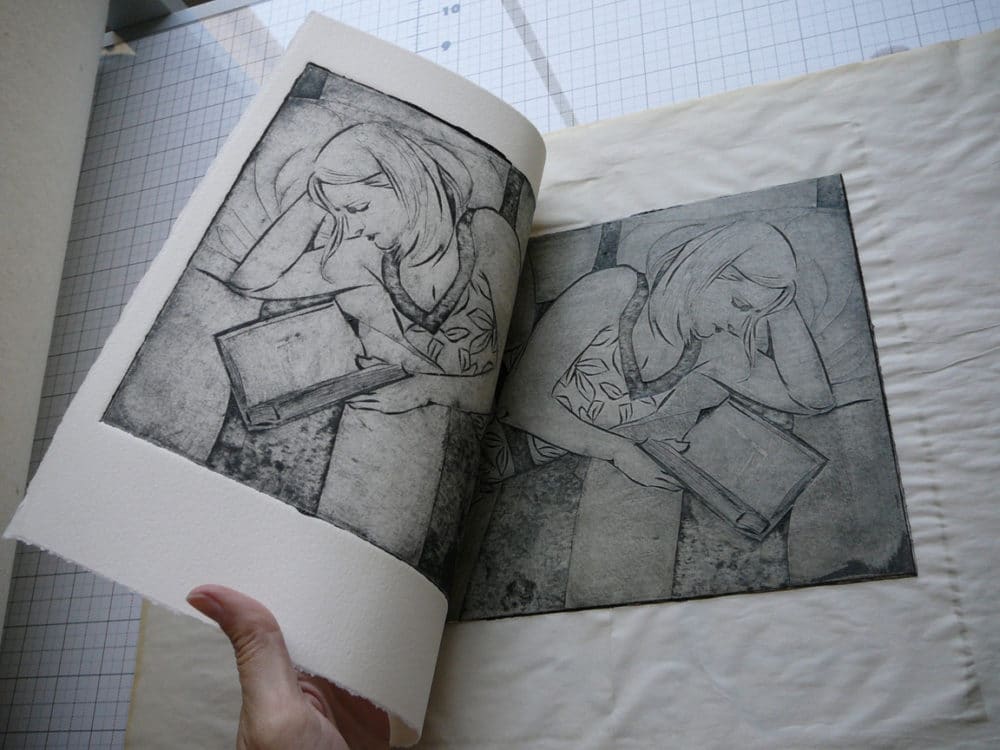
The plate for this figurative collagraph print (above) was an experiment to see the difference between finely incised lines, narrow little channels, and broad recessed areas – and how each would hold ink.
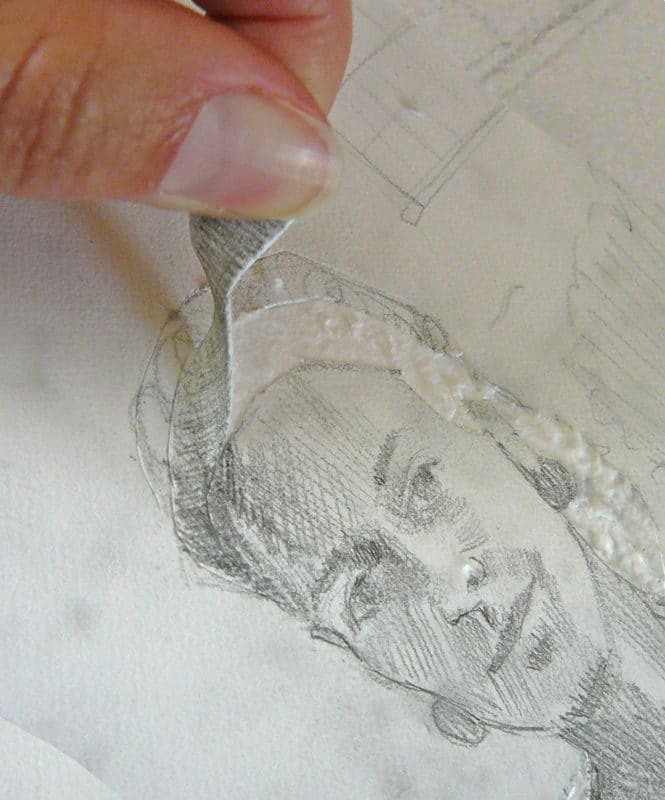
In the photo, the back of a piece of mat board has been drawn with a pencil sketch. Before I started cutting into the material, I coated the entire mat board, on top of the pencil drawing, with Liquitex Gloss Medium & Varnish. Doing this helps reduce tearing as you peel the uppermost layer of the mat board paper away.
After the initial coat of varnish dried, I incised more lines. Some were just cuts with the blade in a single stroke. Others were skinny little channels, peeled away from the surface (all of them shallow) to be no wider than a string of yarn.
In other places, I peeled away the top later of mat board in broad swaths by outlining it first with a Swivel Knife to create wide “wells” to hold ink. I re-coated the plate with gloss medium three times during the cutting to seal the plate. You can also use the gloss as an adhesive to repair any overzealous peeling.
Look at that cottony, ink-holding goodness!
Ready to Print a Collagraph
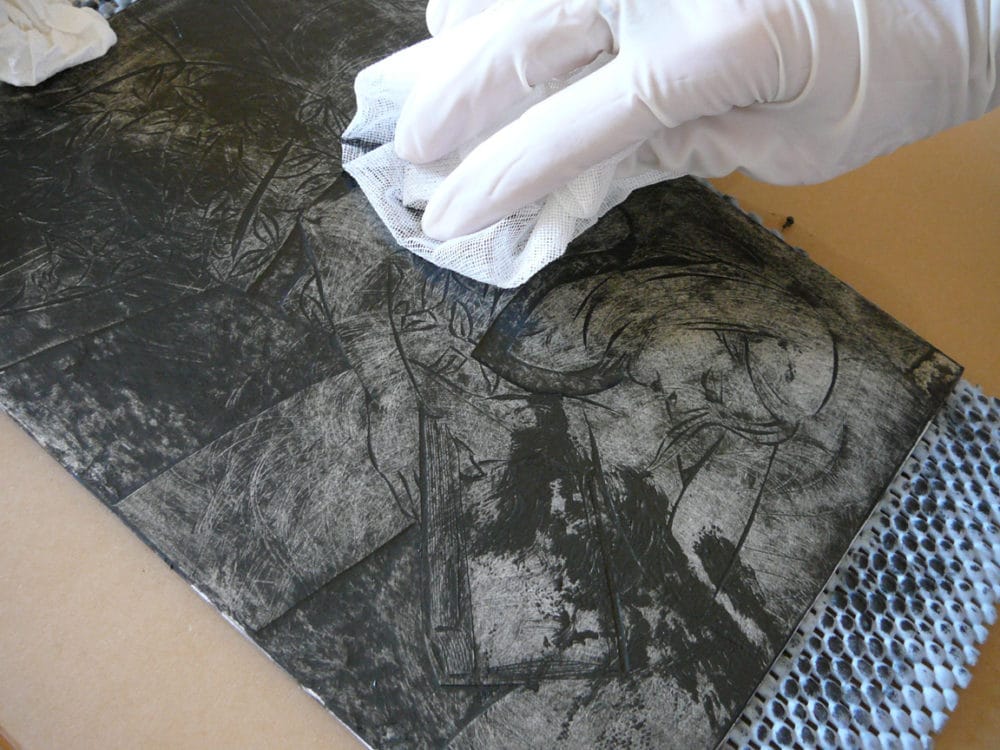
After cutting, peeling and sealing the plate, when it’s totally dry, it will feel sturdy and a bit like a plastic sheet in your hand. The varnish coating makes the mat board tough, and slippery, so you can apply ink, and wipe it with tarlatan cloth, like you would on a traditional metal plate.
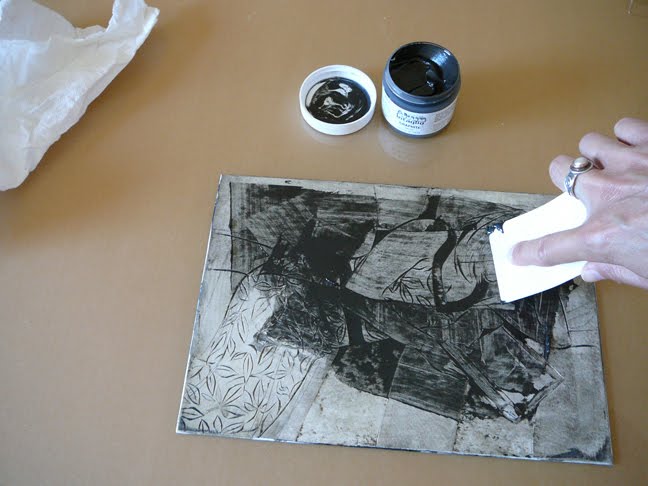
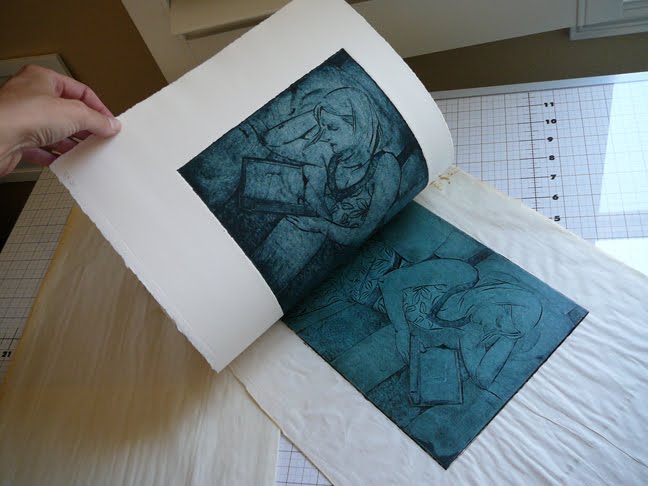
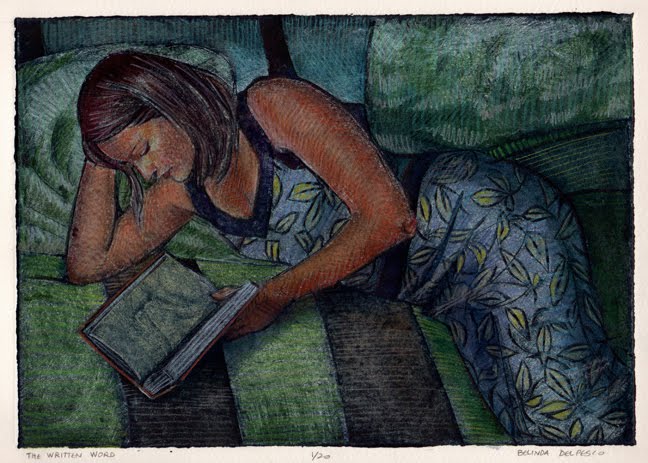
In the photos below, I’m applying Akua Intaglio ink in the color Graphite. I pushed the ink down into the narrow, incised lines that make up the pattern on the woman’s dress. The ink was also scumbled into the broad areas where the cottony texture of the mat board’s core was exposed in broader shapes, like the stripes on the bedcover she’s laying on.
Experimental Inking on Collagraph Plates
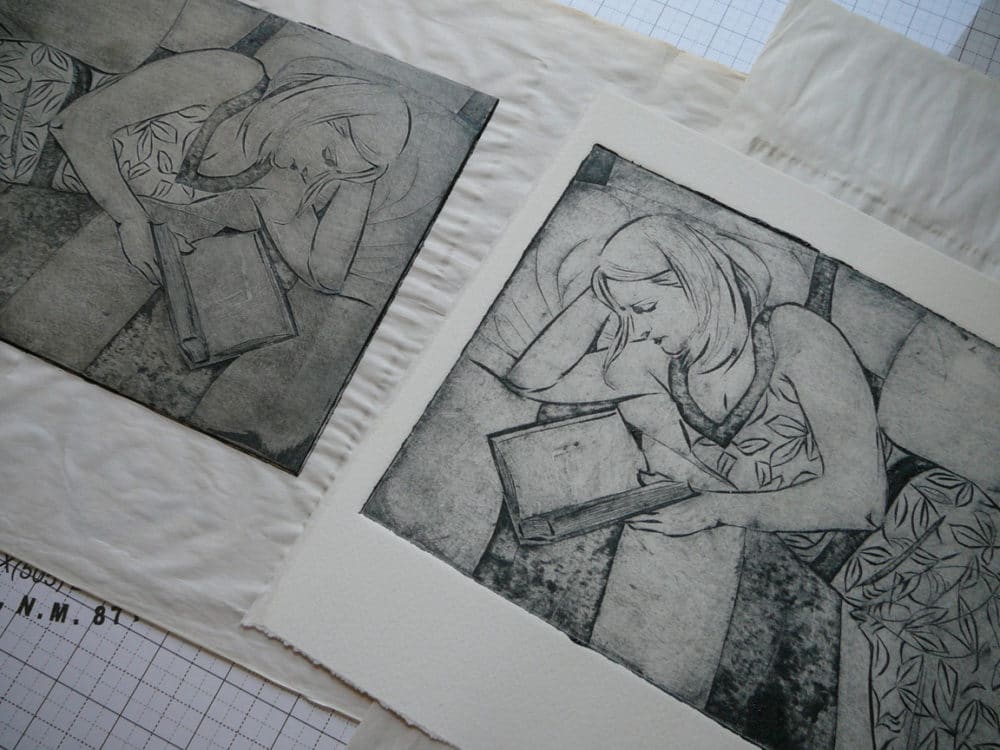
After pulling this print intaglio style with the graphite colored ink, I didn’t clean the collagraph plate. Plenty of the dark ink remained nestled in the recessed lines, and against curbs and corners of the cut-outs.
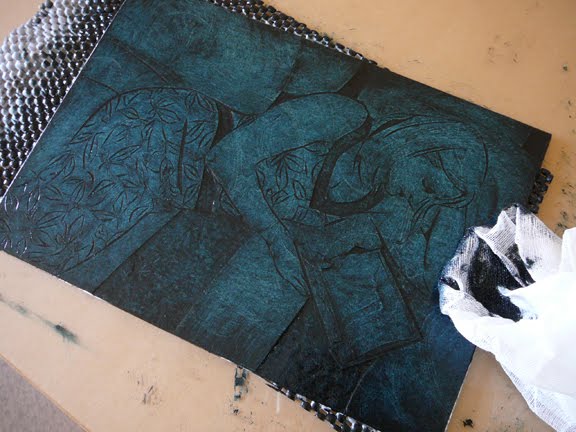
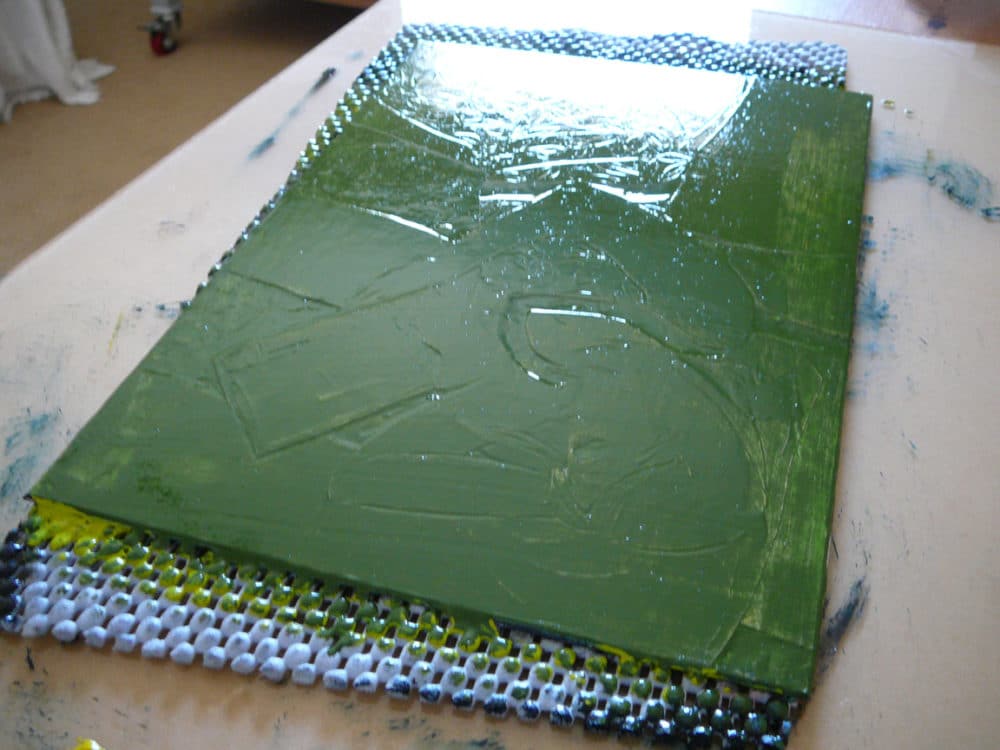
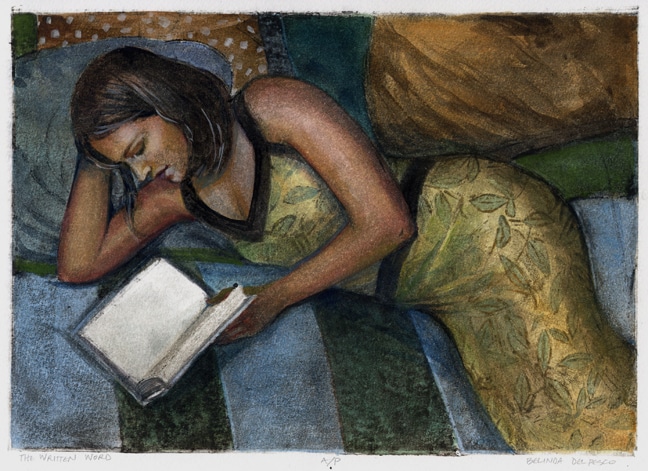
I mixed a little blue and green intaglio ink by Akua, and top-rolled the plate with a fresh layer of ink using a brayer. With a tarlatan cloth, I buffed the surface to simultaneously thin the ink, and push some of it into the wells to mingle with the leftover graphite ink.
Maintain Your Sense of Wonder in Art
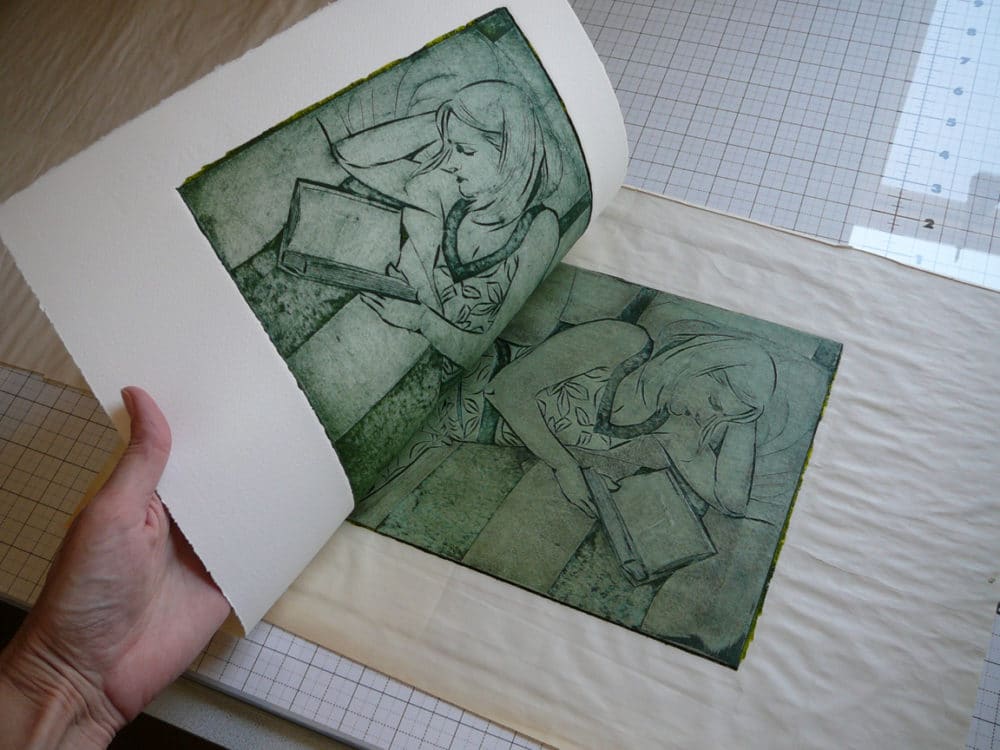
Pulling the first blue-green over graphite print from the collagraph plate inspired an afternoon of experimental inking and printing. I continued inking and printing without cleaning the plate in between each print.
The result was a variety of interesting color shifts, and textures on each print. It was also an informative color mixing session, and the play time on the plates gave me insights on how some of the ink colors differ in consistency and pigmentation.
Inking Your Collagraph Plates
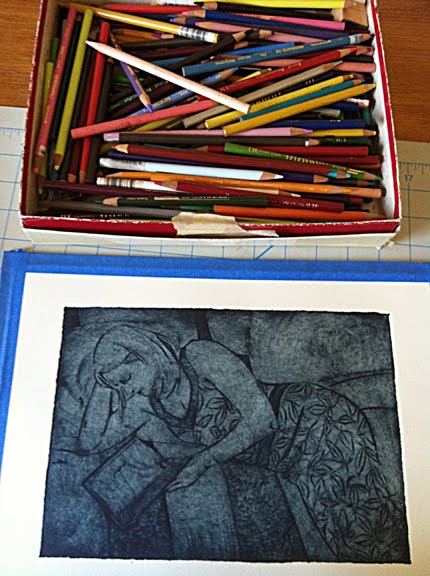
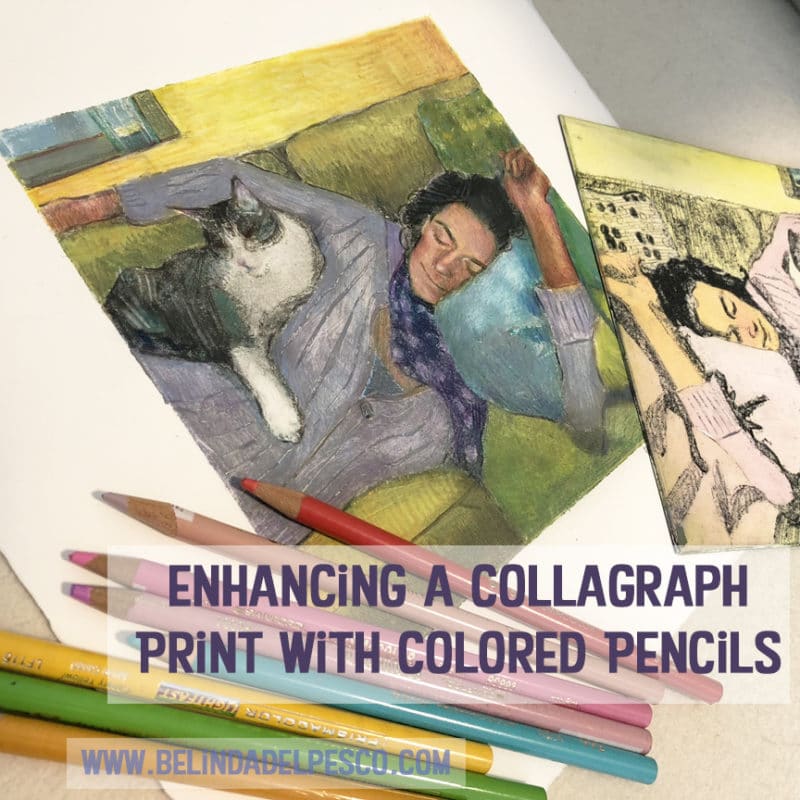
Now I have a stack of colorful figurative collagraph prints, ready to stand alone, or inspire further experimentation with other art supplies. I love using colored pencil on printmaking ink, and I’ll experiment with other media.
With the thinnest veil of pigments remaining on the plate, some of the ghost prints were my favorites. I painted one of them with watercolor below. Have you ever painted your collagraph prints?
The graphite and blue-green ink leftovers are still on the plate under the green.
More Collagraph Posts on This Blog
- Here is another mat board collagraph of a figure napping with a cat, and here’s one of a mother teaching her baby to swim.
- I’ve assembled a downloadable supply list, with links to all the resources to make a collagraph print.
- This collagraph is made a little differently – using kid grade construction paper mounted to mat board.
- Have you ever made a print with glue and mat board? Here’s an example of a glue collagraph.
Enlist Your Sense of Adventure with First Time Art Projects
I hope this post inspires you to do a little experimenting with figurative mat board collagraph prints. Use photos of your friends and family, and keep your first designs small, and relatively simple to increase your chances of success. Most important is a hefty dose of adventuring, and a priority to have fun with the process.
Thanks for stopping by, and I’ll see you in the next post!
Belinda
Art Quote
It may perhaps be thought, that in prefacing a manual of drawing, I ought to expatiate on the reasons why drawing should be learned ; but those reasons appear to me so many and so weighty, that I cannot quickly state or enforce them.
With the reader’s permission, as this volume is too large already, I will waive all discussion respecting the importance of the subject, and touch only on those points which may appear questionable in the method of its treatment.
In the first place, the book is not calculated for the use of children under the age of twelve or fourteen. I do not think it advisable to engage a child in any but the most voluntary practice of art. If it has talent for drawing, it will be continually scrawling on what paper it can get; and should be allowed to scrawl at its own free will, due praise being given for every appearance of care, or truth, in its efforts.
It should be allowed to amuse itself with cheap colours almost as soon as it has sense enough to wish for them. If it merely daubs the paper with shapeless stains, the colour-box may be taken away till it knows better: but as soon as it begins painting red coats on soldiers, striped flags to ships, etc., it should have colours at command; and, without restraining its choice of subject in that imaginative and historical art, of a military tendency, which children delight in (generally quite as valuable, by the way, as any historical art delighted in by their elders), it should be gently led by the parents to try to draw, in such childish fashion as may be, the things it can see and like – as birds, or butterflies, or flowers, or fruit.
In later years, the indulgence of using the colour should only be granted as a reward, after it has shown care and progress in its drawings with pencil. A limited number of good and amusing prints should always be within a boy’s reach: in these days of cheap illustration he can hardly possess a volume of nursery tales without good woodcuts in it, and should be encouraged to copy what he likes best of this kind; but should be firmly restricted to a few prints and to a few books.
John Ruskin, The Elements of Drawing, 1857
Hi Jacquetta (cool name!) – When numbering an edition that is hand colored, or has differences from print-to-print within the edition, it’s customary to include the letters e.v. after the edition number. For example: 2/5 e.v So the print is number 2 of 5, and the ‘edition varies’. Is that how you do it? (Thanks for the compliment.)
Don’t be sorry. You might just be my hero. I’ll report back with my results, but I have to go now… to get some Liquitex.
🙂 You might consider putting 2 coats of liquitex gloss medium and varnish on your plate, to be sure you create a barrier between the glue and the ink. Cheering from the sidelines: good luck!
Perry, did you use glue to seal your plate, or liquitex gloss medium and varnish?