
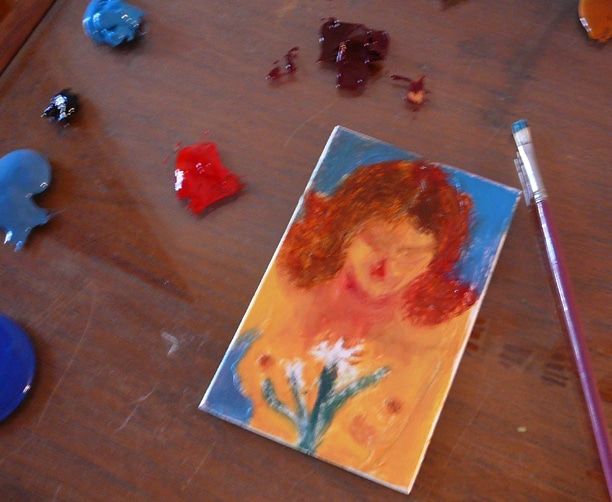
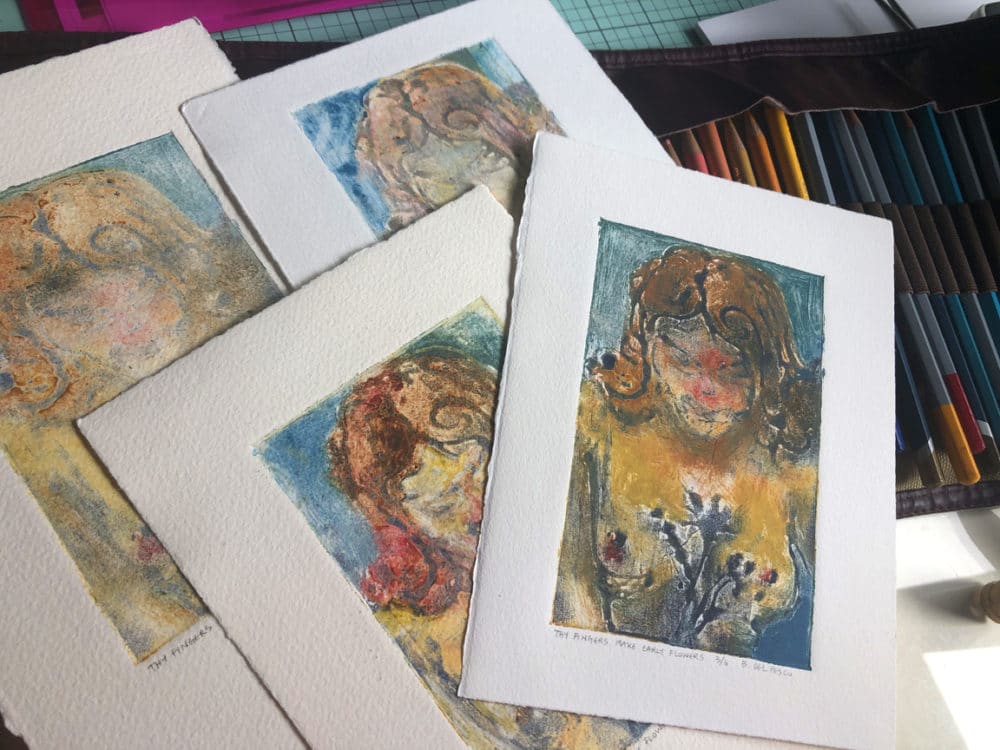
What is a Glue Collagraph?
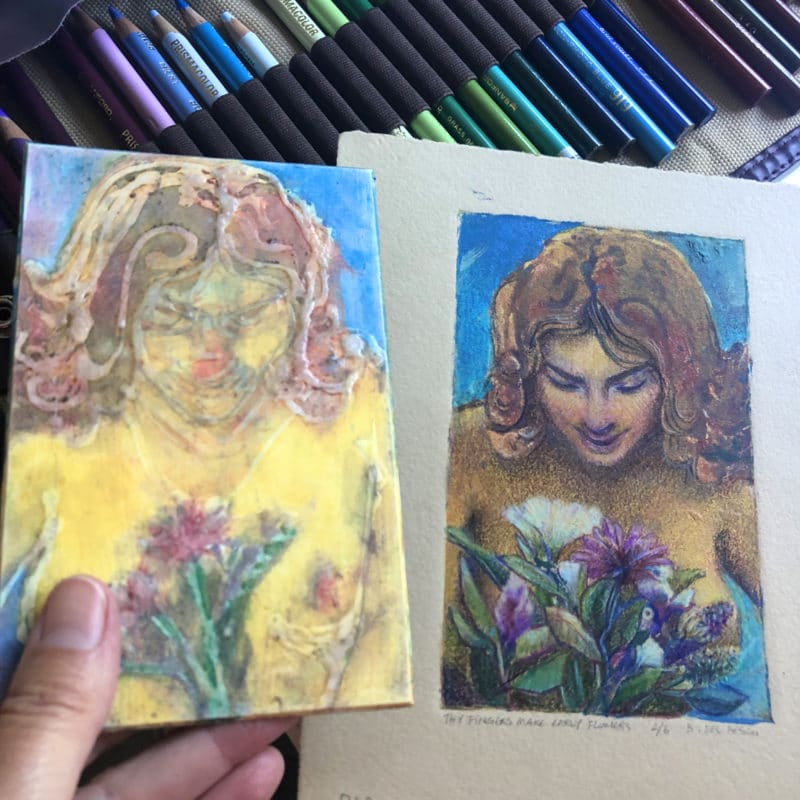
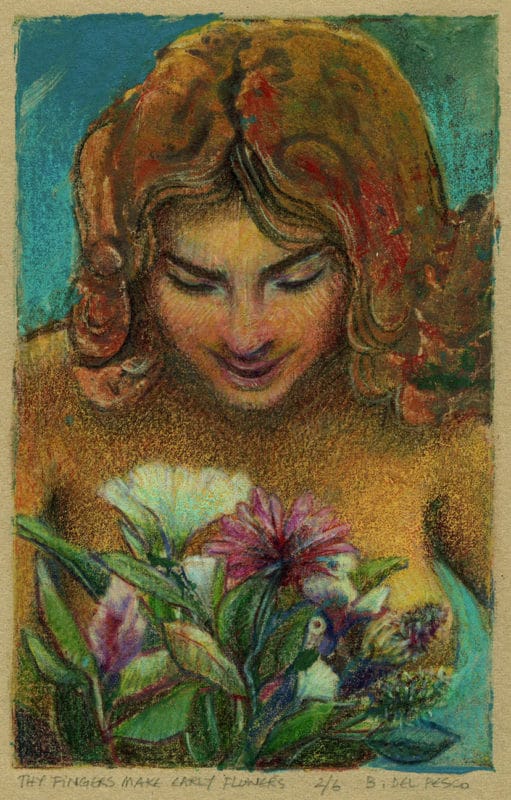
A glue collagraph is a printmaking plate made from a stiff base, like mat board, with a printable design applied to the board with dimensional glue. Here are some examples:
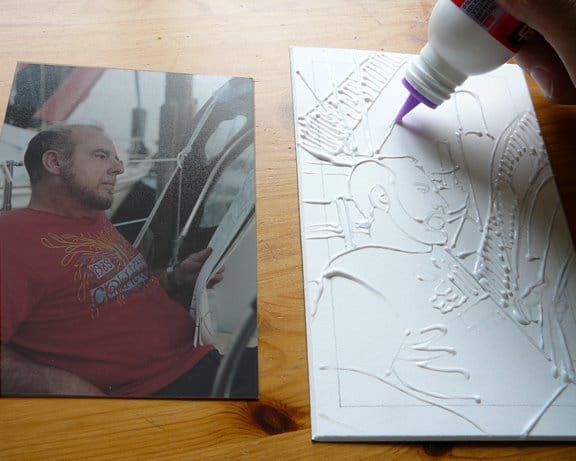
Drawing on mat board with glue 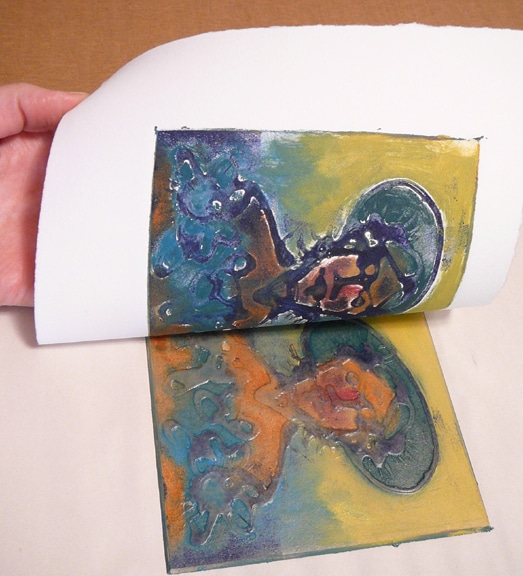
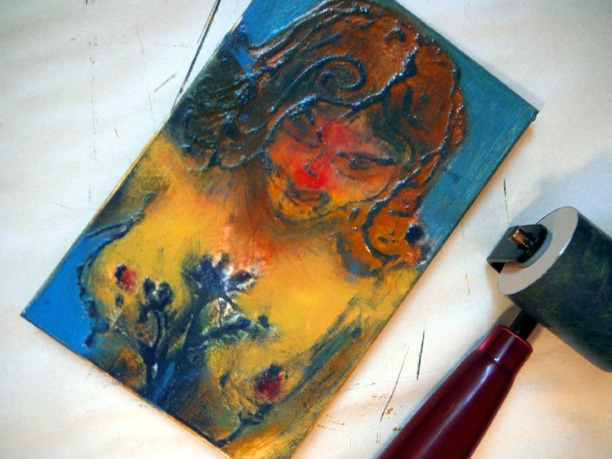
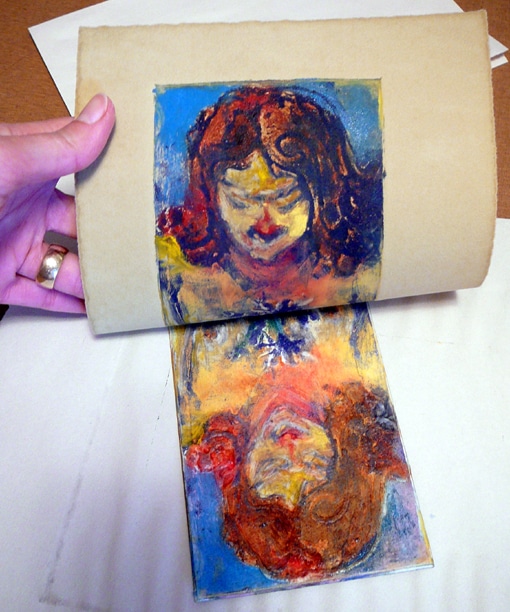
Pulling a glue collagraph of a woman in a hat 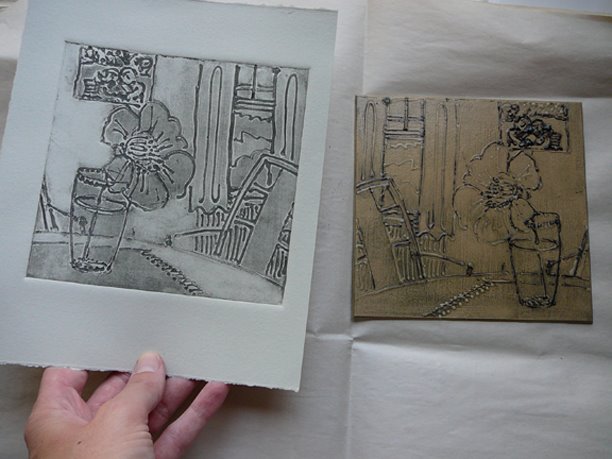
Comparing the glue collagraph print with the plate
Collagraphs are Chameleons of Printmaking
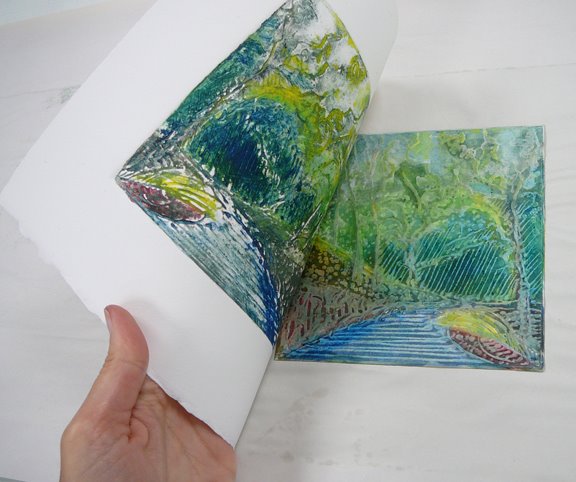
Traditional collagraphs are often built in an additive process – with papers, fabric, thread or organic embellishments adhered on the plate. Think of it as printing from a collage. Here is an example of a collagraph created with incised lines to hold ink, showing that collagraphs can aslo be printed intaglio style.
Each of the many collagraph plate treatments are constructed with the hope of getting compelling marks, patterns and shapes to print on paper. In this case, the glue dries in a raised height from the surface of the plate. This arbitrary topography is perfect for inking both the upper and lower areas with intaglio printmaking ink, with differing values, to print against good printmaking paper on a press.
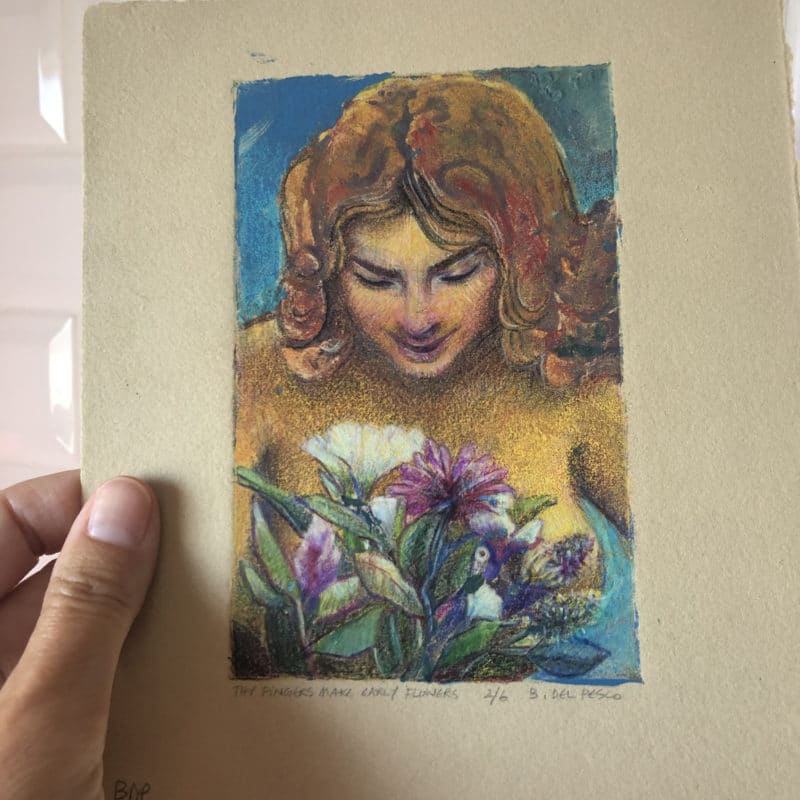
What Does a Glue Collagraph Look Like?
The collagraph at the top of this post was made with a mat board (sometimes called mount board, or passepartout) plate, and drizzled glue applied with a fine point nozzle, left to harden as raised line work.
TIP: After the quick drying glue is completely dry, seal the plate, front, back and sides, with Liquitex Gloss Medium and Varnish Here’s another post on Glue Collagraphs.
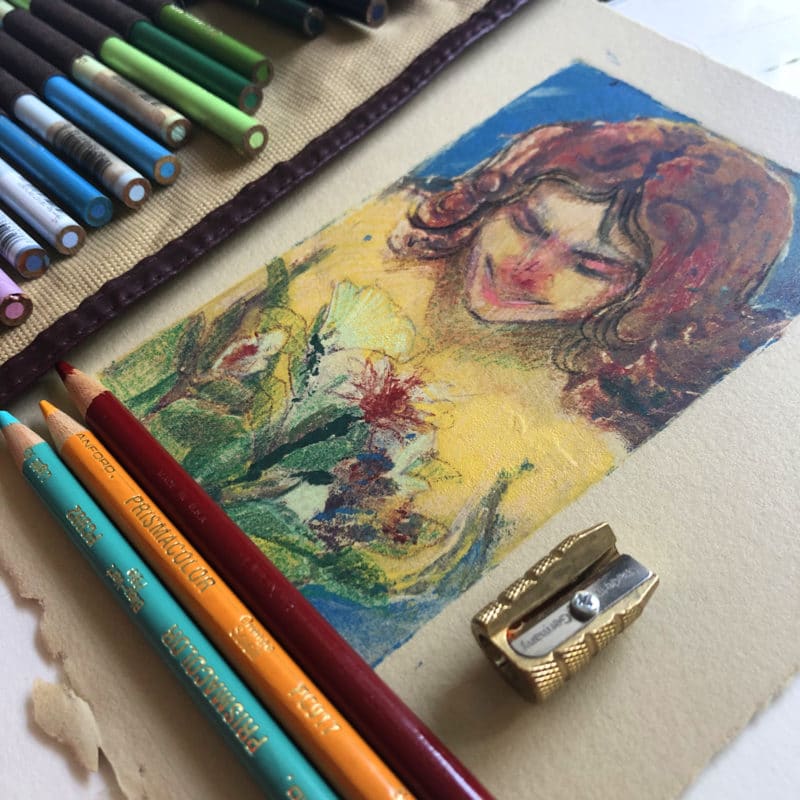
Adding Other Media to Your Collagraph Prints
Hints for a Successful Collagraph Print
You can get a great print from a glue collagraph on a small craft press, *or* a good hand-rub on the back of the paper with a spoon or a wooden drawer knob.
If you’re hand-transferring the image (without a press), I’d recommend two things;
1) Choose a simple design. If you have parallel lines or circular shapes in glue, keep lots of exposed, unglued mat board between them. When raised glue areas are close together, they prohibit paper contact with the plate. Printmaking paper will be suspended too high by the glue to dip in and pick up ink embedded inside a teeny “donut hole” circle of raised glue.
And 2) Use a lightweight, good quality paper, soaked and blotted, like BFK Rives lightweight printmaking paper, which will adhere well to the ink. This paper is thin and flexible enough to curve around the raised glue areas, and hammock down to the flat surface of the plate and pick up your background ink colors.
BFK Rives is also tough enough to give you the option of adding other media.
Printmaking Perfection vs Experiments
I had a fun conversation with an artist friend about starting new art projects with unfamiliar media. Some folks want detailed instructions, a month of study, a full arsenal of every flavor of necessary art supplies, and a guarantee for a successful first time print.
I want you to know that printmaking is not a First-Try-Perfect art making method. It is a beautifully sequential, step by step in the right order, meditative art-making exploration. Printmaking is perfect if you’d like to encourage your timid artist self to experiment more, and fret less.
If you wrestle with your inner perfectionist, learning printmaking may help put your must-be-perfect squaller down for a nap.
Printmaking is tactile, and beautiful and messy. Every single print you pull will have surprises for you. No matter how carefully you build or carve your plate, or apply just the right sort of ink, in measured quantity, with perfect viscosity, unexpected things will still happen.
The nature of the media is about transferring pigment, with pressure, from a slick, nonporous surface to an absorbent, cotton pulp sheet of printmaking paper. Pressure on still-wet pigments pushes slippery particles around. So no matter how carefully we create the image, the press will have its way with the art.
Cultivate Curiosity Instead of Expectation
Surveying the ocean of variables at the start will prepare you for more joy when you approach printmaking with a conviction to experiment. Fostering your curiosity about the process will make it glorious for you.
When your print doesn’t come out as you expected, save that juvenile for a little maturing with other media later.
Try your print again, with alterations in the ink, paper and pressure. Each time you print, you’ll learn more than you could ever glean from a book or a blog.
Post questions about your conundrums in printmaking groups on Facebook (see below for a partial list), roll up your sleeves, and march back to it with the heart of an explorer. We aren’t solving world problems – we’re just making art. Have courage and carry on.
Thanks for stopping by, and I’ll see you in the next post –
Belinda

Some Helpful Printmaking Groups on Facebook
- Collagraph Worldwide
- All About Collagraphs
- Drypoint Printmaking
- Linocut Friends
- Craft Press Printmakers
- PrintHackers
- All About Monotypes
Art Quote
Everything starts with a sketch, made either in the landscape or the studio from natural objects that I have collected. Often when I’m sketching, I’m already subconsciously limiting the number of colours. With linocut, I usually limit myself to five colours, but as I use transparent colours these will often overlay each other to create further colours.
Angie Lewin
Another highly informative post. Thank you for the sharing, it’s very helpful, Belinda.
Hi there, David! I’m so glad the details are helpful! Are you planning to try a glue collagraph?