
Tools for Beginner Watercolor Artists
Beginner watercolor artists need encouragement, tips and effective tools to stay with this lovely medium. Have you ever heard someone say “I tried watercolors once, and I’m terrible, so I gave up.”? Don’t be that person. Stick with it. Watercolors need to be courted for a little while before they’ll hold hands with you.
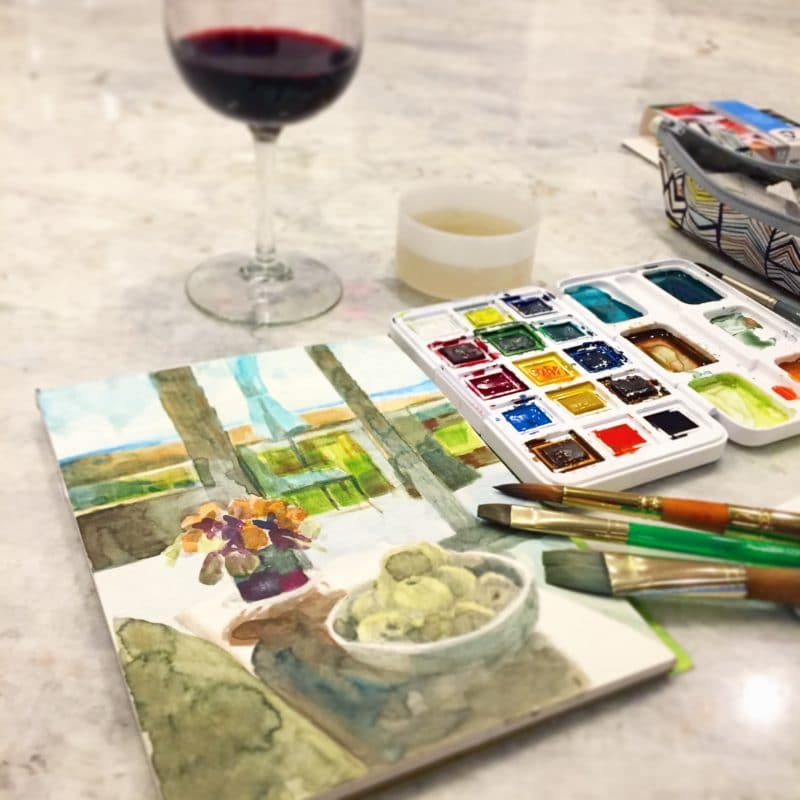
Be patient, and curious about painting with watercolors. Ask lots of questions, and spend time playing with your brushes, paper and pigments without trying to paint a specific thing. It helps to be willing to make mistakes. I tried watercolors a few decades ago, and I was horrible at it too. But I found the watery, gossamer medium so beautiful, I kept playing with it anyway. You can do that too.
5 Drawing and Painting Tools for Watercolor Beginners
Since the drawing underneath your watercolor is the foundation of your painting, take some time with it. If drawing accuracy is important to you, use Sight-Size or Grid methods to help with the placement of shapes and angles. Here is a post about using Sight Size, and below are some tools to help with your beginning watercolor painting adventures.
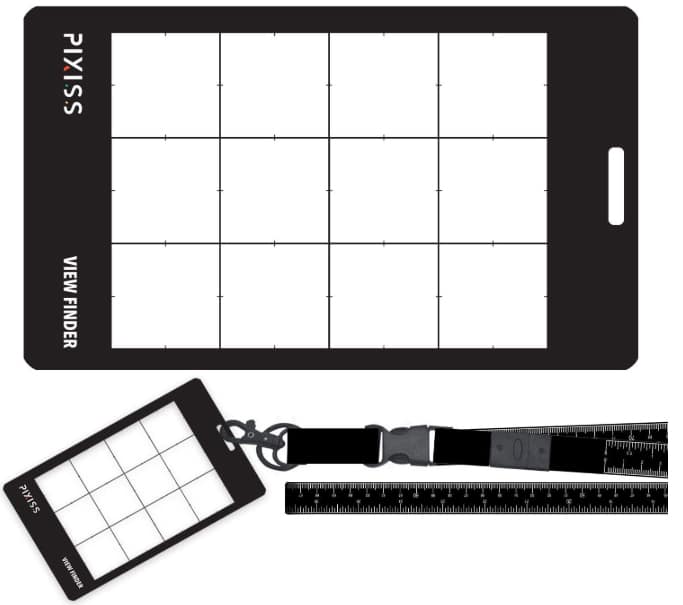
#1 Gridded Viewfinder
This gridded viewfinder above will help you draw from life using the grid system. Lay a grid on your paper that matches the grid in your viewfinder, and focus on drawing the shapes in each cube/square. This will help break down complex subjects into positive and negative shapes.
Focusing on shapes will help you spend less time “noodling” the details, so you can focus on the overall assemblage to give bigger impact to your final painting.
Using a Grid System is like employing a knife to cut a big pancake into easily consumed bites. It’s easier than spearing the entire pancake, and swinging the whole round of it into your mouth. 🙂 That’s what painting and drawing feels like sometimes. Use tools to help map out the subject’s “parts”.
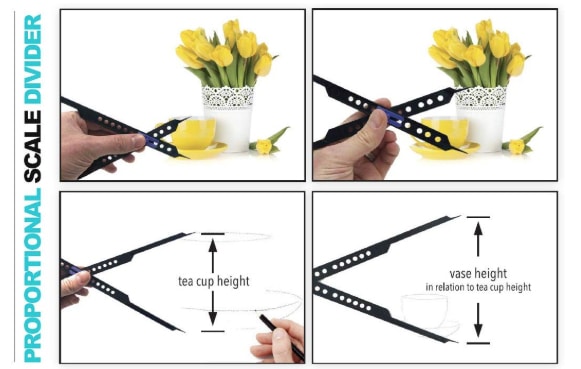
#2 Proportional Scale Divider
If you like to paint from reference photos in your own family albums, this proportional scale divider will be a handy tool. As a beginner, scaling a 4×6 photo up to a 12 x 16 sheet of watercolor paper can be a bit of a strain.
This tool helps you accurately scale up or down by simply expanding the tips of one end to match proportions in your photo, and then flipping the divider over your watercolor paper to mark the edges of that item enlarged. Here is a video explaining how it’s used, and here is an example of one on amazon.
#3 Portable, Thin, LED Light Table
If you’re short on time, new to drawing and painting, and the instructions for gridding and sight size drawing makes your head hurt, perhaps this tool will help you.
Here’s an exercise for beginner painters: using a light table (like this one), trace a favorite photo onto watercolor paper five times. Take those five traced drawings, and give yourself permission to play with your paints, and do some experimenting.
Throw caution to the wind, because you traced the images. There’s no need to grip the brushes with white knuckles because you don’t want to mess up the drawing you just spent hours creating, right?
This lesson is all about getting acquainted with your pigments and brushes. The traced drawing is a little road map underneath the watercolor.
If you mess up, it’s no big deal, because you can trace that image five more times and begin again.
The freedom to experiment, and start over if necessary when the drawing took 5 minutes instead of 5 hours is incredibly freeing. Plus, tracing those lines will train your hand and eye to notice what matters the next time you freehand a sketch under your watercolor.
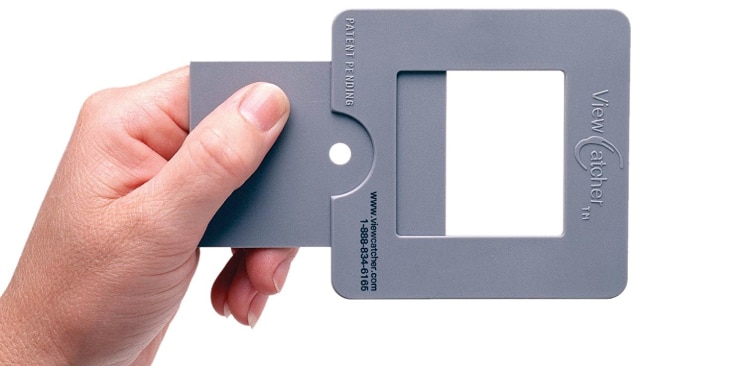
#4 Viewcatcher with Adjustable Aspect Ratio and a Value Checker
I have two of these handy little viewcatcher tools in my studio, and my travel bag. Hold it over a photo or a real life scene to isolate and choose compelling compositions, and you’ll notice smaller bits of beauty to paint.
I use the slider to crop sections of still life setups or landscapes. It allows me to see if adding or subtracting elements is helpful to the overall painting. I also use it to mimic the shape of my sketchbook page, or watercolor paper, so my scene will fit on the paper.
Since the plastic frame is a 50% neutral gray, I can slide the centerpiece closed, and look through the hole to gage if a particular color on my source material is lighter or darker than gray. I also squint to observe the real life color seen through the hole, so I can check it against the value of the color on my painting.
I can also check the accuracy of my painting by looking only at what’s in the frame of the Viewcatcher. It helps keep my “where was I looking” distraction troubles in check. For such a small, simple little tool, I think this one is super handy.
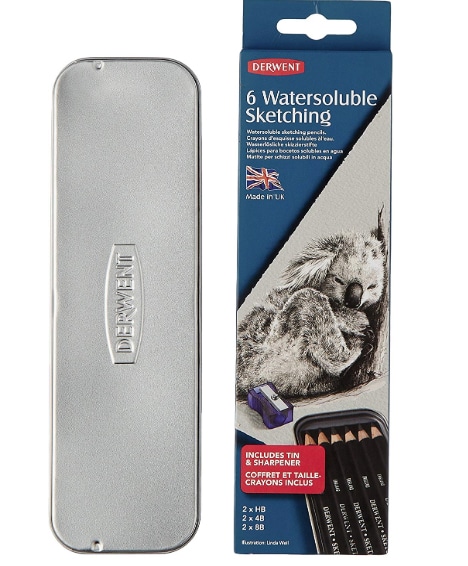
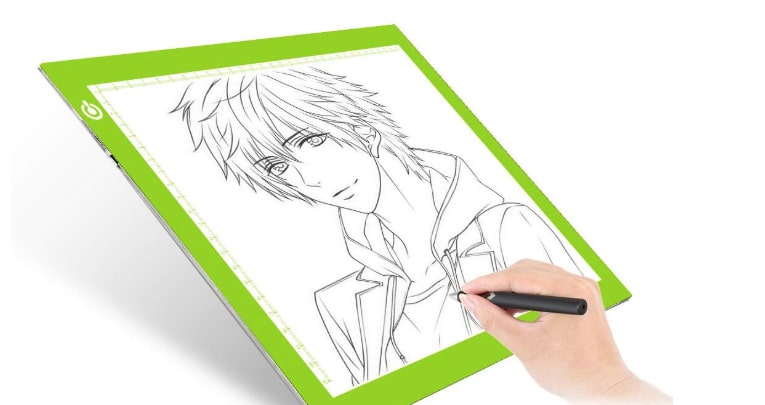
#5 Water Soluble Drawing Pencils
If you worry that your pencil lines will show under your sheerest parts of your watercolors, you’re going to love these pencils. The tin includes 2 HB, 2 4B and 2 8B graphite pencils, and the moment your brushes touch the graphite, they dissolve and disperse amongst your pigments. Check them out here.
If you want to go a step further, you can also use watercolor pencils to sketch under your watercolors. I use a neutral dove gray watercolor pencil, or a sienna brown pencil, and by the time I finish the painting, I can barely find my marks from the drawing underneath the pigments.
Bonus Round: Building an Artist’s Reference Library
Your artists’ library of reference books will be your Go-To for inspiration, instruction and getting unstuck. It’ll also be a place of knit-brow confusion, because every watercolor artist has a different set of favorite colors, and best choice of brushes, and most frequently used watercolor papers.
Don’t be frustrated by that, because those contradictions are proof that there is no right or wrong choice for quality pigments, paper or brushes. Be prepared to experiment. Trial and Error should be a required workshop for beginner watercolor painters. Put your experimental lab coat on, grab a book by an artist you like, and be ready to play with your paints, paper and brushes. No judging the outcome.
As long as you’re using university student-grade to professional grade watercolors, paper and brushes, you’ll be fine. Archival materials are your friends. You shouldn’t expect satisfactory results if you’re using children’s pre-school pigments, with the awful brush that came with that set on standard office copier paper. Start slow, and build your materials, and your skills together, one thing at a time.
Here are some excellent books in my artist’s reference library that I recommend:
Watercolor Paper
Which Watercolor Paper is Best?

Principles of Art Posters
If you’re a beginner with watercolor, you may also be new to drawing. Here are some tools (below) to help you move in the right direction towards your progress.

Mindset for Beginning Watercolors
Let’s remember that making watercolor paintings is not the same sort of seriousness as performing brain surgery on children. We forget that making art is a creative pastime, meant to be fun and relaxing. But we confuse the fun with easy.
Try not to approach your art table thinking that you’ve got to create a masterpiece. If you’re a beginner, you’ll make art that looks like someone just figuring watercolors out, and that’s okay. Be kind to yourself along that path. If you don’t know where a painting should go next: how dark of a color to choose, what pigment to water ratio you should mix, or how to handle the background, wing it. It’s okay – it’s just paint and paper.
Go ahead and try something, and if it doesn’t work, you’ll try something else on the next painting, because now you’ve learned that this particular choice didn’t deliver what you were looking for. Getting less than you hoped for doesn’t mean you failed. It means you just learned something.

We All Need Community
Okay, I hope I didn’t overwhelm you. If you have questions about any of this stuff, or you have a particular area you’re struggling with in your watercolor painting goals, leave a comment and I’ll get back to you. Other readers might answer as well, because we’ve all been there, and we get better at art together.
Thanks for stopping by today, and I’ll see you in the next post! (Subscribe here.)
Belinda
P.S. If you already have tube paints, and you just need a tin to take them outside for garden paintings, or art-night at a friend’s house, check out these handy empty tins you can squeeze your paints into.

Art Quote
You can’t trust your talent. I have taught school for a very long time, and I never met a student who was untalented. Talent is as common as house dust and kudzu vine in Alabama and just about as valuable as teats on a boar. Nothing is as valuable as the habit of work, and work must become a habit. Or, as Blake said “Execution is the chariot of genius.”
Barry Moser

I can paint tight watercolors that look like oil paintings. How can I make the breakthrough to paint wonderfully juicy, watercolory paintings?
(Nothing like an easy question!)
Hi Tina, That’s a GREAT question, and there are a ton of exercises to help tight paintings become looser. Part of the challenge is one of mindset; treat each exercise as an experiment, with no “masterpiece goals”. Try painting a watercolor with limited strokes; one per shape/object. Try painting with the brush held by the tail, standing, at a distance from your paper. Try opening your palm, face up, and laying the brush across the bed of your four, aligned fingertips, tail of the brush towards your torso. Stabilize the brush with your thumb over the brush handle just above your index finger, as though you’re holding a conductor’s baton, and try completing a watercolor with this light grip to introduce an “unfamiliar” to your process. Try painting the same image, five times, using combinations of standing, or seated but at a distance, or single stroke color, or counted strokes, where you use a pencil to track in the margins how many strokes you used to complete the painting, etc. It can be done, but you have to mix up your habits a little. 🙂
Happy Birthday!
Hi Carol, Thank you very much! Have a great weekend!