
Colored Pencils Enhance Monotype Prints
Have you ever added colored pencils to refine parts of your monotype prints? (If you’ve never made a monotype, here is an introduction to dark field monotype prints without a press.)
Whether your subject is portraits, abstract, still life, or landscape, adding colored pencil will transform a mediocre print into a monotype jubilee. You can add color and enhance details to just a little of your monotype, or the entire print. You get to be the Boss. Because it’s Your Art.
I’m serious – I hope you’ll give it a try. If you have a stash of old monotypes you were less than thrilled with, pull one out, and abracadabra – take your oh-well print, and transform it into a that’s-what-I’m-talking-about sheet of Glorious. Just add colored pencils. (Or any other media you’d love to layer upon the ink.)
Monotype from Recycled Plastic
I have several colors of Akua Liquid Pigments – from back in the day – before Speedball owned the company. Despite their age, they work very well for light field, full-color monotype prints. (You can also use Akua intaglio inks to make a monotype.)
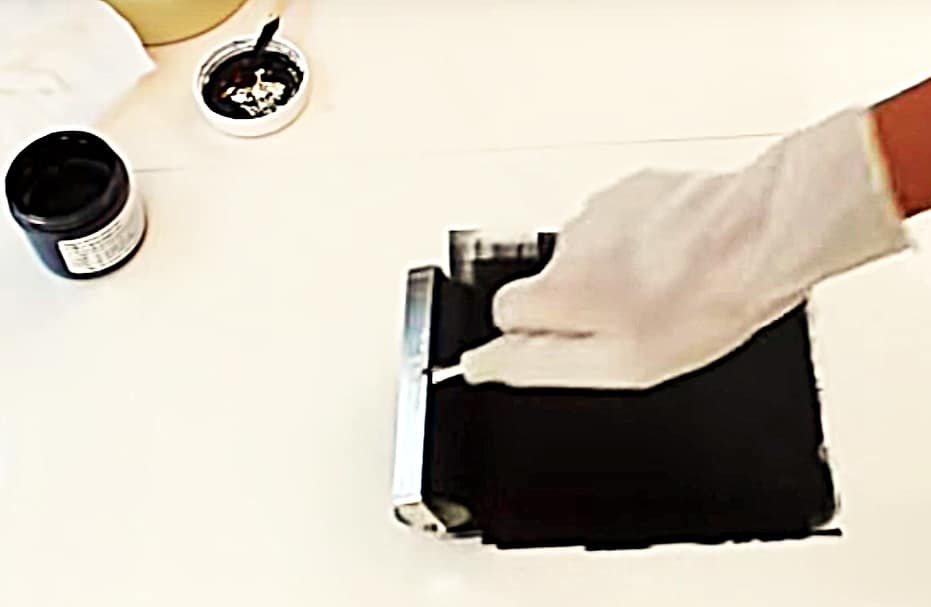
Everyone is still stuck at home, so we find art supplies in the stuff we already have, right? I snipped the front off a plastic report cover to use it as a plate for this monotype. You can see marks on the acetate sheet, where I used it as a registration jig template for some smaller test prints. Reduce, reuse, recycle, right?
Using Plastic Report Covers as Monotype Plates
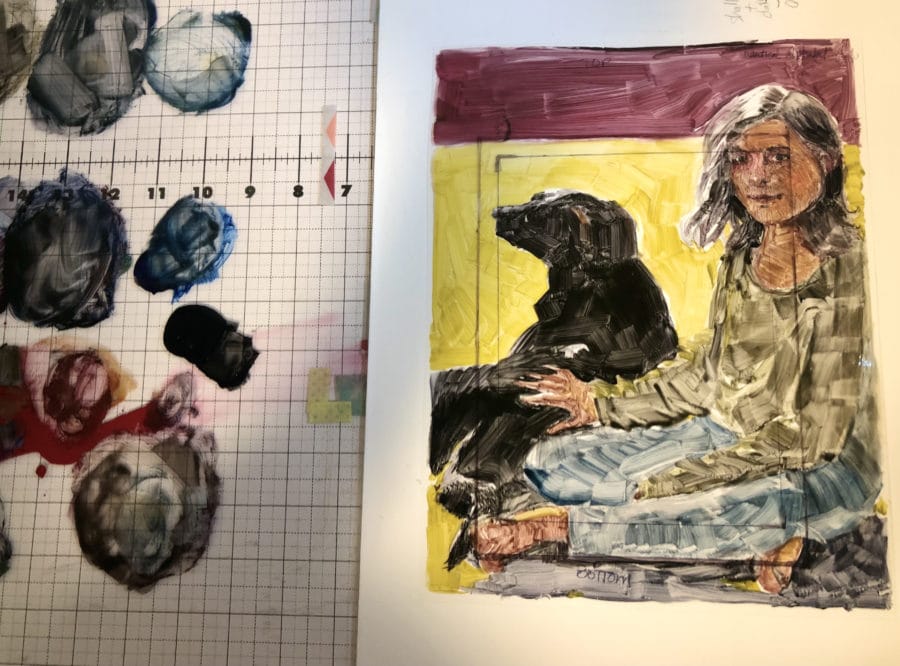
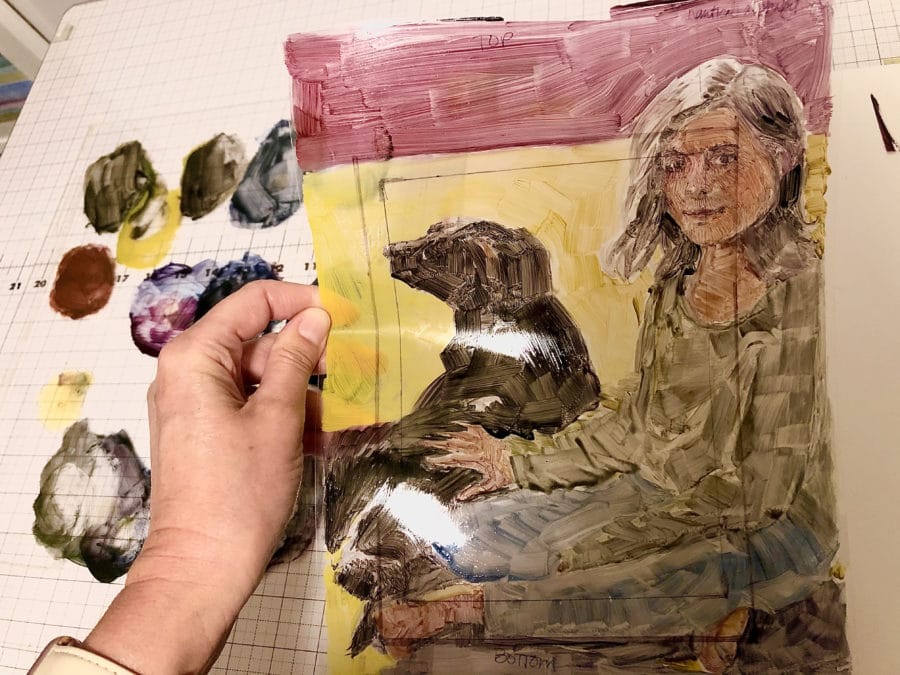
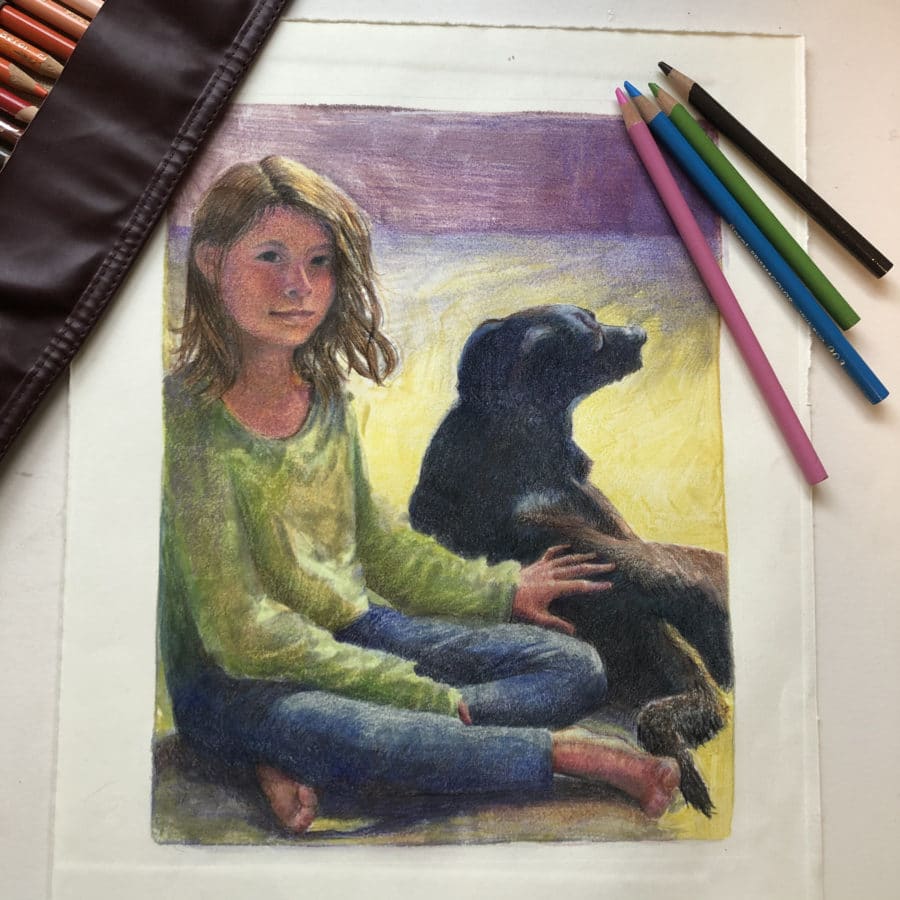
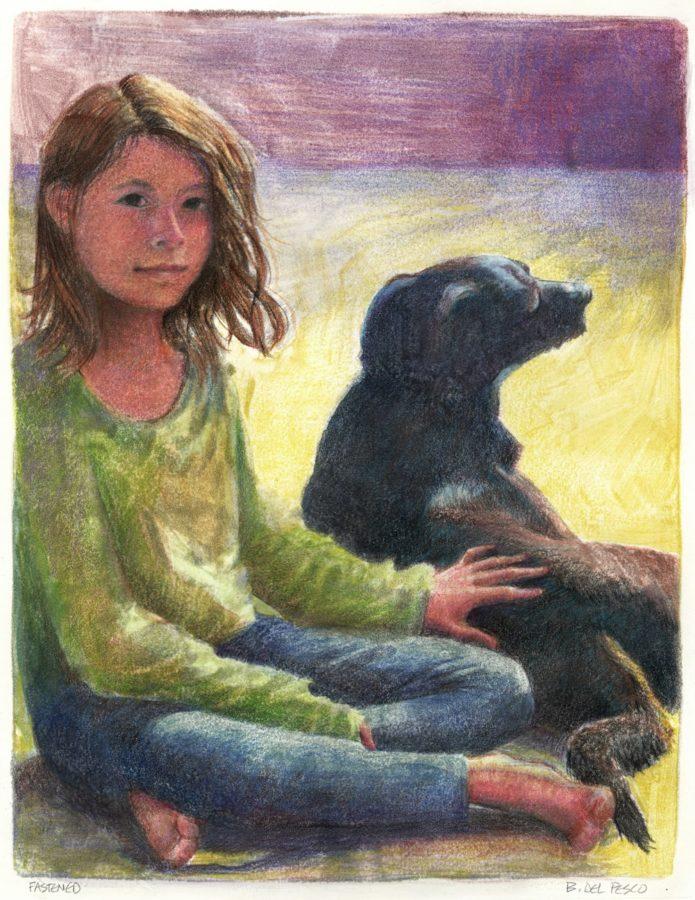
For this portrait of a girl and her dog, I painted Akua liquid pigment with bristle brushes directly on the report cover, after washing it with dish soap (and drying it thoroughly with paper towels) to ensure there were no oily fingerprints to repel the ink.
This monotype was not planned. It was late at night, spontaneous, and painted quickly, just before bedtime. Do you ever do that? Get sucked into the rabbit hole of one-more-piece-of-art before the end of the day? It feels a little sneaky and rushed. 🙂
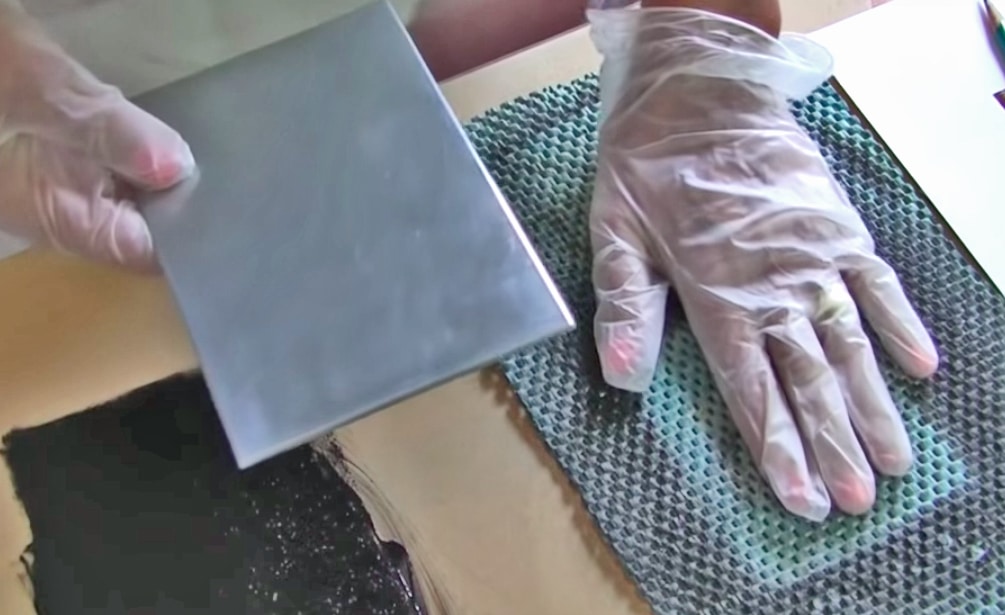
Matching the Right Printmaking Paper for Hand Transfer of Monotype Prints
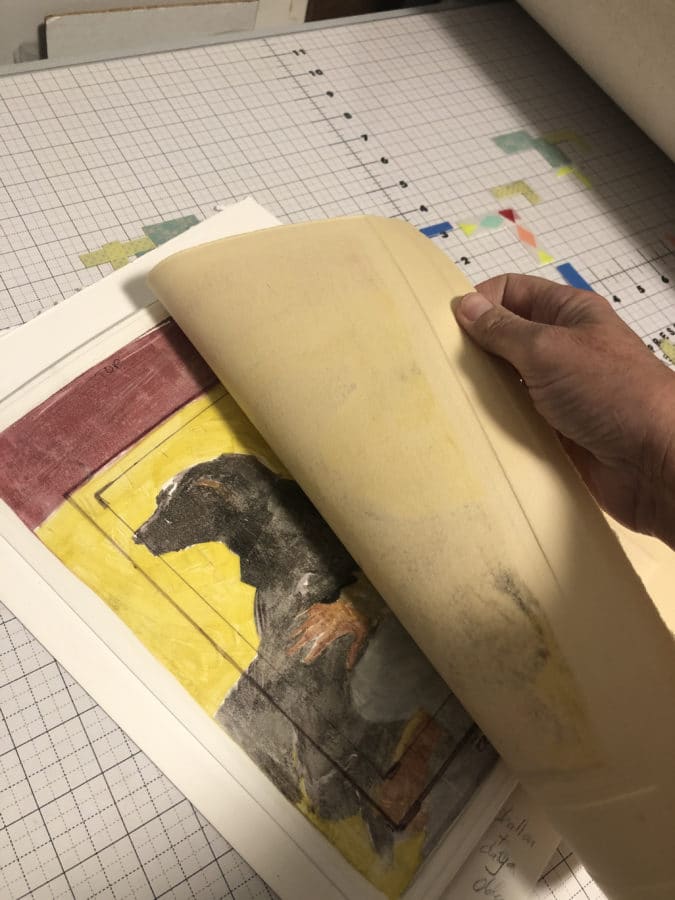
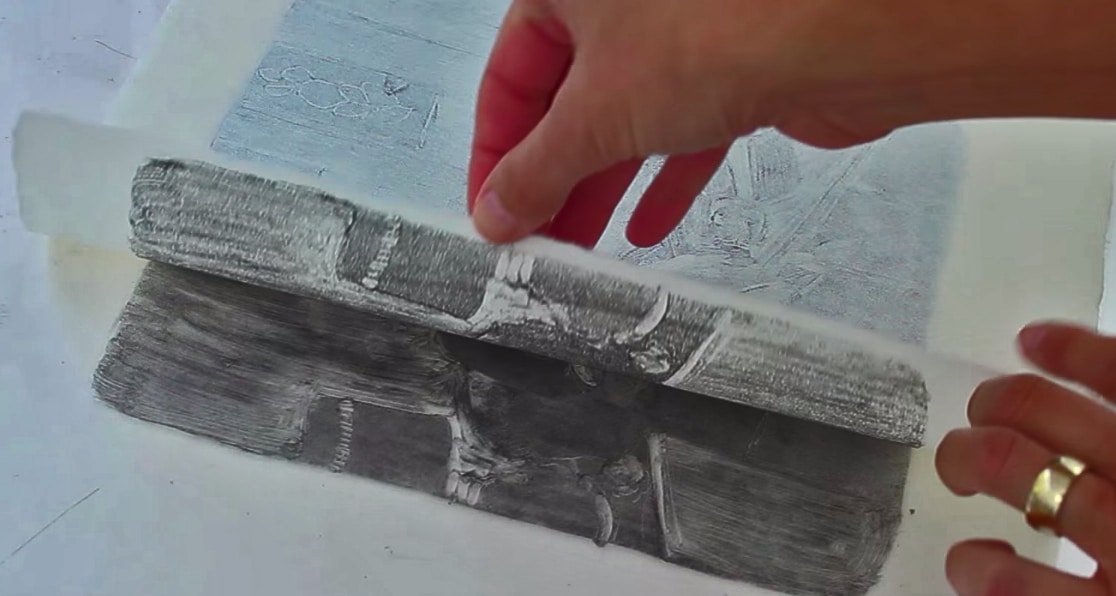
I used a metal spoon to rub a sheet of BFK Rived printmaking paper into my quickly scumbled monotype. I rubbed and rubbed, and when I pulled the print, there was almost *no ink transfer*. Ugh.
To be fair, I know heavyweight paper doesn’t transfer as well when you’re rubbing a monotype print by hand. BFK Rives 175 gsm does a beautiful job on a press. And yes, I have a press, but I wanted to make this monotype the same way you will, without a press.
As you can see in the photo above, it just didn’t work.
So I tried again with a sheet of BFK Rives 115 gsm, and I could see the ink transferring as I rubbed. Moral of the story: when doing hand transfer monotypes, use lightweight printmaking paper.

What to Use as a Monotype Plate
I used a sheet of clear acetate snipped from a report cover for this print, but you can use a monotype plate made from lots of different materials:
- a sheet of plexiglass (also called Perspex, Acrylite, Lexan, or acrylic in other parts of the world)
- a pane of glass from a photo frame, a glass shelf, or a mirror. (But only if you’re printing by hand, and not on a press. It’s also wise to attach duck tape [this zebra print duct tape is my fave] all around the edges of the glass to give yourself a place to grip the glass without cutting yourself.)
- a piece of Yupo paper – this is watercolor paper made from 100% polypropylene. The surface is white, waterproof, strong and slick. You can use a sheet of it over and over again to print monotype prints.
- a sheet of Dura-Lar drafting film – this surface is a mix of Acetate and mylar, made from polyester. The clear sheets make flexible, very durable printmaking plates, and they are sheer, so you can see through them to trace photos or scketches onto the plate.
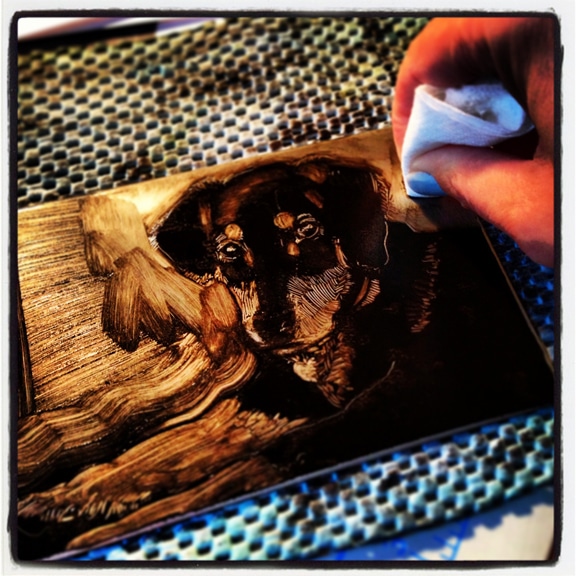
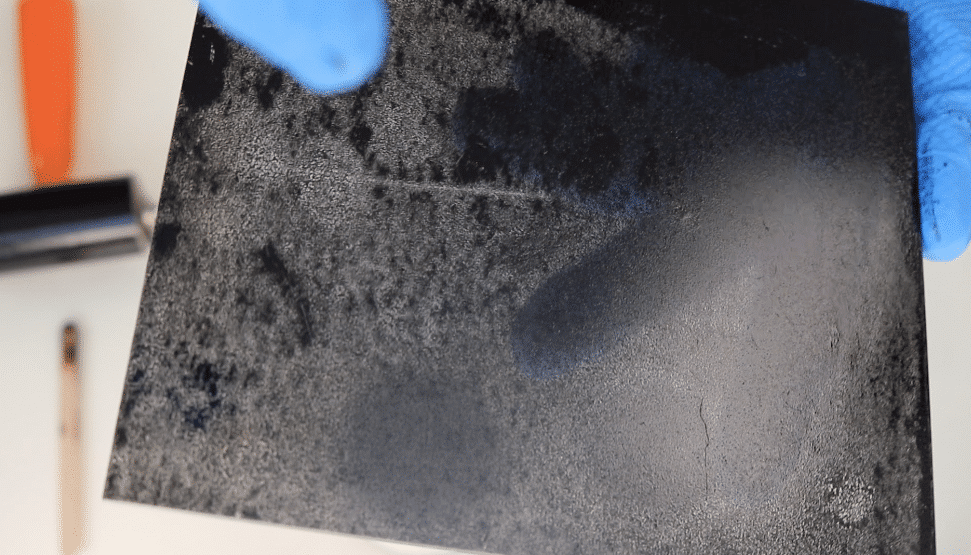
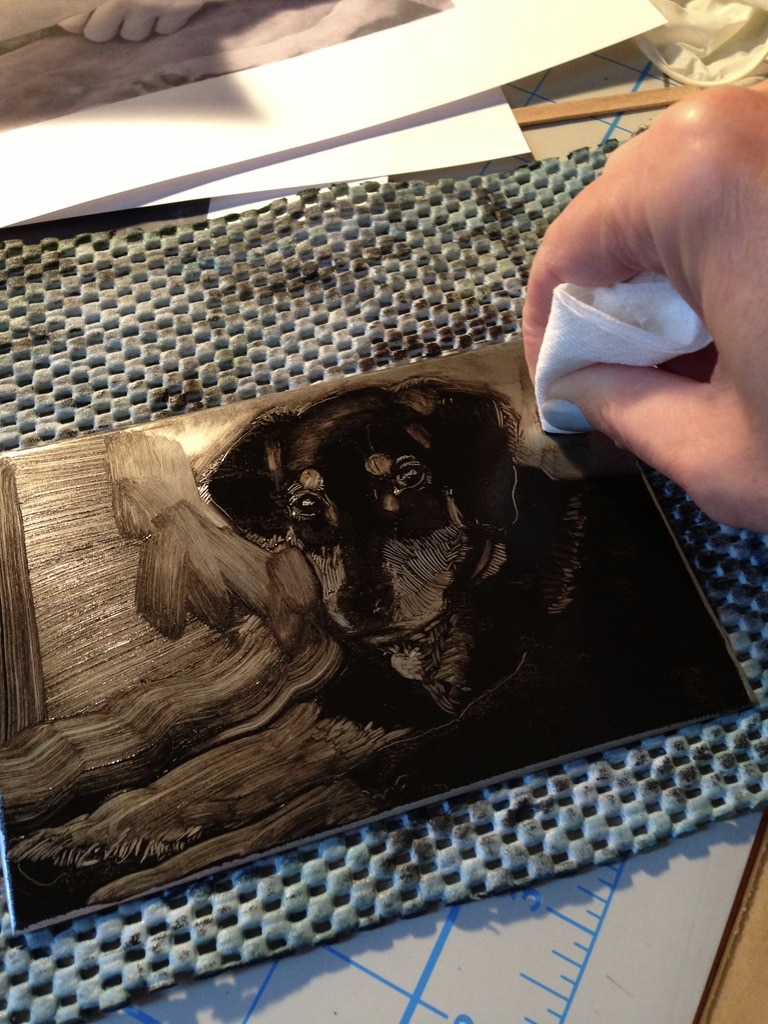
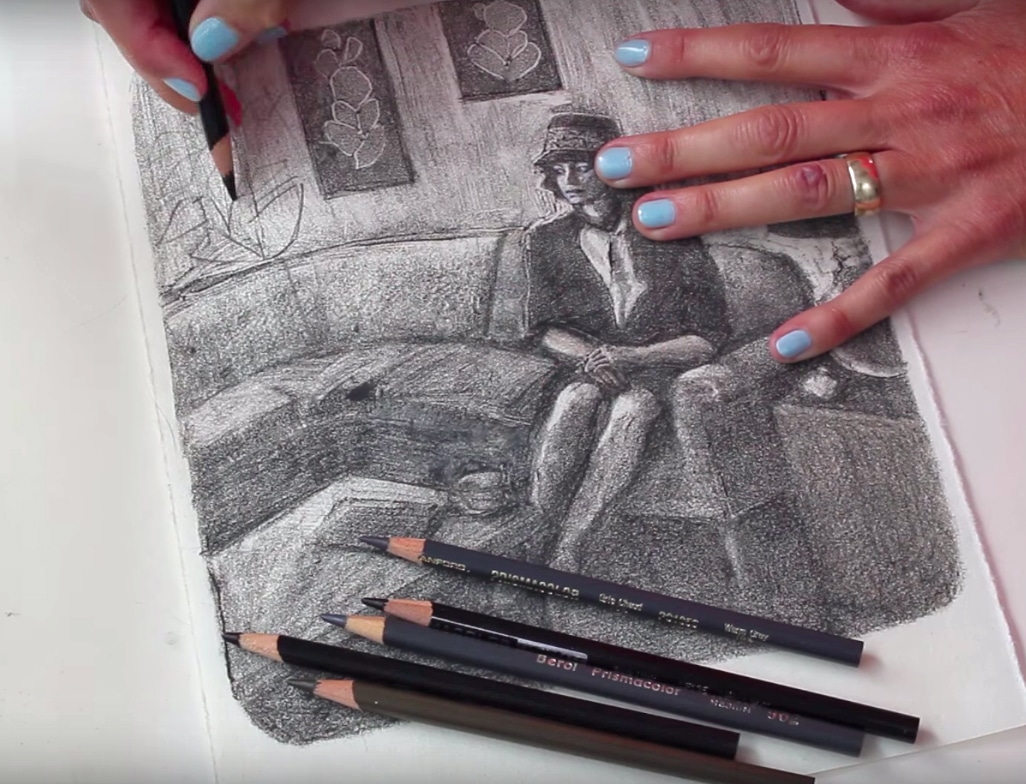
Adding Colored Pencil to Your Monotype Print
Once the ink is dry on your monotype print, you’ll have so much fun adding colored pencils!
The pigments in most colored pencils are wax-based, mixed with differing ratios of powdered pigments and binding agents. A good pencil’s core color will adhere to intaglio printmaking ink like chalk on a blackboard. The higher the pigment load in the core, the more color you’ll see scraped across the ink in your monotype.
For the past two decades, I’ve used a mix of Prismacolor Pencils, and Caran D’Ache Luminescent Pencils. I still have pencils from the original set of prin=smacolor pencils I bought in 1999, and they adhere beautifully and brightly to most printmaking inks.
Colored Pencils are one of my favorite art supplies for enhancing monotypes and watercolors. (Here is a post about using colored pencils to repair watercolors.)
Read More About Monotype Prints
- If you’re brand new to monotype printmaking, this monotype print tutorial will cover the basics of making a dark field monotype print without a press.
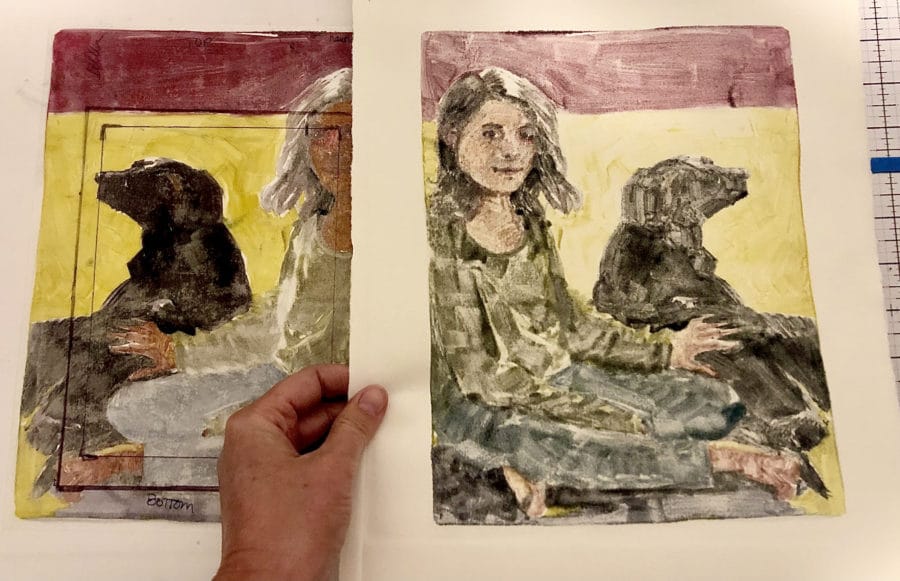
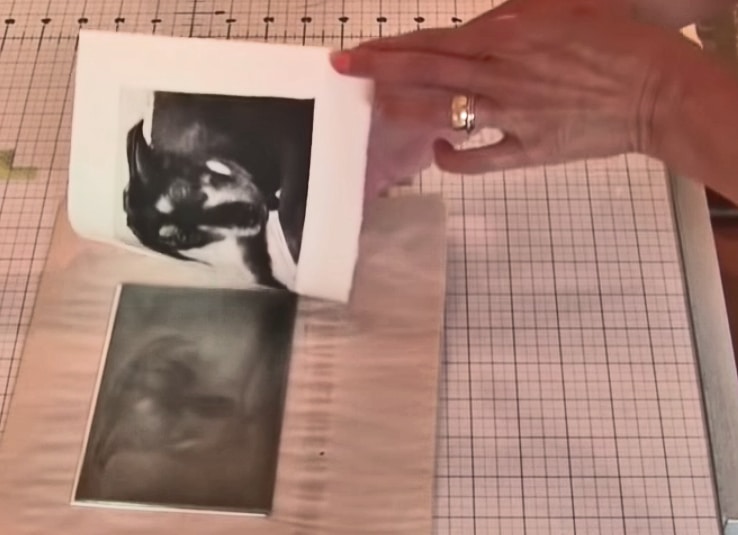
- After you pull a monotype print, there is often enough ink left on the plate to pull a second, faint version of the first monotype. These soft, transparent siblings of the original print are perfect candidates for colored pencil or watercolor enhancements, and they’re called monotype ghost prints.
- If you’re on Facebook, be sure to join the Monotype Printmaking Group, as there are lots of helpful posts, inspiring images, and shared How-To’s.
Monotype and Colored Pencil
I hope you’ll try mixing your monotype printmaking with other media. Especially if some of the prints in your stash need a little extra boost of color or details/repair.
During this time of lockdown, an evening spent immersed in creative playtime is a salve. Applying bold strokes of color to an old print is a door to a calmer place, with delightful results emerging under your art supplies. And it might start a whole new series of evening art shenanigans on the couch!
If you have any questions about this process, leave them in the comments and I’ll get back to you.
Thanks for your visit, and I’ll see you in the next post.
Be adventurous,
Belinda
P.S. Harvest some inspiration and take a look at the paintings, drawings and monotype prints by artist Jane Frederick.
P.P.S. I’m building an online monotype course, and you can get an email when it’s posted by signing up right here.
How to Make a Monotype Print
If you've ever wondered how to make a dark field monotype print, you've come to the right place! Here are step by step monotype process photos, videos, and a supply list with links to the items you'll need to get started.
You don't need a press, or any fancy printmaking equipment.
And if you learn best by watching a demonstration, here is a list of monotyping tutorial videos that cover dark field and light field monotype, as well as trace monotype printmaking demos.
With a little space cleared on a kitchen table, a few supplies, and some reference photos, you'll be making monotype prints in no time at all! Happy Printing!
Materials
Tools
Instructions
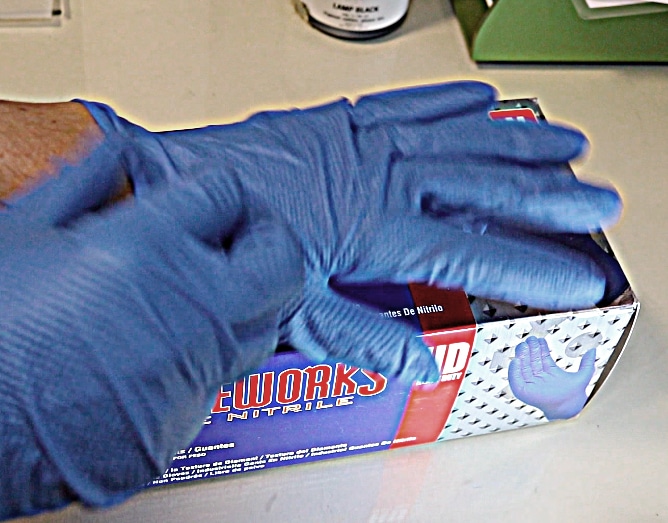
- Prepare a flat, clear surface to work on by covering it with newspapers. Gather all supplies close at hand, and put on your apron and rubber gloves.
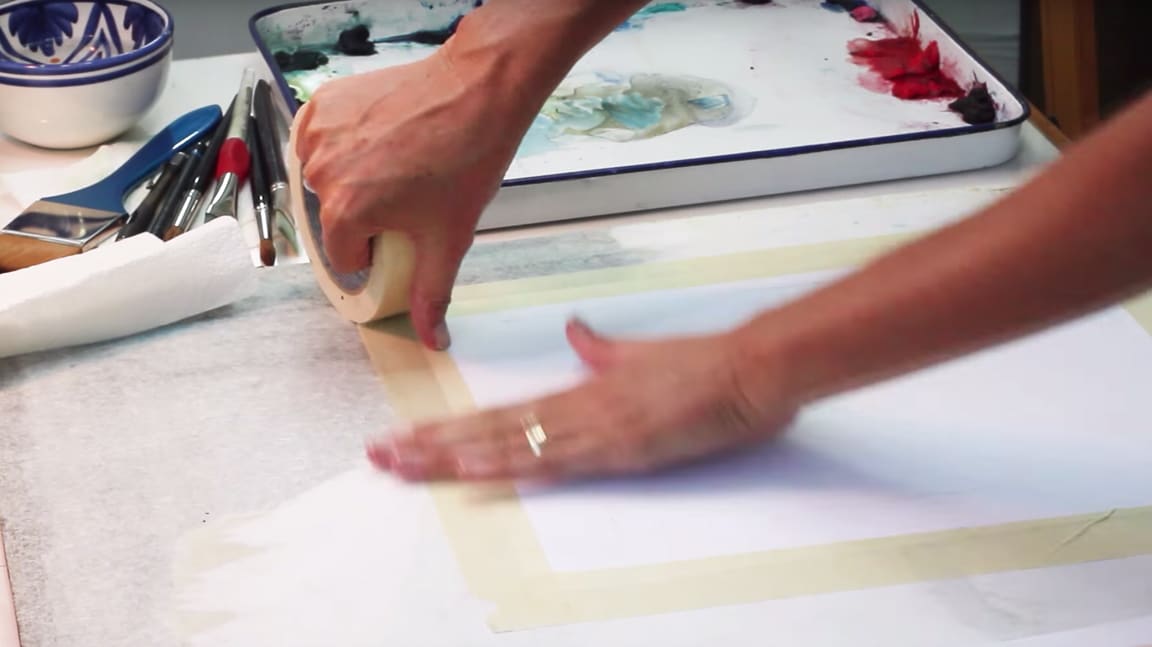
- Tape down your ink slab.
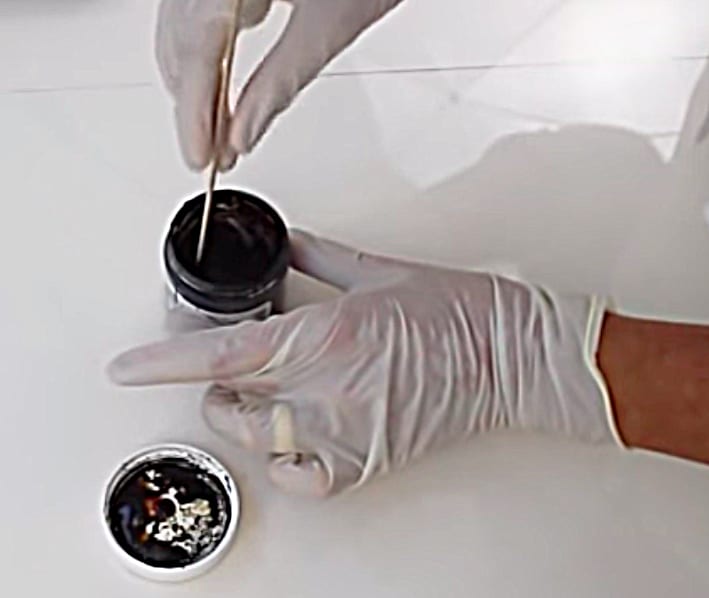
- Stir your printmaking ink until it's smooth and mixed well. Put a dollop of ink on the slab about the size of a cashew nut.
- Use your brayer to roll the ink out on the slab until it's evenly covering the brayer, and the slab, and you hear the ink "hiss" as you roll back and forth
- Put a piece of non skid under your plexiglass printmaking plate (not necessary if you're printing from a gelli plate) and begin coating your plexiglass with a smooth, even coat of ink
- When the plate is completely covered, if the ink appears loose, shiny or thick, lay a piece of newsprint on the plate, and very gently, with light pressure, smooth it with your hand as though you were smoothing a wrinkle from a bed sheet
- Peel the newsprint from the inked plate and discard it. Now that your ink has been blotted, it should be less shiny, and a bit thinner on the plate.
- Pull out a reference photo, and without touching the inked plate with your hand, begin drawing into the ink with your rubber tipped tool, and cotton swabs.
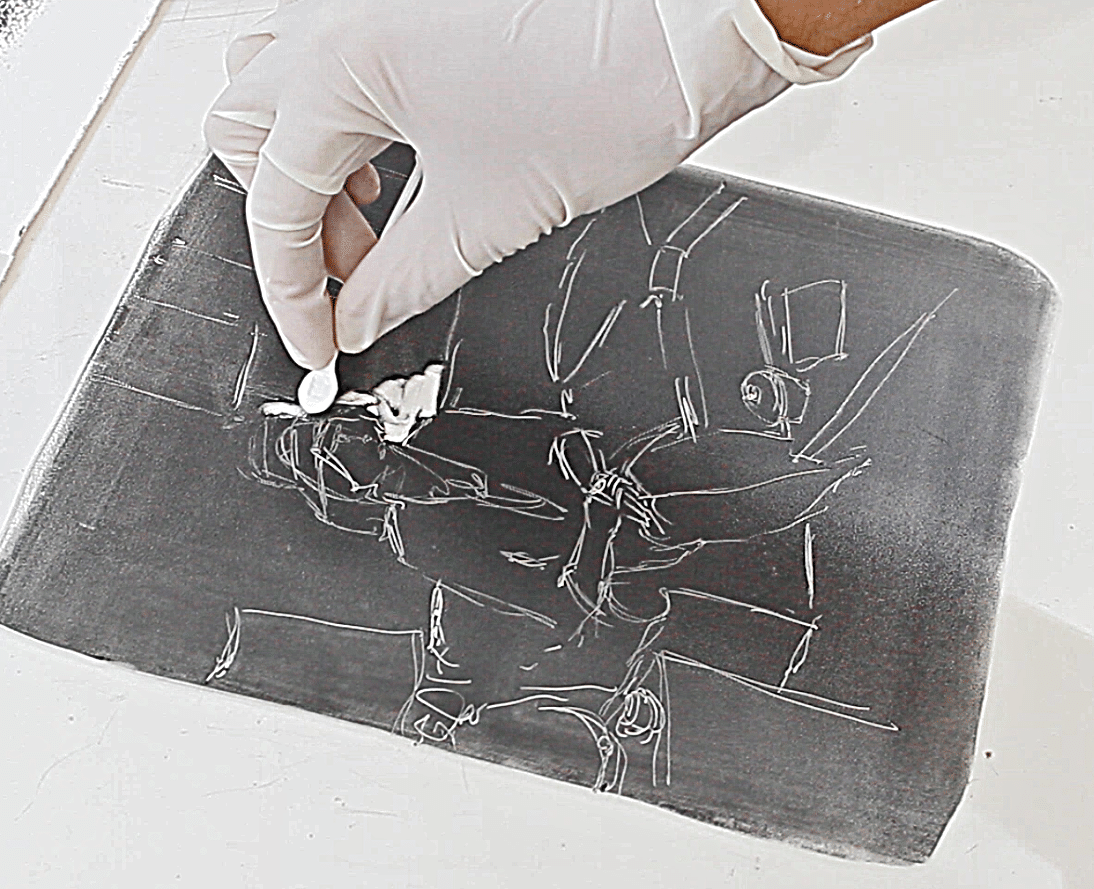
- If you need to rest your wrist while drawing, slide your drawing bridge over your ink plate so you can rest your hand on it above the ink.
- Use your brushes or your gloved finger tip, or rolled paper towel, or cotton swabs to feather halftones in your design. You can also use them to add more ink by dipping in the ink slab and adding darks to your design.
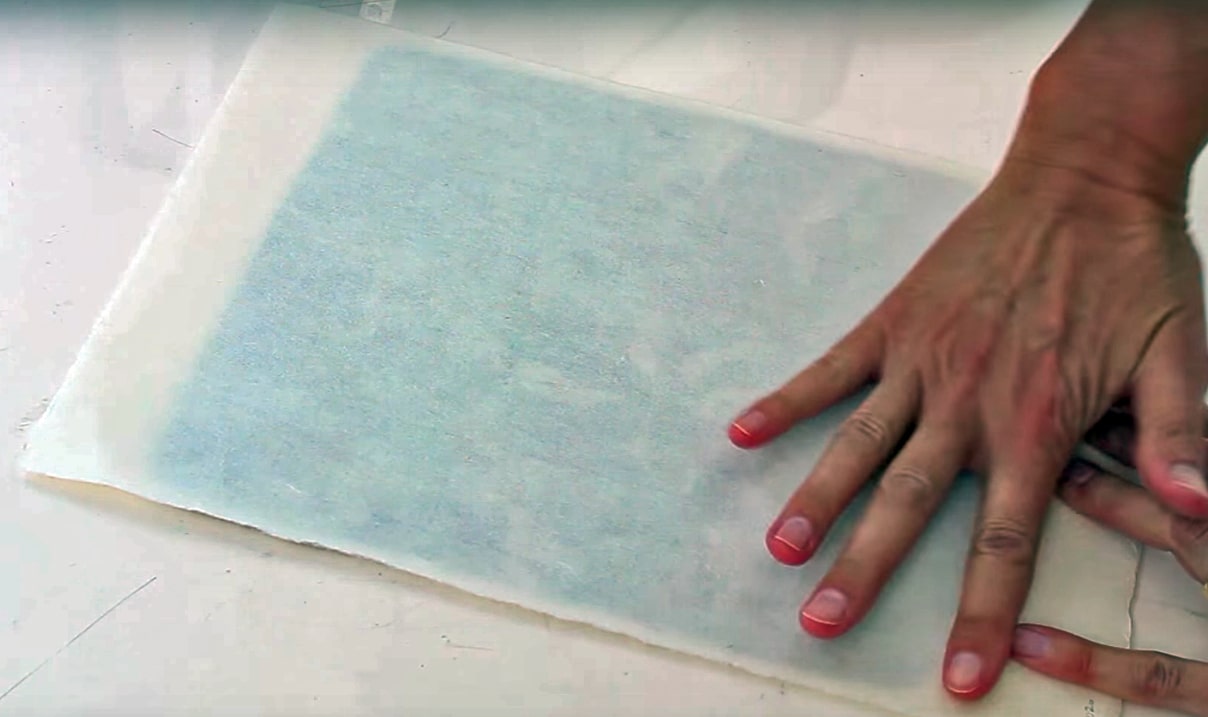
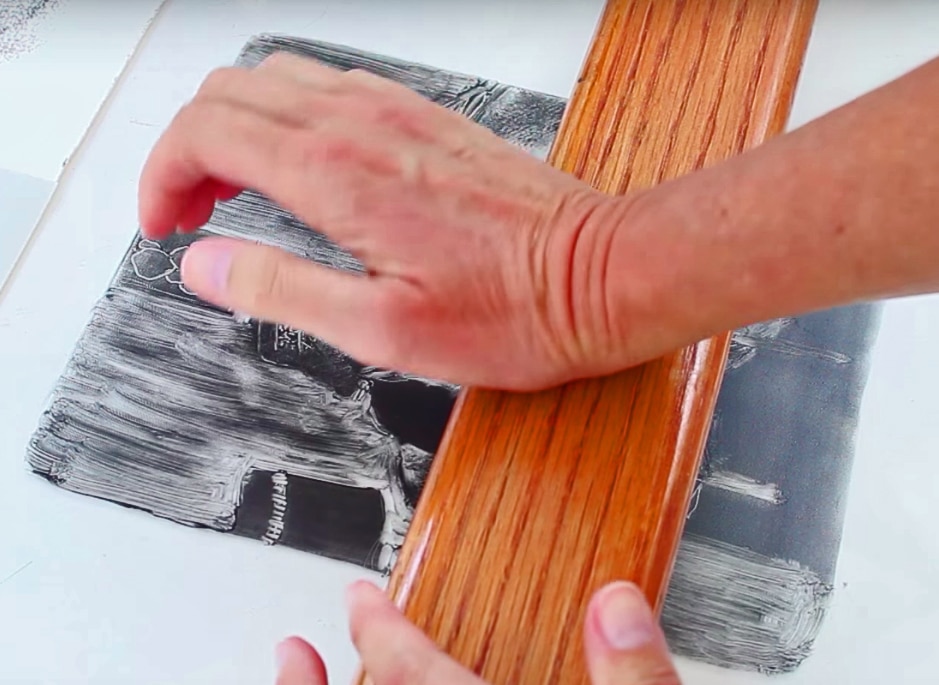
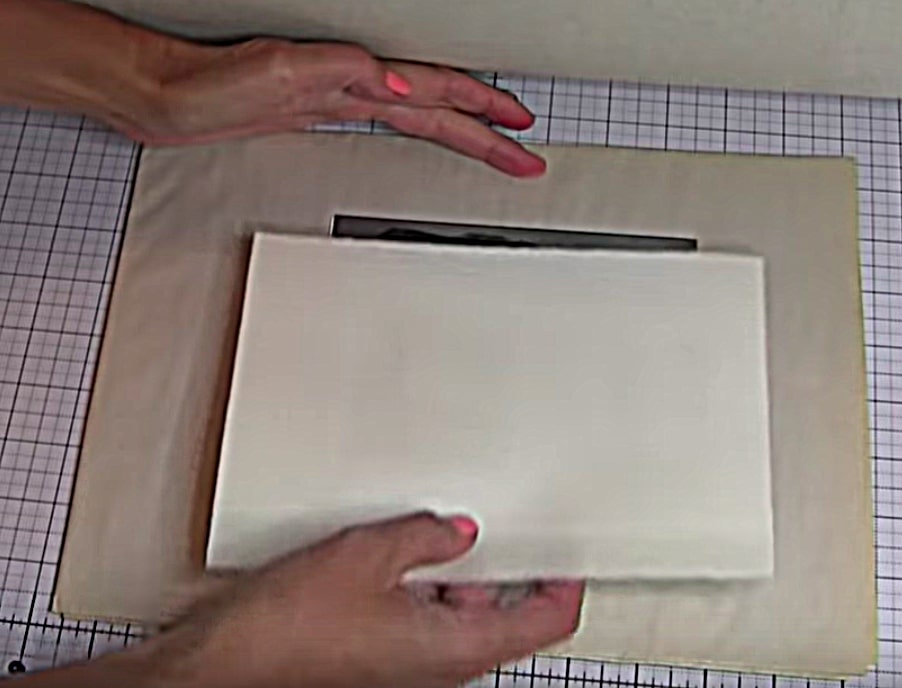
- When your design is ready to print, pull a sheet of printmaking paper from the package or pad, and with your spray bottle, lightly spritz the side you'll be printing on. Blot with a paper towel, and lay the damp side down on your inked and designed monotype.
- Hold the paper steady with one hand, while rubbing the back of the paper with either the baren or a metal spoon.
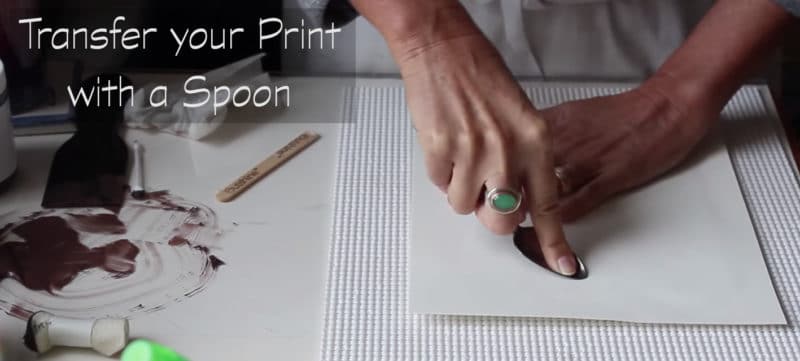
- Keep the paper in place with a firm hand, and peel up a corner to see how your ink is transferring to the paper. If it looks too light, or mottled, apply more pressure with the spoon in circular motions.
- When you feel like you've transferred enough ink from the plate to the paper, pull your print, and take delight in your beautiful monotype.
- After the ink is dry, feel free to add color to the print with colored pencil, pastels, or watercolor (provided you didn't use re-wetting ink, like Speedball).
Notes
If you make a mistake on a portion of your plate while you're designing and clearing ink, re-roll your ink, and re-blot if necessary. The inks (if you're using akua) stay wet for a very long time, until they are pressed to paper, so take your time, and get the hang of this painterly printmaking process.
Art Quote
The beautiful, which is perhaps inseparable from art, is not after all tied to the subject, but to the pictorial representation. In this way and in no other does art overcome the ugly without avoiding it.
Paul Klee
I have been intending to write a big THANK YOU for you generosity with you instructional posts. They are simply the best.
Hi Ceci – Thank you so much for taking the time to let me know they’re useful! I’m so glad. Keep making art, and stay determined in your conviction to learn more and more. Cookies and Tea to you, B.
Hi Belinda. I found this article to be wonderfully inspiring and informative and I really can’t wait to give monoprinting a go. I noticed you use Akua pigments to paint onto the report plastic. Can you suggest an alternative to these or would we be able to somehow use our Akua intaglio inks to paint with? I would really welcome your advice. I absolutely love your work. Kindest regards.
Hello Henrietta, Thanks for your compliments – yes, you can use your Akua intaglio inks – I use mine for monotypes all the time. With hand transfer, use smooth & thin printmaking paper. Before you pull a print, make a test swatch print: use your chosen inks to make some marks on a corner of your report cover, and then press your chosen paper with your chosen transfer tool (spoon, baren) to see what level of transfer you’ll get. If it doesn’t transfer well, increase your rubbing pressure, or add some modifiers like transparent base, or use heavier layers of ink, etc. Try different papers till you find the best match. And then make a Bunch of monotypes!