
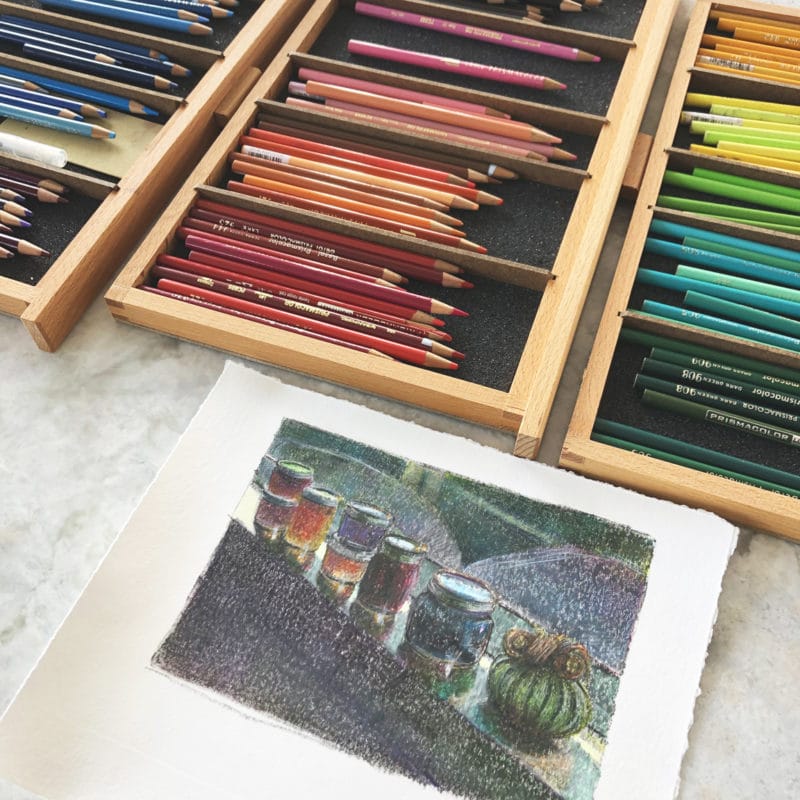
Monotype Printmaking Experiments
Every printmaking adventure has some element of surprise. Add a drop of modifier to the ink, or swap a tried and true paper for a different brand – and you might pull a masterpiece, or a dud. Monotype printmaking experiments will inform and improve all the prints you make afterwards.
Reserve a proportion of studio-time for experimentation, and take notes on your results.
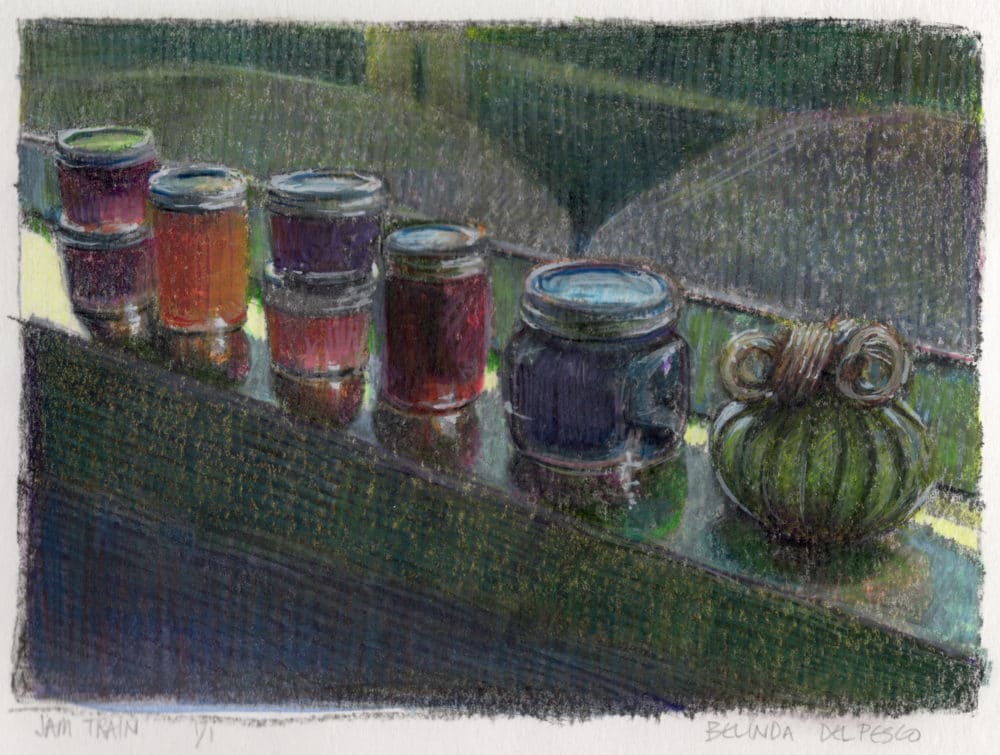
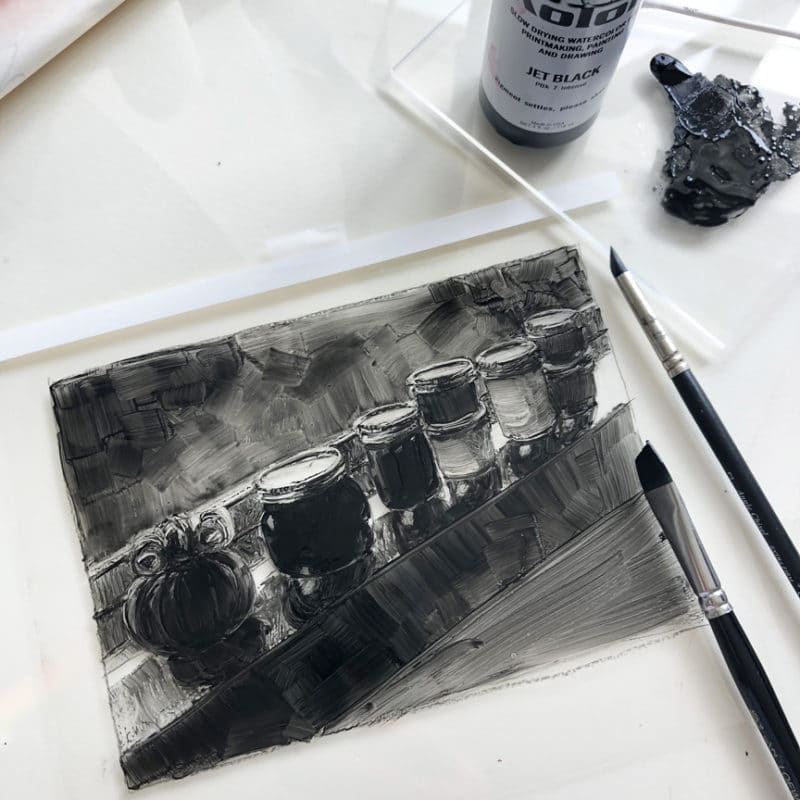
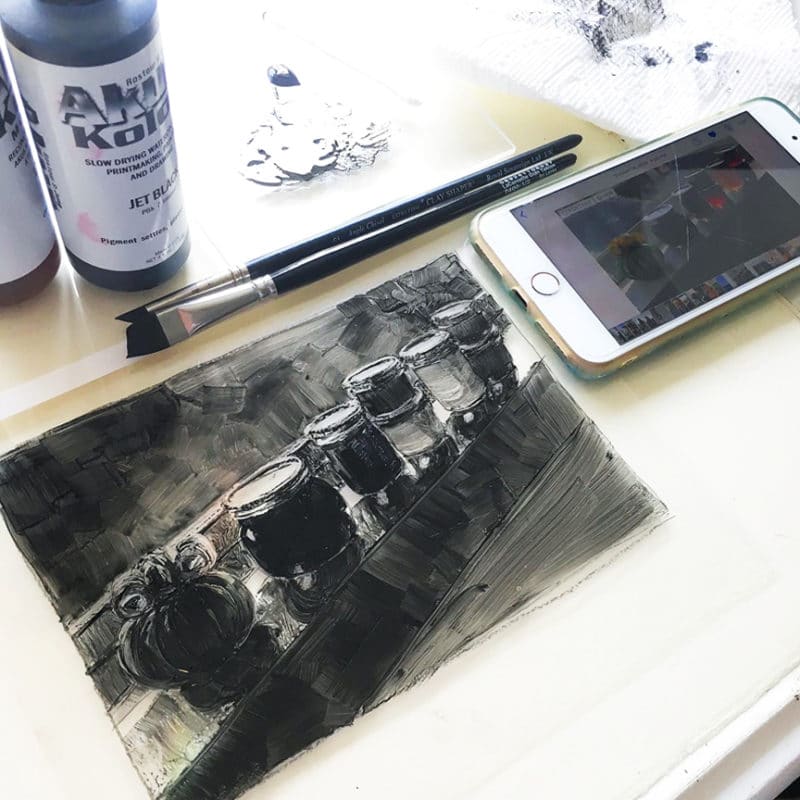
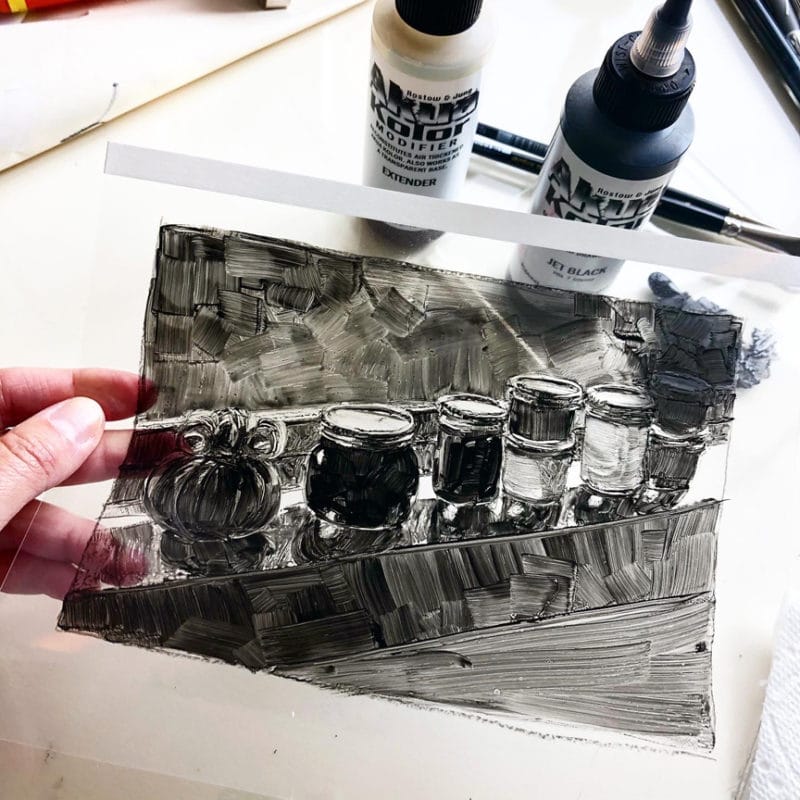
The monotype printmaking disaster in this post was launched by one change in my sequence. Let’s take a look at the steps, and the repairs on this monotype.
Tiny Changes = Big Difference
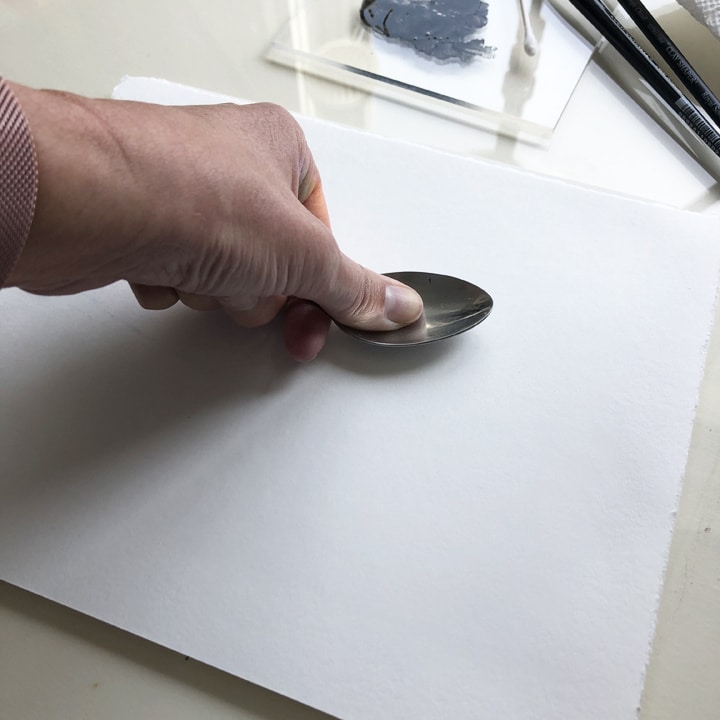
Lately, I print on BFK Rives or Arnhem1618 printmaking paper. When printing by hand (without using a press), a very light mist of water from a spritzer on the paper, blotted hard before printing, helps with ink transfer. That tiny increase in moisture makes the paper softer, and more responsive to the pressure of a spoon or baren, pushing it into the ink.
Trying New Papers
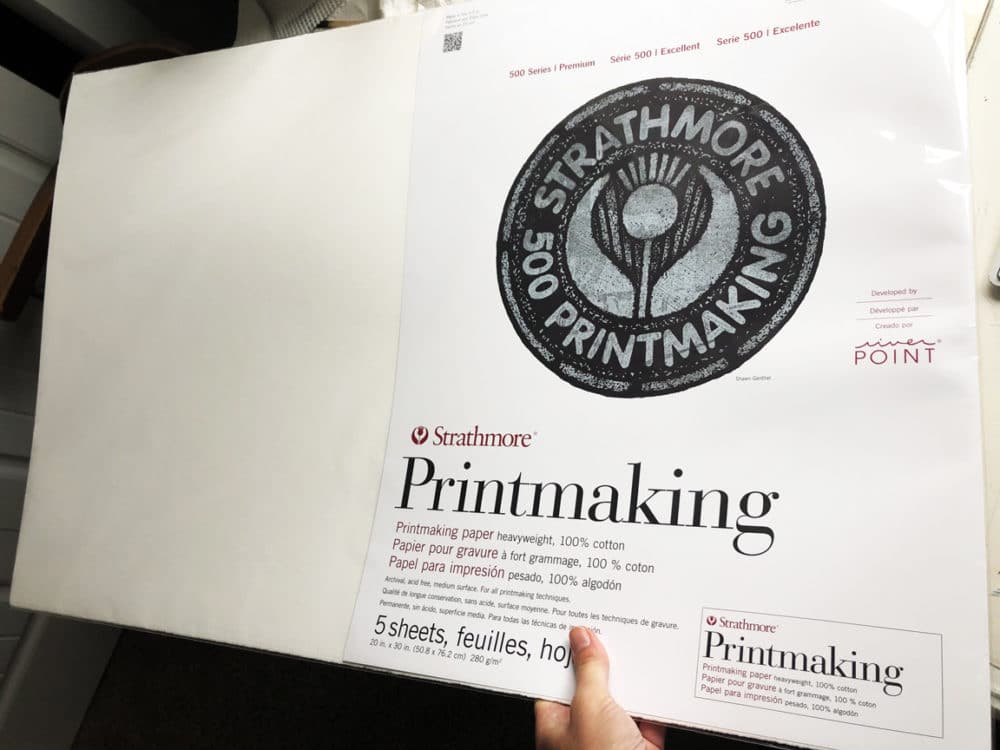
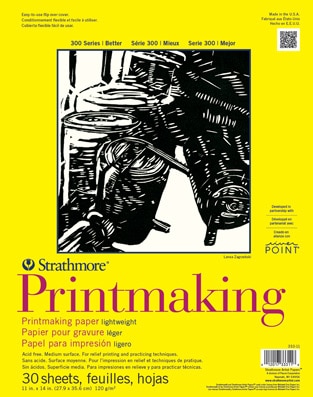
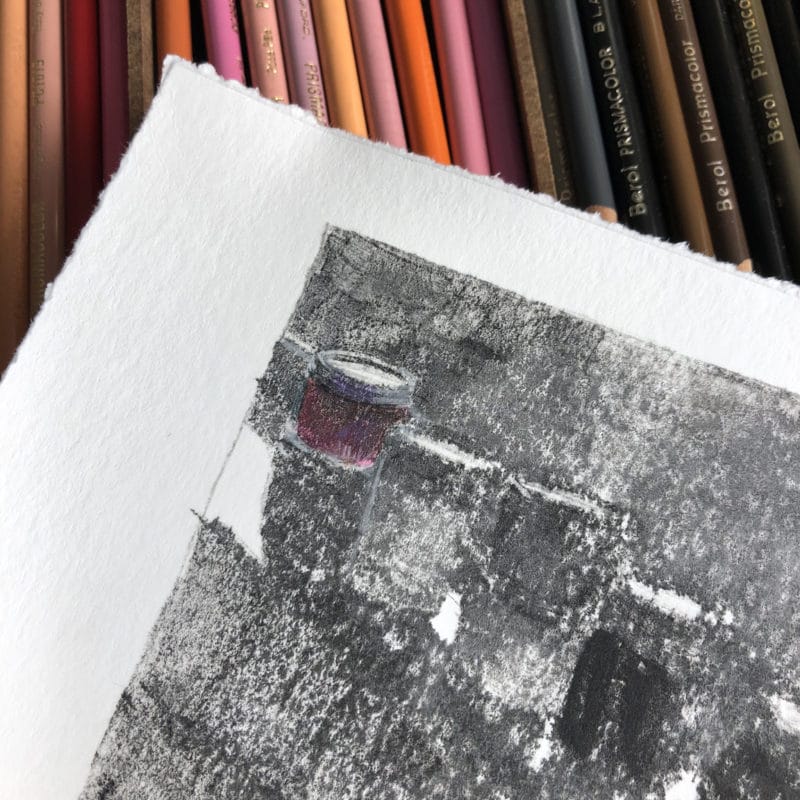
Strathmore Heavy Printmaking paper is new-ish to me. I’ve got 300 and 500 series to try, and this monotype was printed on the 300 series heavyweight printmaking paper. The paper got a fine mist in a single sweep, followed by blotting, about 5 minutes before printing.
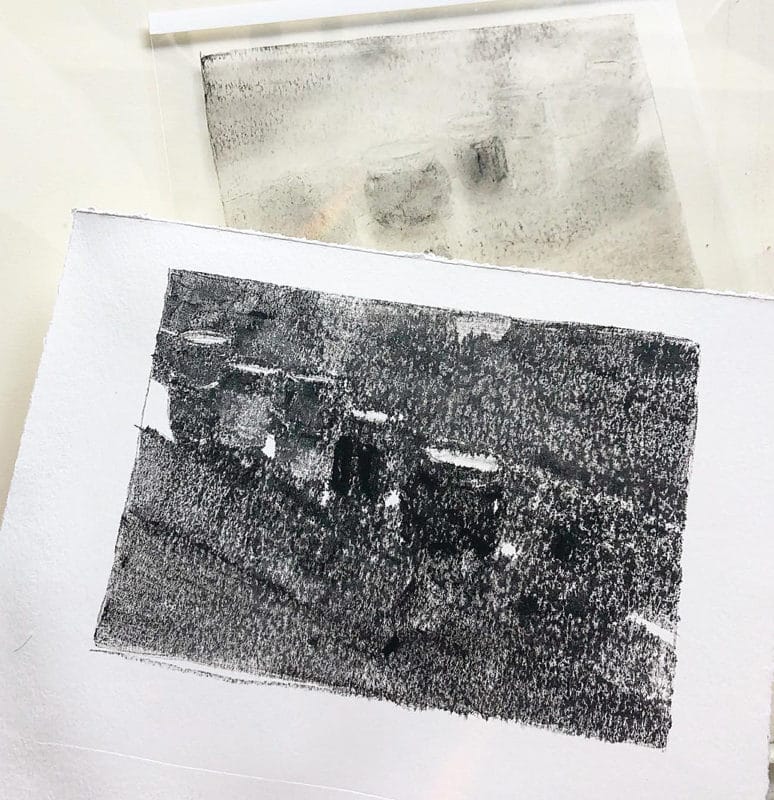
As you can see in the pulled print below, that little bit of moisture in the paper invited the Akua Liquid Pigment to wick into the fibers in every direction. Almost all detail was lost. The transfer was good – since most of the ink transposed from the plate to the paper, but all the mark-making and shapes were lost. It was like printing on a wet paper towel.
Test First, and Then Print
This is not a bash on Stathmore paper. It was my bad. It’s also not a sponsored post. But this is useful information if *you* are dipping a toe into printmaking.
The paper-ink-moisture-pressure relationship is tricky. You really benefit from lots of experiments, and note taking, before you attempt a time-consuming monotype. Spending 30 minutes testing your ink against your paper, wet, and dry, with and without sample marks and details – will save you from slumped shoulders and sad faces.
Get to Know Each Other
Every ink manufacturer uses different binder, pigments and recipes. So does every paper manufacturer. Using an oil-based ink with 100% cotton printmaking paper across three brands will result in wildly different prints. Reviews on Amazon claim that paper or ink is terrible because the first print came out bad. Of course it did! You didn’t test it with your working style, or that ink with this paper, etc. Every new art supply benefits from a little courtship before committing.
The Moral of the Story
Strathmore makes all sorts of great papers that I use regularly. Their printmaking papers are relatively new, and I’ve had great results using the 300 and 500 series while printing monotype, relief and intaglio.
Up to this print, I had not used it 1) dampened 2) with Akua Liquid Pigments. So, may I suggest that you print on your Strathmore 300 series paper direct, and dry when using Akua Liquid Pigments.
There are two Morals in this Story
If you’re new to monotype printmaking, it’s helpful to keep a notebook on your ink/paper experiments. It’s also good to visit the paper manufacturer’s website to read their recommendations.
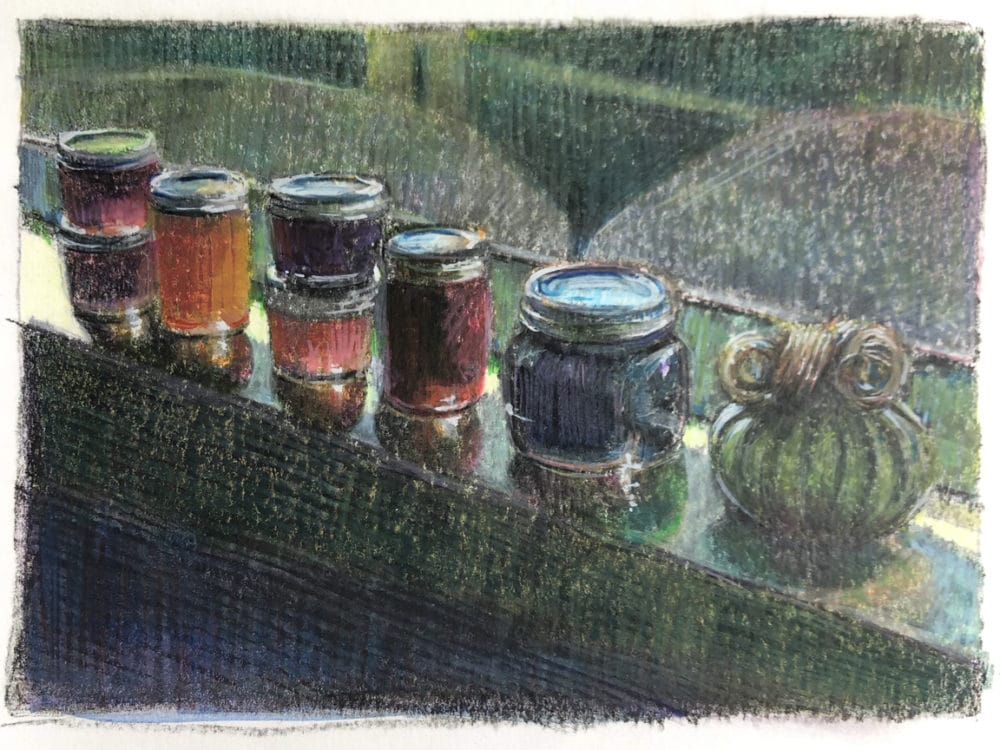
The newest entry in my notebook (Moral # 1) – Monotype with Akuakolor ink (now called Akua Liquid Pigments) unmodified, transferred by hand, on Strathmore 300 series Heavyweight Printmaking paper should be printed on dry paper. (Here is an example of the same Akua Liquid Pigment ink printed on dry BFK Rives paper in another post about a full color monotype print.)
Resurrect your Failed Prints with Other Media
Gazing upon a crappy print – especially when you’re new to any printmaking process, and you’ve invested time and hope – will squash creative curiosity. You can feel all Boohoo for about 30 seconds, and then you have to shake it off. Begin at once to plot your strategy for repairs to the lousy print, and adjustments on your next print. #movealong
Grownups have a hard time being beginners. We’ve forgotten how to process failure and keep going. We get discouraged too easily and shun things that feel hard. But let me encourage you…. Make more prints, and experiment with adjustments in paper, inks, wet vs dry, modifiers, transfer methods, etc. Have fun playing with your printmaking supplies. Take notes on your results. Experiment over research.
You’re in the driver’s seat.
The Fun Part
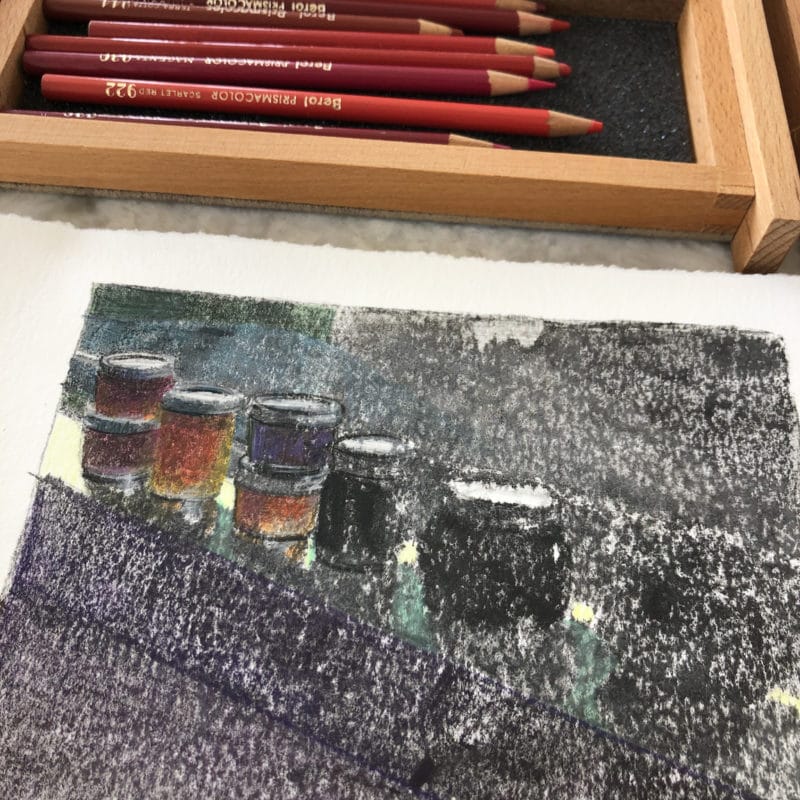
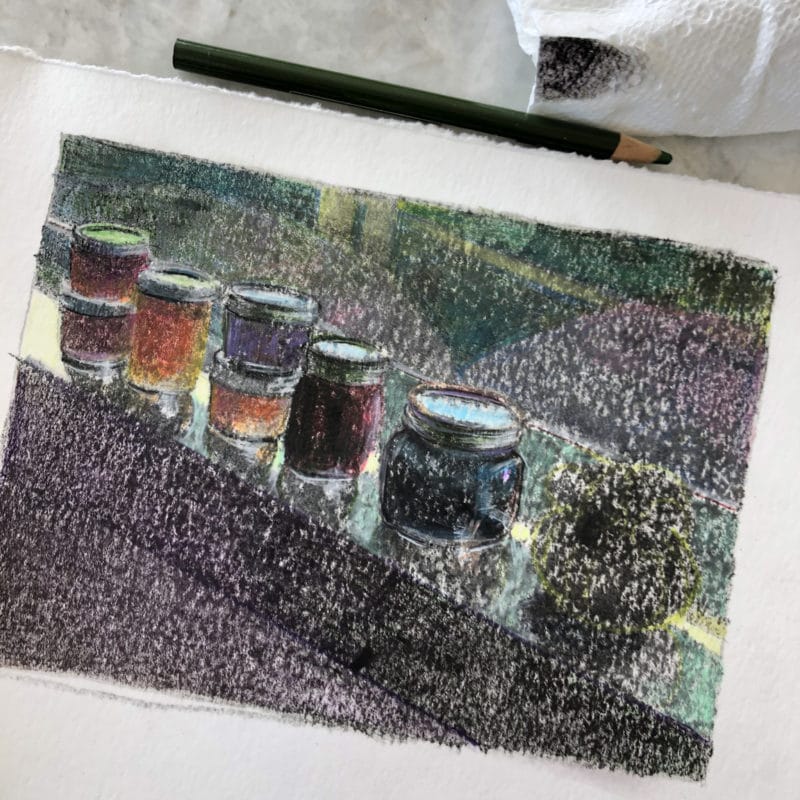
Grab your failed prints and art supplies, put an audiobook or podcast on about creative conviction, and bring those disasters back to life. Send the fuzzy ink transfers through colored pencil sick bay. Wheel the stack of over-inked prints to the pastel crash cart. Fertilize the failures with crayons, oil pastels and opaque markers. What have you got to lose if the art is not moving you in its current state? Repair, revive, re-examine. N’est pas?
Make Art – It’s a Gift to Yourself
Resuscitate failed art. The makeover from a messy print to something you’ve salvaged will pull up your socks, tighten your belt and scurry you forward to the Next Printmaking Experiment. Improvement requires that you Keep Making.
Thanks for stopping in today, and I’ll see you in the next post –
Belinda
P.S. If you enjoy Andrea Bocelli’s music, he’s posting a free concert from Milan on his YouTube Channel, Easter Sunday (April 12, 2020) – a solo performance representing a message of love, healing and hope. Watch live at 10am LA, 1pm NYC, 6pm UK, 7pm CET at https://AndreaBocelli.lnk.to/LiveFrom…
P.P.S. The good folks at Sketchbook Skool published this fine post with 5 Tips to Fill and Empty Sketchbook. Look at all that fun!
Art Quote
Writing and reading decrease our sense of isolation. They deepen and widen and expand our sense of life: they feed the soul. When writers make us shake our heads with the exactness of their prose and their truths, and even make us laugh about ourselves or life, our buoyancy is restored. We are given a shot at dancing with, or at least clapping along with, the absurdity of life, instead of being squashed by it over and over again. It’s like singing on a boat during a terrible storm at sea. You can’t stop the raging storm, but singing can change the hearts and spirits of the people who are together on that ship.
Anne Lamott
Hello Belinda! Each time I receive your post, you make my day! Thanks for all the good suggestions you’re sending me. Take care! Hélène
Hello Hélène! Thanks for the feedback! I’m glad these missives from the studio are reaching you. I am mostly talking to myself – trying to keep my head in the game, so to speak. Here’s to being kindred spirits on the need for, and spread of, *encouragement*!
Hi there Belinda! Hope you are keeping safe. I’m betting you noticed that your two “usuals” are cotton paper, whereas Strathmore is not. It’s a little counterintuitive to me that the Strathmore paper would suck up the ink as it did, but I don’t have too much experience with it, – the components of the paper, and the sizing chemicals are pretty different, aren’t they? I’m still working on my watercolor skills! A remote class with my guru, Gary Tucker tomorrow! So glad everyone is doing remote these days, since I haven’t’ found any painting teachers near me yet!
Hi there, Ivy! Thanks for the hello. I’m glad you’re still exploring watercolor, and you have a remote access mentor too! Good going, my dear. And yes, the Strathmore 300 series is a wood pulp rather than cotton paper. Even so, the Strathmore does a beautiful job with relief prints, and I think it’ll work with monotype too, as long as I print on dry paper. We shall see. All is well here, and I hope all is well there too. Making cookies helps. Today’s batch: oatmeal pecan with chocolate and butterscotch chips. If you lived closer, I’d leave a few on your doorstep. 🙂
Thanks again for another great blog post. You are always inspiring !
Hi Bonnie! I’m glad you feel the intent here… I’m talking to myself, and anyone else who needs a boost to keep at it! We’re all in this together.