
Inspiration from Other Artists
Thank goodness monotype artists share their work online, or we wouldn’t have any painterly printmaking to look at from the comfort of our coziest researching-the-internet chairs.
Every artist who ever clicked the publish button on a blog post or social media to share images of their work gets a grateful hat-tip from me.
Sharing your art takes a certain amount of grit and courage, because everyone has an opinion.
One person who adores your painting might be best friends with another who hates it. But as we’ve talked about in this post, that’s never a reflection on your work. Capiche?
The Art World is Your Oyster
I’m endlessly inspired by the enormous amount of art published online. My instagram feed is loaded with gorgeous images from artist’s studios all over the world.
You don’t have to travel to multiple cities to see beautiful art, or schedule time to attend short-run gallery exhibits.
There’s no time pressure to ensure that you see an artist’s most recent work before collectors snatch it up and take it home where it’s out of public view.
We can just search the net, and fawn over all the beautiful work from a comfy chair with a cup of tea.
So, let’s do that. Make yourself comfy, and grab something to sip.
Let’s look at some monotype artists, shall we?

Artists Making Monotypes
- The incredible figurative and still life monotypes of Frank Hobbs slay me with his economy of marks. His compositions and use of tonal variation presents such impactful monotypes.
- Have a look at this video of layered color process used in Peri Shwartz’ monotypes. If you’ve ever considered multicolored or larger format still life prints, this will inspire you.
- Nanette Wallace makes beautiful dark field figurative monotypes in her Oregon studio, inspired by vintage black and white photos. And she posts wonderful videos of her process in the Facebook Monotype group here. Check out Nanette’s website here.
- David Begley’s ethereal dark field monotypes often feature glimpses of figures floating in starfield-esque environments. He works on a lightbox and you can see some of his process in this interview.
- If *you* want to try making a monotype, I’m building an online course on that topic right now. Sign up here to be notified when the course is published and available.

Staying Connected by Sharing
My grandmother used to say sharing is a way to stay connected to each other. ? If I walk next door to share a piece of the apple pie I just made, we’ll see and talk to each other, and connect for a minute or two.
Since you’re reading this (and I thank you for that), we’re sharing a few minutes of time, and connecting over this Babushka nesting doll of internet art-discoveries.
I hope there’s a kernel of inspiration for you here, and your upcoming days are dotted with fresh ideas, eruptive art-making and a renewed conviction to share your work with other artists.
We all need this visual community of creators. Have courage, and play with your art supplies. ?
Thanks for stopping by to say hello, and I’ll see you in the next post –
Belinda
P.S. Did you know you can download the printmaking supply catalog from McClains for free on their website? Check that out here. They also demonstrate a bit of monotype making here.
P.P.S. You can subscribe to this blog, and get each new post via email, so you won’t miss any goodies, right here.

Monotype Tutorial Videos
- Links to Trace Monotype mash up with watercolor & pastel (Tutorial #1) https://youtu.be/vSBkHBQt7rU
- and Trace Monotype mash up with colored pencil (Tutorial #2) https://youtu.be/_-8o0CrJ0BE
Love this, and the message. I find the blog world totally supportive, which has made it an enormous pleasure. Your work is so wonderful, and your energy and dynamism amazing.
Thank you.
XOXOXOXOXOXO Barbara
Hi Barbara – You’ve been in the world of art-blogging long enough to know the community deeply. It’s a global network of support and communication. We are so lucky. Thanks for your visit, and your always cheerful encouragement.
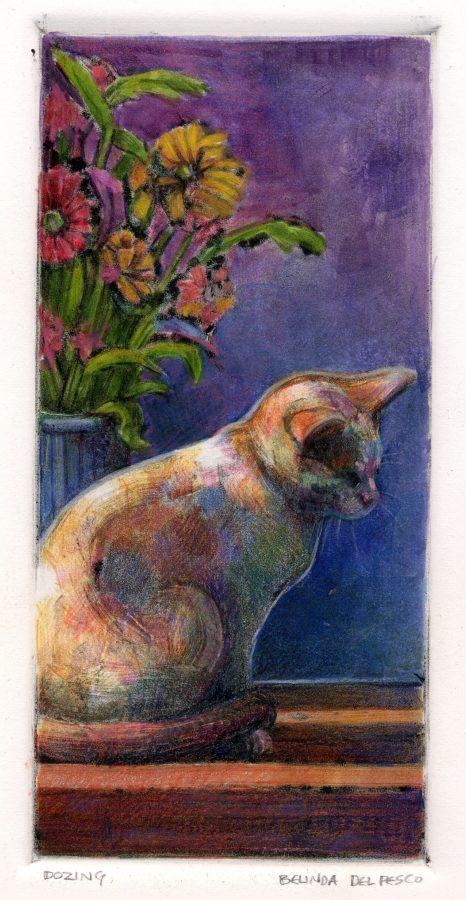
Wow, Belinda! This post is so full of good stuff for me, I can hardly believe it. I LOVE your painting at the top of this post! The color is so deep, and of course, I’m a cat person…
I’m currently working on my watercolor skills, which was an offshoot of one of your posts about coloring lino prints and/or monoprints and their ghosts w WC! I feel like I’m running in circles, but good circles. I’ve been focused enough on the WC to begin developing my palette and some favorite watercolorists – Gary Tucker – http://www.garytuckerartist.com/gallery/, Edgar Albert Whitney, and Edo Hannema; http://www.edohannema.nl/wordpress/summary/ for now. Mostly doing tutorials as they appeal to me as my skills at developing scenes to paint still need work. I am hooked on an impressionistic style.
And thanks for all those links to different artists to check out! This is always one of may favorite parts of your posts. Don’t know how you keep coming up with them, but you do! You’re right – we are SO lucky to be able to stay at home and look at all the great art online. Hope to be contributing some to it some day. You’ll get credit for that, your posts are the best, and so inspiring.
Hi Ivy, Thank you so much for the note, your nice compliments, and the LINKS! I wasn’t familiar with Gary Tucker, but I’ve subscribed to his blog (thank you!), and I’ve been looking at Whitney’s work and following Edo for a few years now. Good for you to dive into studying all these inspiring watercolorists! There is so much fun in that journey, even if – as you say – we are all running in circles. Good circles.I know that feeling very well. Thanks for your compliments, and keep the fires of your enthusiasm stoked for your art-making. I’m high fiving you.??
Hi Kathleen – Thank
YOU
for visiting and leaving some feedback! 🙂
Hi Kathleen – Thanks for the compliments! Yes, I have my own press, and I love it! I also print with a baren (my favorite is a particular wooden or metal spoon. You can see them in action on this video: https://youtu.be/tB4tTziQnPc
Thanks for the feedback! 🙂