
What is a Collagraph Print?
The word collagraph sounds a bit like the word collage, right? The root of the word – Colla is derived from the Greek word for glue – kólla. Many collagraph prints are made by inking and printing from a plate that has been built up with glued-on elements (paper, leaves, thread, etc.).
Can you imagine sealing the surface of a traditional collage with a glossy varnish, and then inking and wiping it to print on paper? Any smooth, flat areas of the collage would wipe clean, but plenty of ink would remain nestled against curbs of applied elements, or textures on the plate. That’s a collagraph print.
Intaglio Inking and Printing
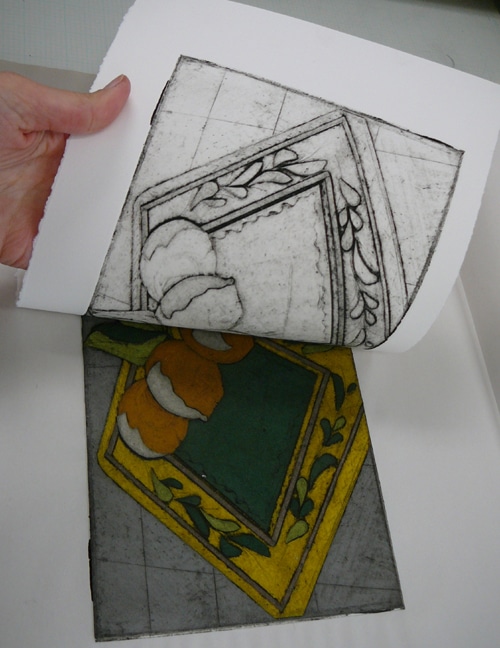
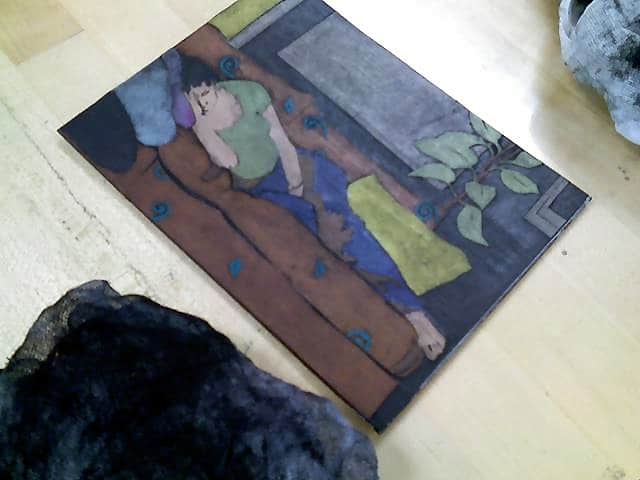
When paper is pressed against an inked collagraph plate created with paper cutouts, you’ve made a collagraph print (see above).
Collagraphs can be abstract or representational.
The topography of adhered elements can supply deep areas for ink, or very shallow recesses. Even a shallow scratch in paper will hold ink.
What is Intaglio Printing?
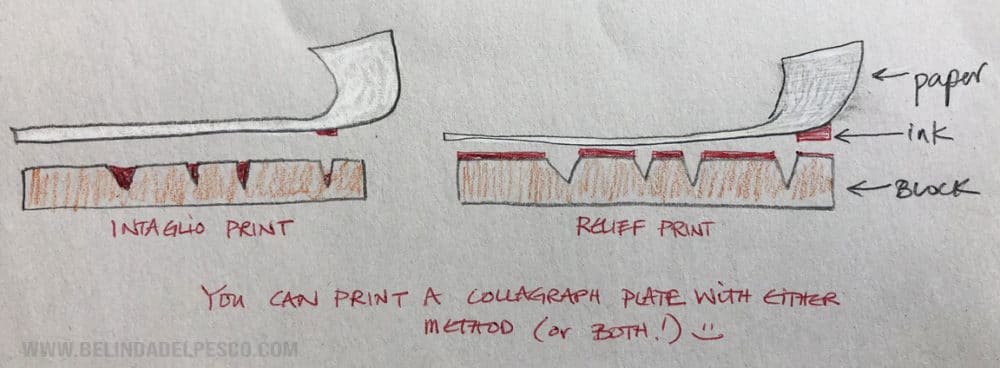
Inking and wiping the uppermost surface, and leaving ink embedded in recessed crevices, or nestled in toothy textures is called intaglio printing.
Intaglio is from the Italian word intagliare; to carve or engrave. Printing in the intaglio method means you’re transferring ink to paper from the recessed areas of a plate. (If your ink is on the upper parts of the plate, like a linoleum block, you’re using the relief method.)
Topography of Collagraph Plates
Considerations for building collagraph plates to print in the intaglio method are related to the height of your adhered materials. Extreme height variations on your plate will make it challenging for the paper to reach the ink. So, think soft hills and shallow valleys, rather than the Rocky Mountains.
Imagine a city of skyscrapers, with buildings in various heights. Fill the streets with a layer of purple ink. Lay a giant piece of paper over the entire city, and try to push the paper towards the streets, low enough to make contact with the purple ink. The highest buildings will prohibit the paper from hammocking down to make contact with the ink.
Imagine the same scene, except swap the skyscrapers for a matrix of buildings that are all single story. Now the paper can reach the ink, and collect that purple. Can you picture that?
You can see how the paper had to stretch and dip to reach the recessed areas of the plate to make contact with the ink.
Paper and Etching Press Considerations
High and low extremes in your adhered elements on a collagraph plate requires paper to stretch into recessed areas of ink, so you may tear the paper as its being draped over higher shapes on your plate.
If you’re using a press, hard materials applied to the plate that rise much higher than the thickness of the plate itself may damage the cylinder on the press, or cut through the press blankets.
In order to create a curb that will hold enough ink to print on paper, you need no more than the thickness of a sheet of paper. Pinky Promise.
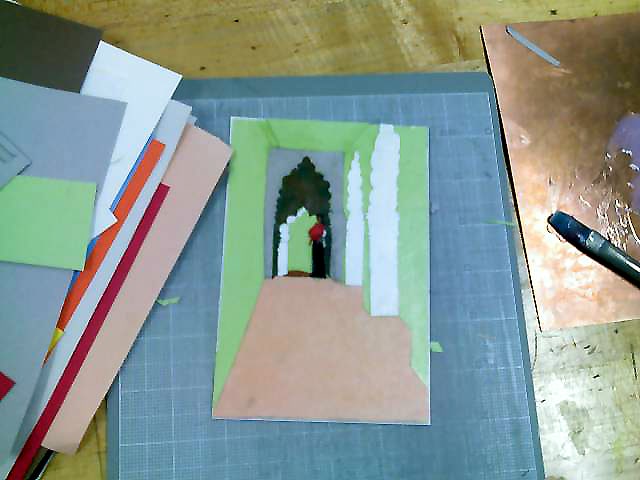
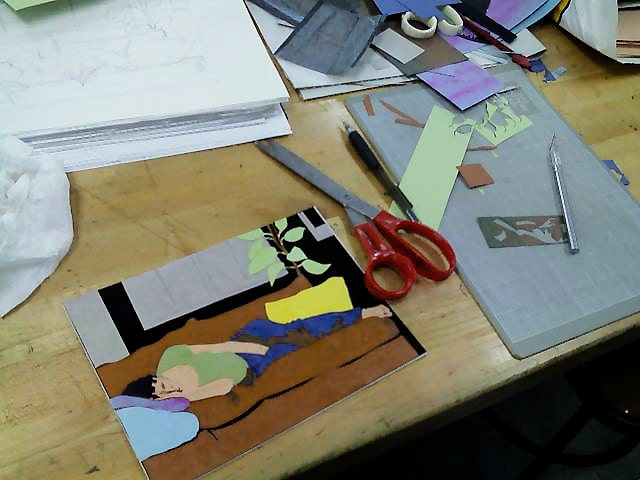
With that in mind, let’s take a look at a simple mat board collagraph with nothing more than kid-grade construction paper and acrylic gloss varnish to create a beautiful, printable matrix.
Building the Collagraph Plate
Layering cut shapes from construction paper, and adhering them to a sheet of mat board (also called mount board, press board and passe-partout in other parts of the world) will create enough topography to print a beautiful collagraph print.

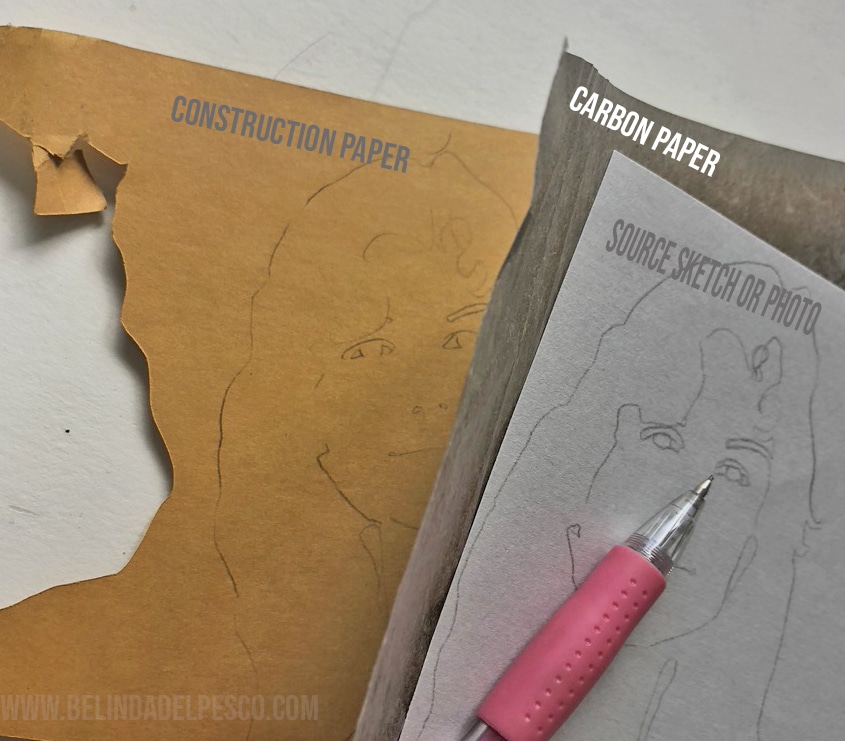
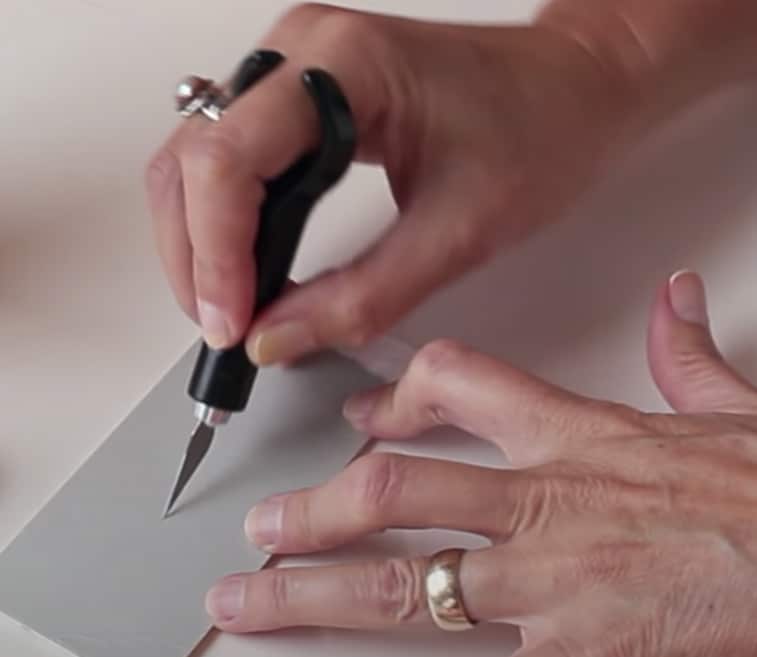
Drawing Help from Carbon Paper
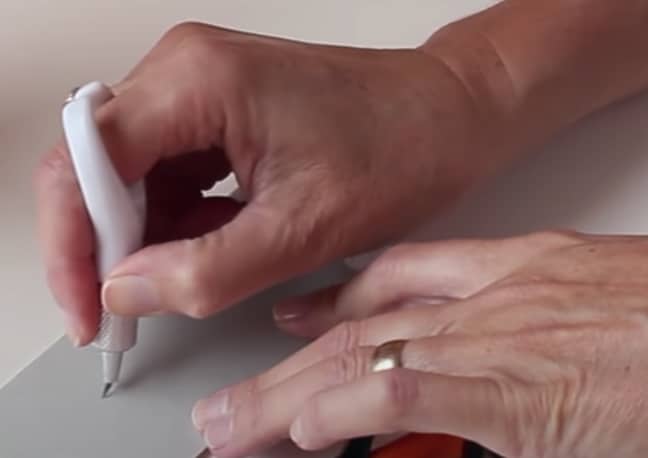
You can use scissors or a blade to cut the shapes from construction paper freehand. If you want more control over the shapes and design of your collagraph plate, you can trace onto the construction paper with barbon paper, using your drawings or a photo as your reference.
Cutting Shapes from Construction Paper
If drawing is not your strong suit, you can print a photo from your computer, and trace the elements you want onto different colors of construction paper.
Cut them out on a self healing mat with a blade – this swivel knife works well (see below) – and adhere them to the mat board with Liquitex Gloss Medium and Varnish. Be sure to push all the bubbles out from under the construction paper shapes so there’s good contact with the mat board.
Be Sure to Seal Your Plate
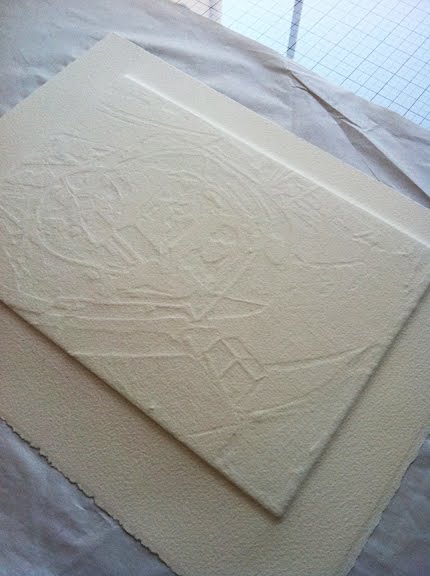
Once your collagraph plate is assembled with all of your shapes of construction paper, seal the entire surface, all four edges and the back with a thin, but complete coating of Liquitex Gloss Medium and Varnish. (If you use shellac or button polish in your studio, that works too.) Let it dry completely before you try inking and wiping the plate.
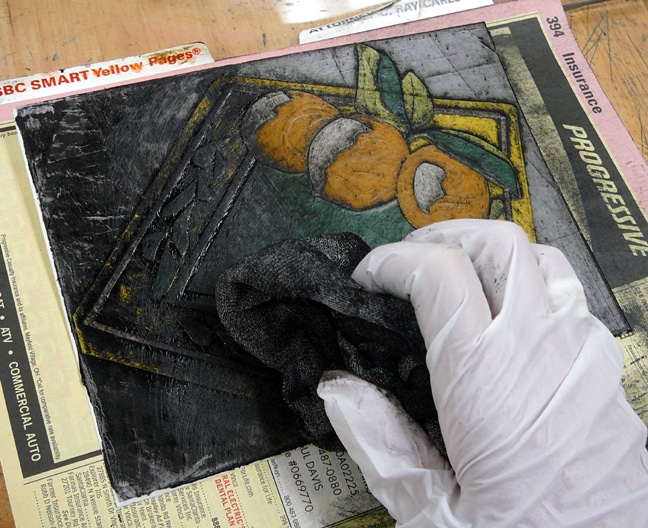
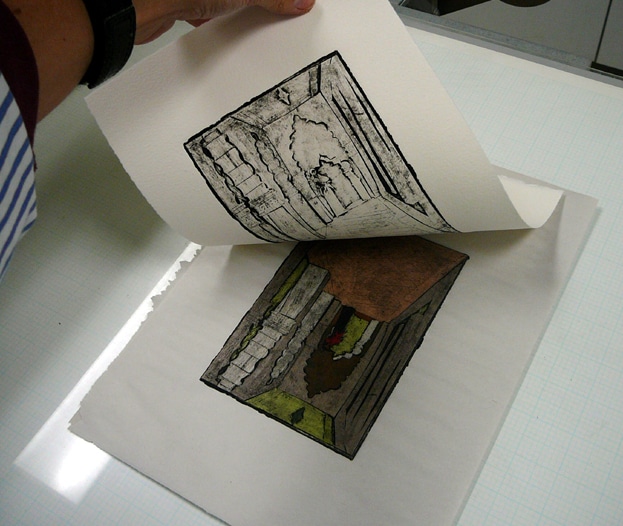
Some ink remains on the flat areas of the collagraph plate, while more ink sits against the curbs, and in the grooves between the paper boundaries.
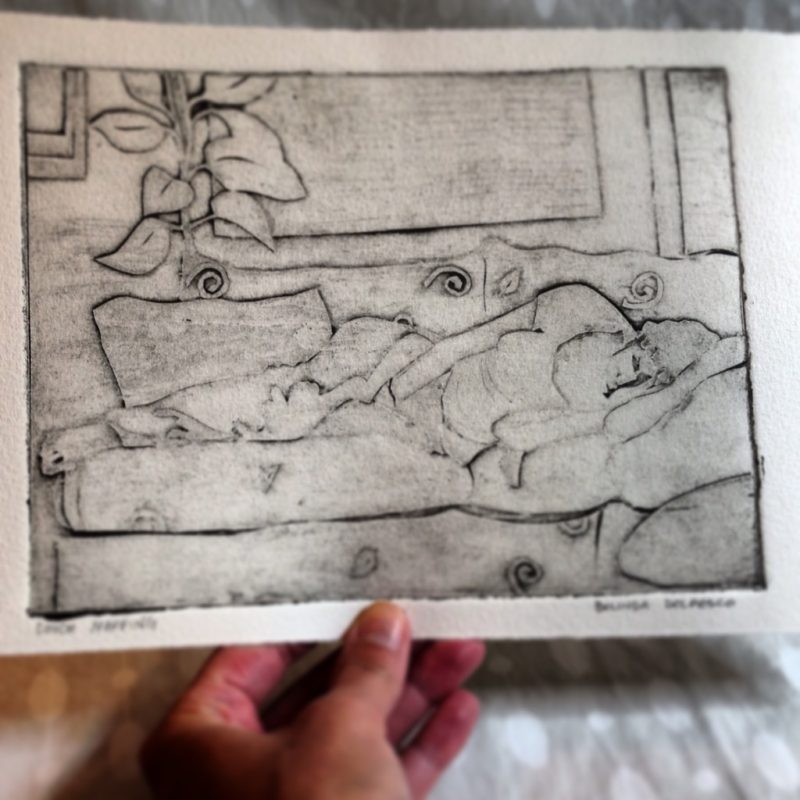
Can you see how the ink transferred from around the curbs surrounding the construction paper cut outs?
Simple Supplies with Fun Results
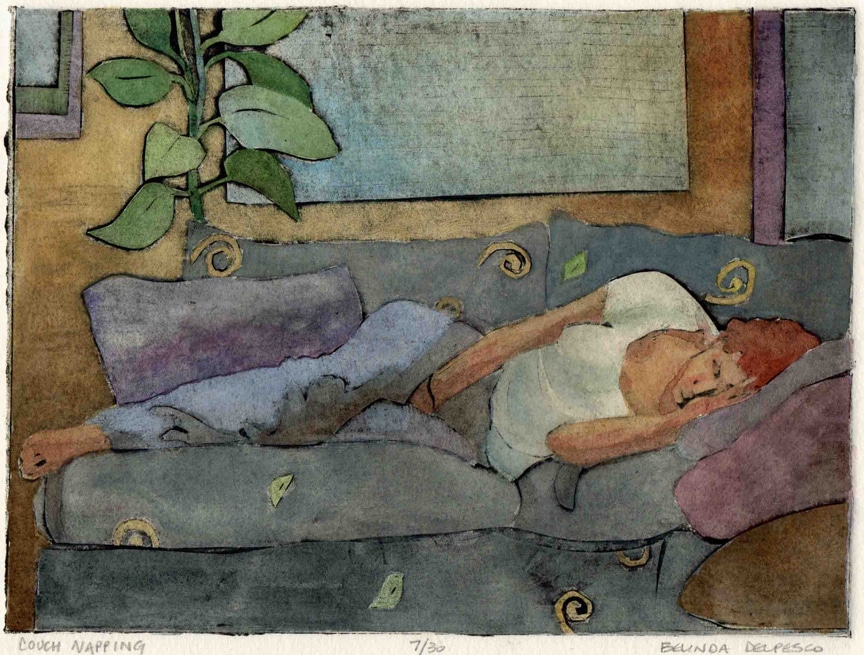
One of the things I love about this method of collagraph printmaking is the colors and designs in the actual plate. You can use neon colors in your construction paper, or muted, earthy tones. When you’re finished with the plate, it’s a work of art all by itself.
The more you make these plates, the better they get. As you learn about where the ink nestles against the edges of the cutouts, you’ll get more and more clever in your overall designs. You approach to both cutting the shapes and inking the plate will get awesome.
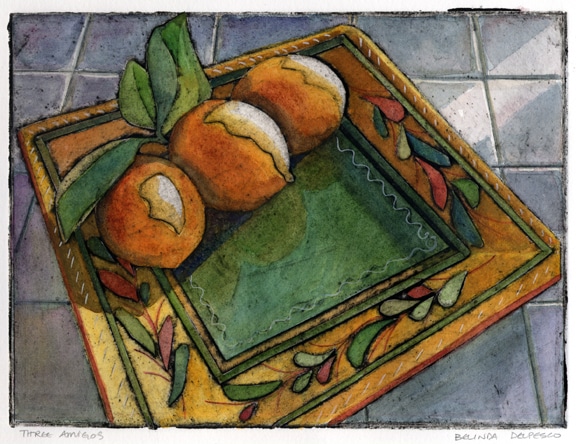
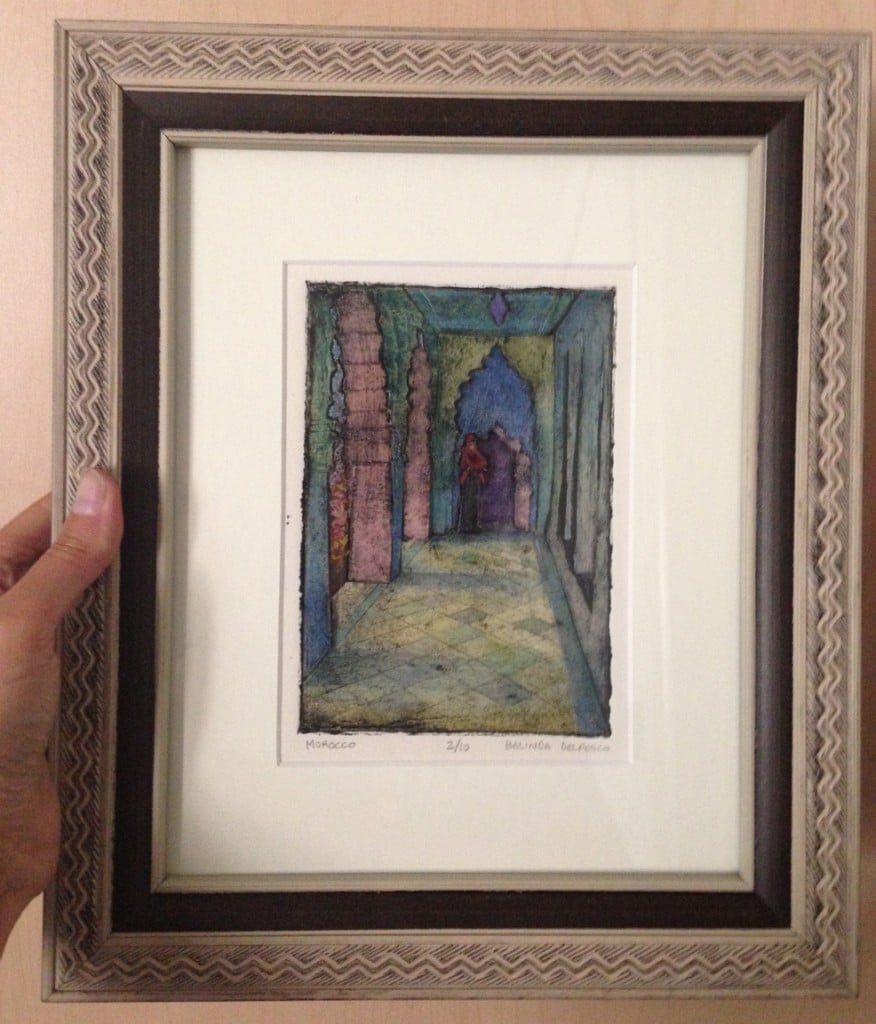
The prints are such fun. I hope you’ll give one a try. They can be painted with watercolor, acrylic, colored pencil, gouache, pastel, or any media that suits your whim. If you make one, be sure to come back and leave a link in the comments so we can see what you’ve done.
Thanks for stopping by and I’ll see you in the next post –
Belinda
Collagraphs, Many Ways
Just so you know, collagraph plates can also be made in a subtractive way. By incising linear elements from the base plate, or peeling away part of the plate itself to create recessed wells to hold ink. (See this post for an example of a subtractive style collagraph.) For this style, there’s no construction paper necessary, and the plate is again printed intaglio style.
Collagraphs can also be made from mat board and glue, or used in combination with other printmaking methods. A collagraph plate can be designed to print controlled areas of color. Print more details with another plate in a different format, like this example of a collagraph printed with a dry point engraving on top.
Art Quote
We’re all so busy doing our work that sometimes we fail to build a skill worth owning.
If you invest 100 hours in a rare skill, you’re likely to acquire it. If you could learn to sharpen a tool better than your peers, organize a high-performance database, see the nuances in some sector of cryptography, know how to build a pretty-good WordPress site or really understand the arc of a particular writer’s career, you’d have something of value. Something that anyone who was focused enough to invest 100 hours could have, but few will choose to commit to.
String together a few of those, or dig deep and develop a 1,000 hour asset and now you truly have something.
There’s huge pressure to fit in, and plenty of benefits if you invest the time and stand out instead.
Twenty hours a week for a year and you can know something that puts you in a new category. Access to knowledge isn’t nearly as difficult as the desire to learn.
Seth Godin

Hi Belinda,
Terrific tutorial about this. I have been curious about collagraphs, and will give it a try. I don’t have an etching press, but i do linocuts with hand pressure, and i think that should work here too.
Thanks for sharing your knowledge.
I just dipped my brush in my ice tea again… and it made a great shadow
Hi Priscilla! I’ve done that with coffee, and (almost) red wine once… we artists have to keep our rinse cups close, and drinking cups on a far table, eh? 🍷 🙂
Hi David, The couch napping collagraph print is sold. I’m sorry about that. I can look in my files to see if I have any prints from that edition left to add watercolor to if you’d like. Thanks for your interest. B.
Belinda, the piece with the woman napping…………is it for sale?
dpainter@cox.net