
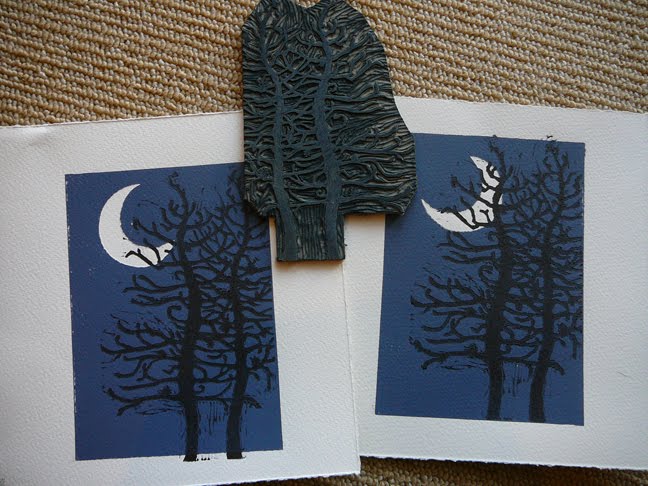
Linocut Ideas for Beginners
Have you ever made a linoleum block print? Linocut ideas can be challenging to conjure if you’re not sure where to start.
Visitors to my booth at art festivals say they recall making lino block prints in grade school – or printing from rubber erasers, or potato stamps. But what is the grown-up version of a linocut?
The fun thing is this: no matter how old the folks discussing grade school printmaking were – they remembered what their first print was. A gecko, a spider, a dog, etc. And they tell the story of their printmaking adventure with a smile.
Simple Tools, Particular Sequences
Printmaking can be a simple process. With a few supplies and a bit of instruction, you can make multiple prints at your kitchen table.
This post will help you find ideas for still-life, printable subjects you can carve from an unmounted sheet of traditional battleship gray linoleum, or rubbery speedy carve blocks. Read on…..
Gather Your Block Print Ideas
If you’re looking for ideas to make a linocut print, I have an approach to share that’ll result in a whole series – especially if you like still life.
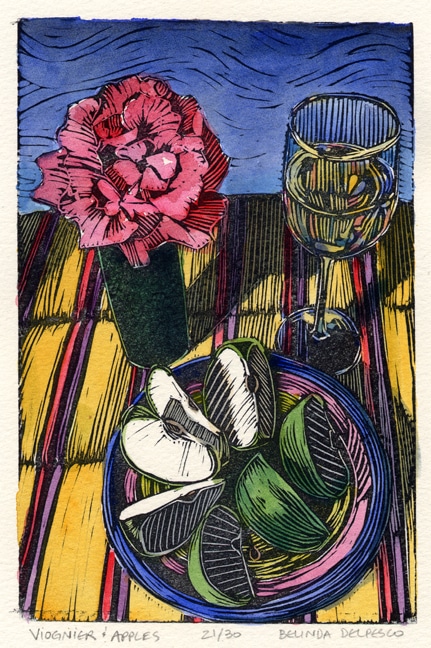
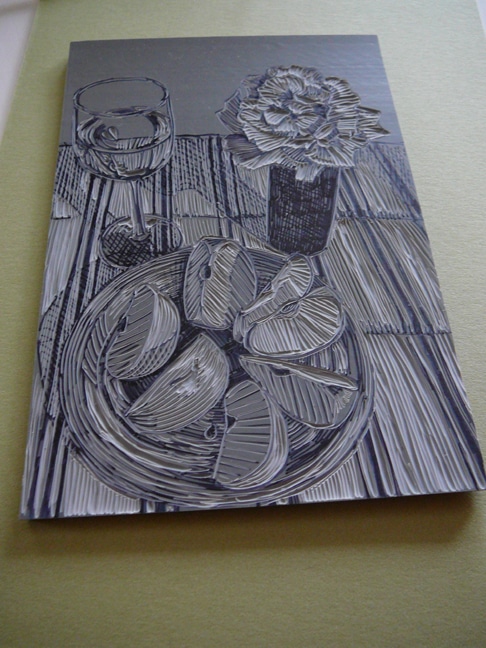
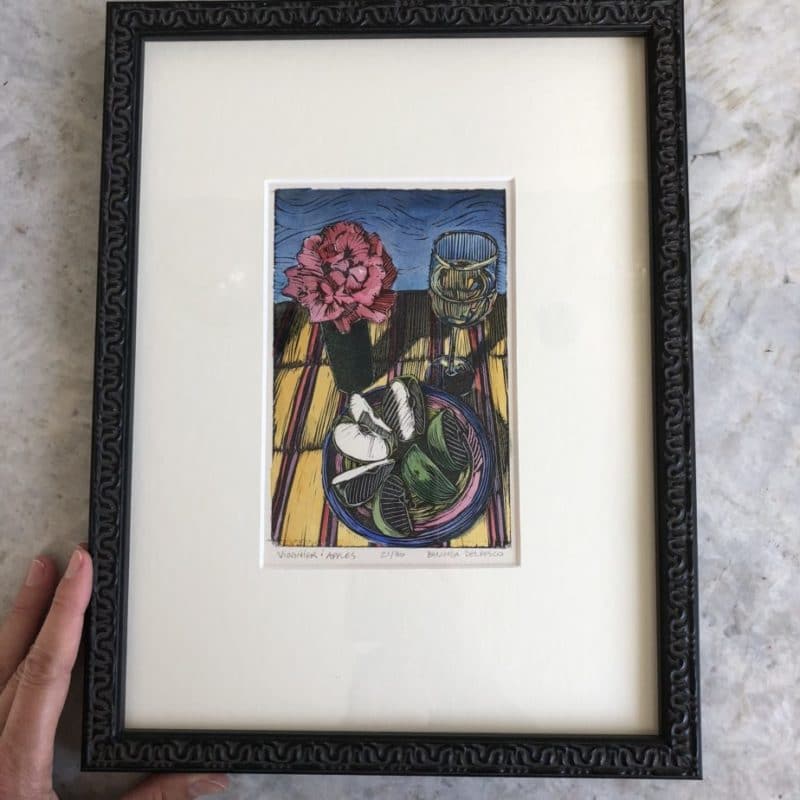
The sliced apples and rose linocut print at the top of this post was the result of a scoop through the kitchen to collect items with bright colors. You can do this too.
For the print above, I gathered a dinner napkin with stripes, a green apple, a dessert plate, a wine glass, and a bud vase.
I snipped a rose from the yard, sliced the apple, poured water into the wine glass, and arranged the objects on the napkin by a sunny window.
The photos I took of the arrangement were snapped with my cell phone camera, with the flash turned off, from a variety of angles very close to a bright window for good light.
Still Life Linocut Ideas
What you don’t see in my composition for the finished linocut at the top of this post is the clutter [dinner dishes] all around the still-life arrangement.
Peripheral messes won’t matter in your still-life arrangements either if you use artful cropping. Don’t clean the house. Just arrange your props, and start taking photos. See the steps for this below…

Linocut Reference Photos
In the photo above, the reference image for a linocut is in the viewfinder of my cell phone.
If I snapped that photo, and printed it to draw an artful linocut design on a block, you’d never know about the clutter that surrounded my original subject. So don’t worry about your clutter either. 🙂
How to Set Up a Still Life Photoshoot for Linocut Ideas
Look for a little sunshine coming through a window. Arrange one or two still-life objects on a patterned cloth napkin (or use gift wrap paper underneath a still-life), and snap photos with your phone.
Consider arrangements of everyday items from around the house as Still-Life props:
- A plate, napkin, and cutlery make an interesting geometry for a linocut.
- A scattering of lipsticks, nail polish, and a compact with a brush blush.
- A cup of tea next to a book with a set of eyeglasses on the book casting shadows from the frame and the lenses.
- A tape dispenser, a pair of scissors, a container of glue, and a trio of sharpened pencils.
- A bottle of ink and a quill pen next to an envelope, stamps and paper.
It doesn’t take a lot of items to create a compelling layout in a sunny spot for a great linocut. Move your phone’s viewfinder around to see views of the arrangements from the top, sides and at the horizon line.
Keep your arrangement simple if you’re just starting out. You can get gradually more complex as you gain experience.

Looking Through Photos for Linocut Ideas
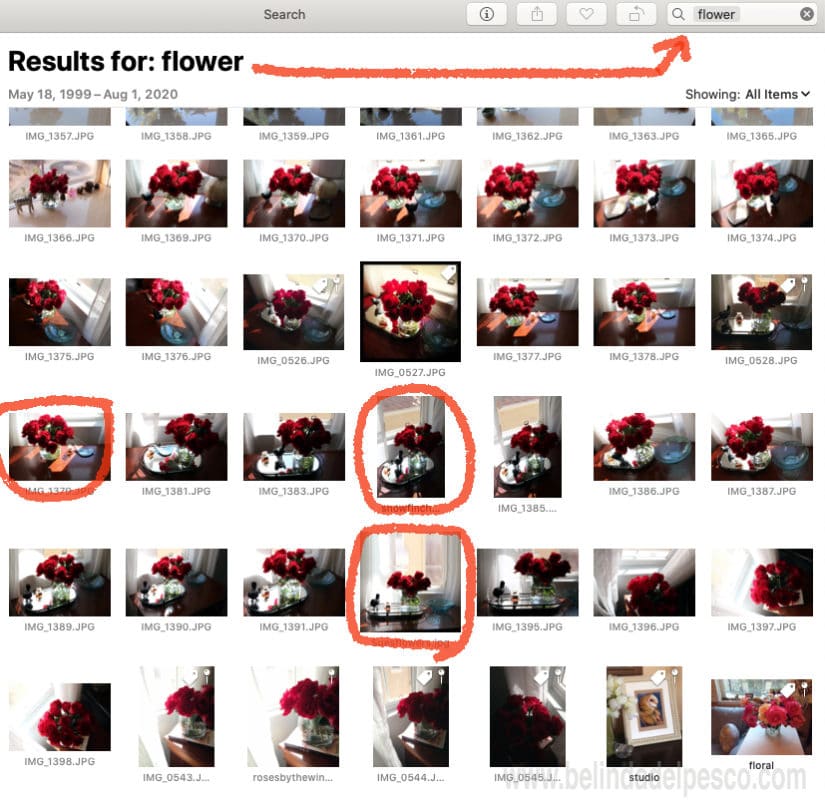
In the photo above, I’ve searched for the word Flower in the Photos app on my Apple computer. All the images snapped with my cell phone are stored in the Photos app so that I can search for subjects, colors, or people. Have you tried searching your photo archive for a particular subject or color?
In a search for the word flower, the results of a still-life photo shoot are tiled on the screen. The red roses against a window were photographed from different angles backlit by the sun, with a variety of items added to the layout.
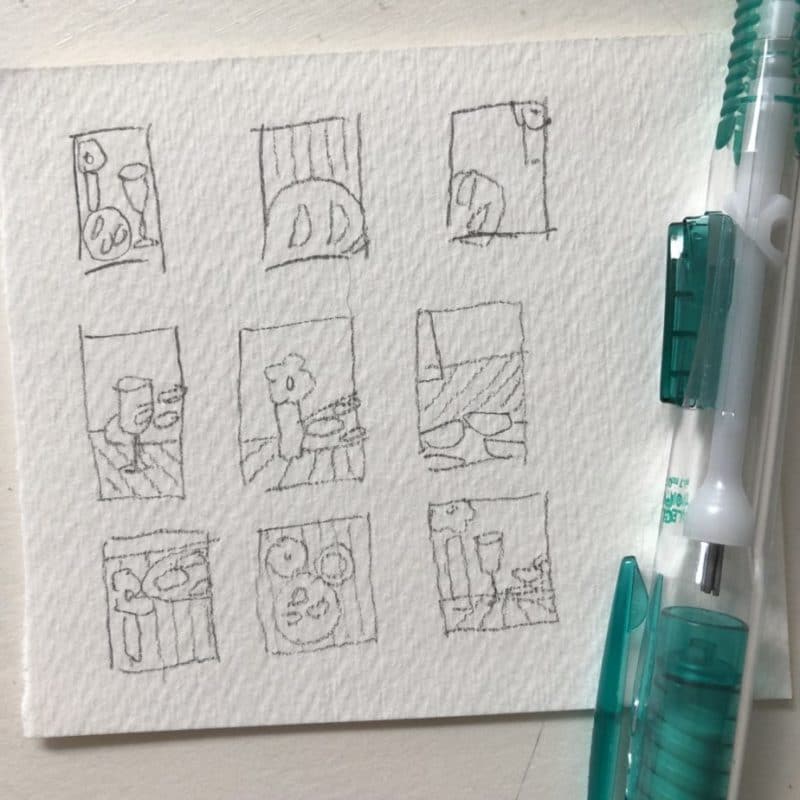
By looking at the resulting pictures as thumbnails, you can see the compositions without all the details. Focusing on the shapes will help you discern which layout will make a more compelling linocut.

Linocut Reference Photo Design Tips
Arrange your still-life objects, and pull out your phone or a camera. Start photographing arrangements from a variety of angles and distances.
Squint often to reduce the details into shapes, and look for compositions in your grouping that suggest:
- Diagonal lines
- Circular clusters
- X-patterns
- Asymmetry.
Use the viewfinder of your camera to survey compositions, or preview your arrangement with an Artist’s Viewcatcher.
Play with shadows.
Take lots of photos.
Move objects out of the frame, and rearrange the remaining things in the viewfinder. Take more photos.
Zoom in on just one or two of the items in your arrangement, and snap photos of parts of that item with artful cropping.
Put something back into your shot, and remove something else. Take aerial views, ground-up views, horizontal views, and diagonal views with your camera.

Experiment with Linocut Idea Images
Once you’ve selected image candidates to make into a linocut, consider using editing software to translate the photos to black and white.
Looking at your reference photos in monochrome will help you visualize them as single-color, black-and-white linocuts.
You can also crop the photos to get more interesting compositions or overlay parts in a composite of multiple photos. (Example: Put a window in the background behind your still life that didn’t have a window in the shot, etc.)
From one arrangement of items pulled from your house, you might end up with 25 linocut ideas, as well as sketching and painting fodder if you enjoy other media too.
Sorting Your Linocut Ideas
The photos snapped for the linocut at the top of this post have been used over and over, in other media. Take a look at this watercolor, this pen and ink study, and this monotype, for examples. One photo session with your phone could result in a goldmine of linocut and painting ideas.
If the objects collected for your linocut still life arrangement are significant to you in some way, or they follow a theme, they’ll be even more fun to carve or paint.
Take an all-white item grouping (eggs in a white bowl), or perhaps an arrangement of themed items, like binoculars, a folded map, and sunglasses.
Or gardening clippers, and a seed packet with a glass of lemonade or a piece of fruit.
You could assemble all the same objects – like spools of thread – artfully arranged in a stack.
How about a selection of daisy flower heads on a sheet of paper, in the sun, so the petals cast shadows?
Or a variety of leaves arranged in a heart pattern, etc.
Example video: have a look at this clever linocut of cameras by printmaker Hannah Forward.
Whatever you decide, have so much fun with it!
Gather Your Linocut Supplies
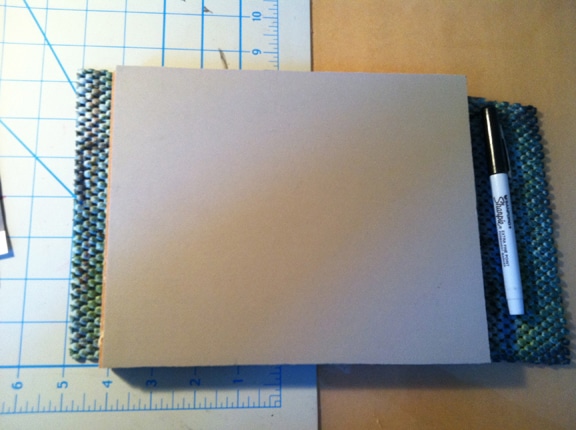
To begin a linocut, gather your reference materials; a drawing, a photo, or a still life – or a clear view of a landscape or interior scene from life. Cut a sheet of linoleum to the size you need, get a permanent marker, some fine grit sandpaper, and your carving tools.
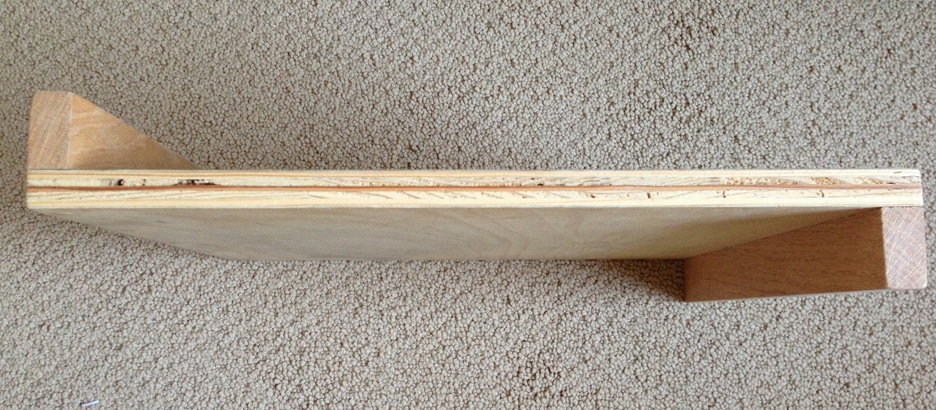
It’s also helpful to have some non-skid shelf liner to rest the linoleum on. Perhaps you can even acquire a bench hook, so your hands are never bracing the block, and getting in the path of the blade while you’re carving.
Prepare Your Linoleum Block
Before starting, use some fine-grit sandpaper wrapped over a block, and lightly sand the uppermost surface of the linoleum block. Sanding removes any bumps or blemishes, as well as the sealer used by the manufacturer to keep the material from drying out.
If you’re on Facebook, take a look at this post by Dick Blick on the variety of linoleum they carry, and some of the characteristics of each type.
Sketch your drawing with a permanent marker, or transfer it with acrylic varnish from a print-out from your computer. (Do you know how to do that? If not, let me know in the comments and I’ll explain.)
Drawing the Design for Your Linocut
Using a permanent marker, draw your linocut design on the sheet of linoleum, while keeping black-and-white design elements in mind.
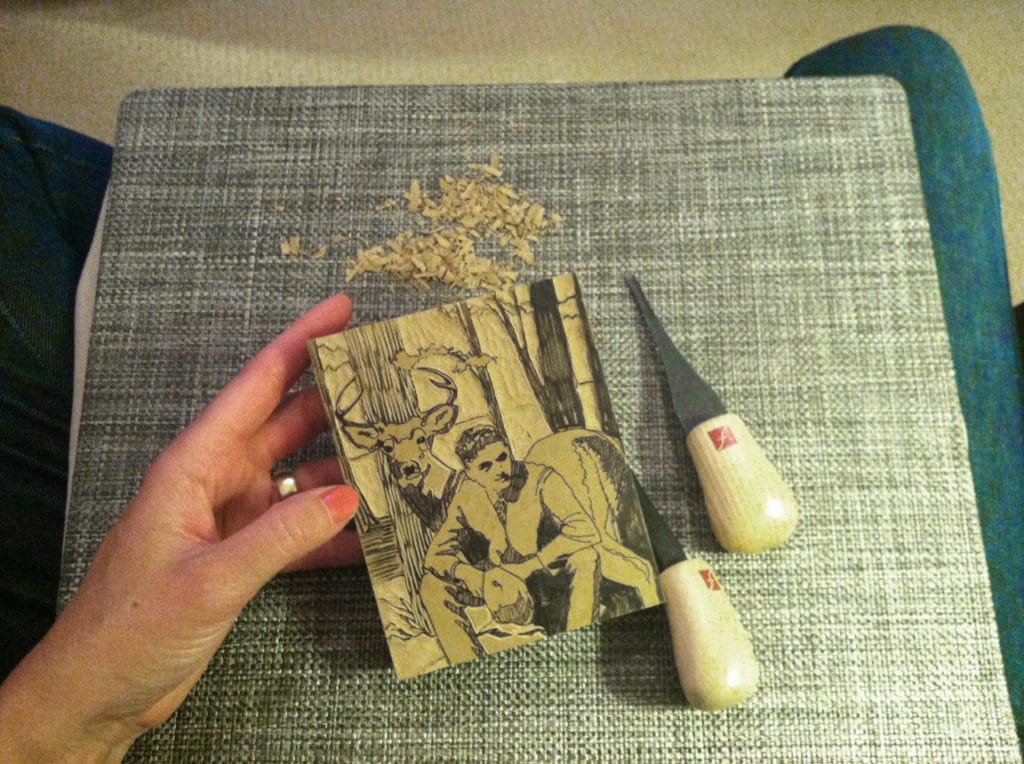
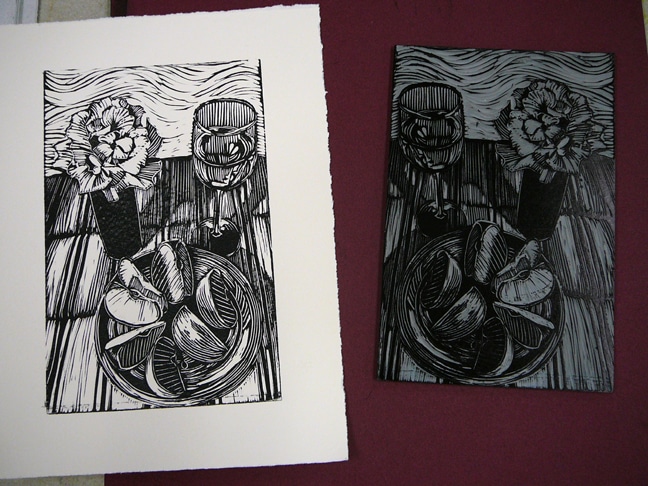
You’ll be carving everything from the linoleum material EXCEPT your drawing, so use your marker to draw the dark parts of your reference image.
Leave the brightest, white parts alone, without any drawn lines on the linoleum. You’ll carve those away, which will result in the white paper showing through on your print.
Linocut Planning
Look at your reference photo in advance, and ponder which parts should be drawn (printable), and which parts should be left out (carved away to show the white of your paper), etc. Sometimes, it’s helpful to increase the contrast in your reference photo with photo imaging software, and print it in black and white.
If you’re adding any words to your print, be sure to lay the lettering out backward because the text (and your entire image) will print in reverse.
If you’ve never made a linocut print before, choose a relatively simple design so you can get the feel for both cutting and printing. And give yourself permission to mess up; everything new takes a little practice.
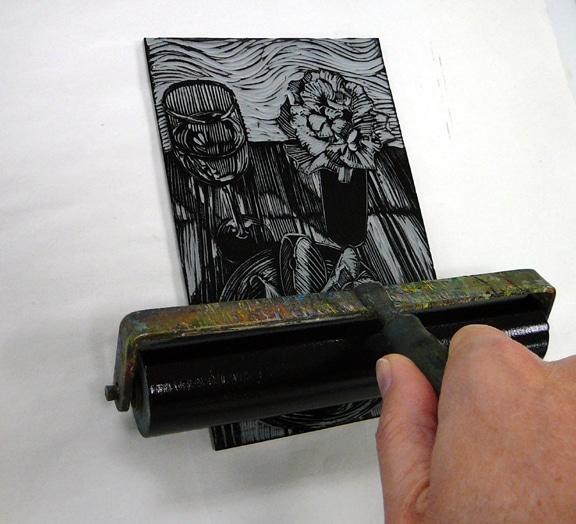
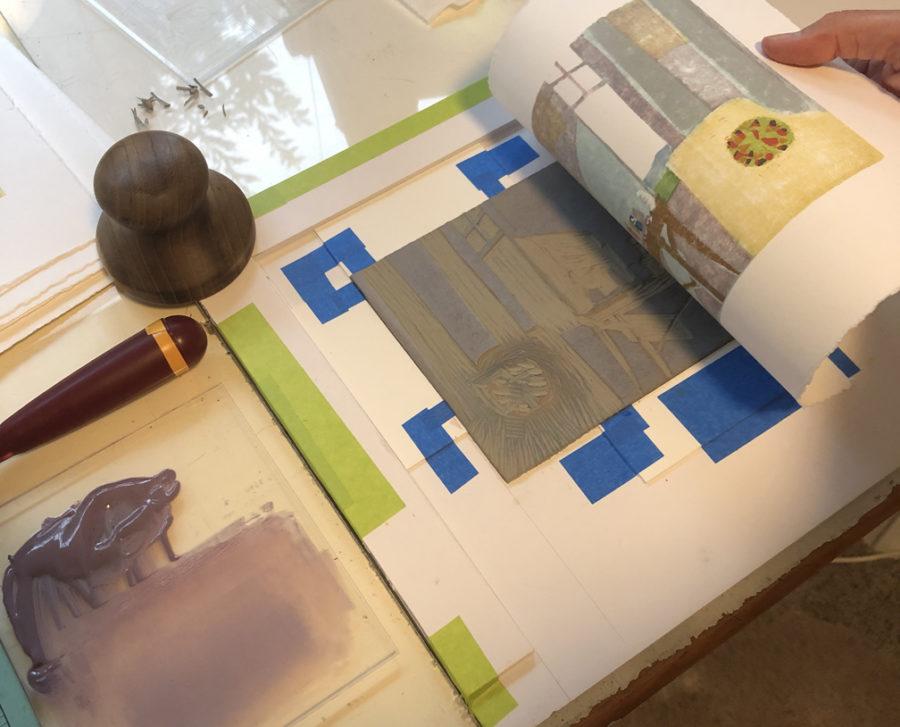
Rolling Out Ink for a Linocut
Rolling ink on the block (above). And speaking of rolling ink, there is a great video tutorial on McClain’s website for inking a block in a blended gradient with printmaking inks.
I love their tip of using tape as a guide to keep the roller aligned with the block. If you have any tips to share about inking, or block registration, please leave them in the comments at the bottom of this post!

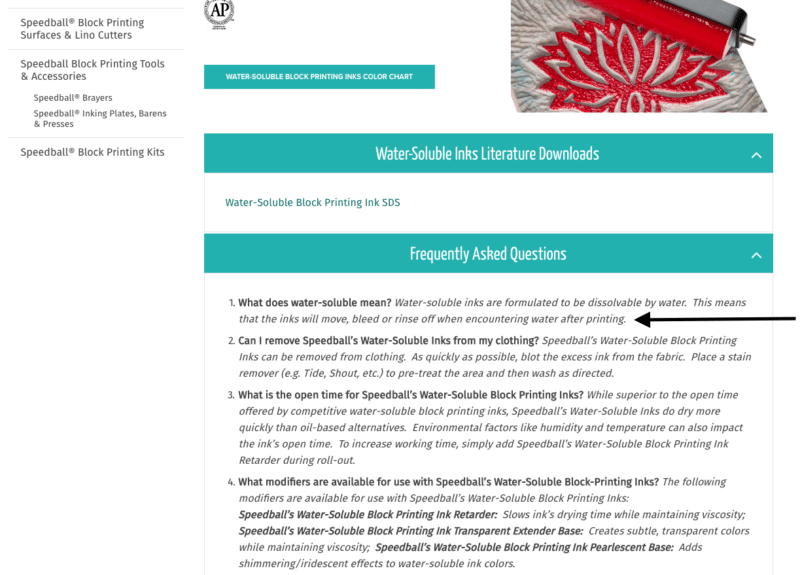
Printmaking Inks that will Re-Wet
If you plan to add other media to your print after it dries – especially wet media like watercolors or acrylics, be sure to select an ink that dries permanently.
Many water-based inks in art supply stores re-wet when you attempt to paint them, which leads to a big mess of muddy colors and lost details in the print.
Do your research to find inks you can paint on, and be sure you’re printing on a paper heavy enough to handle additional wet media without buckling, warping, or bleeding through.
Are you Going to Make a Linocut?
I hope you decide to dive into this wonderful printmaking method, and your adventures are fruitful and fun.
For a little more inspiration, here is a link to a Pinterest board I’ve curated – all devoted to linocut and woodcut – for your linocut idea harvesting.
If you have any questions about the particulars of linocut process, leave a note in the comments. You might find other readers of this blog will reply and help too. We all get better at art together. 🙂
Thanks for stopping by, and I’ll see you in the next post!
Belinda
P.S. Here is a cool article about Wayne Thiebaud’s self-curated exhibit at SFMOMA
P.P.S. If you’d like each new post over here to magically arrive in your inbox, you can sign up for a subscription (free) here.
Here is the first video (below) in a playlist of linocut relief print videos to help you get started with this versatile, fun form of printmaking!
Art Quote
I look; morning to night I am never done with looking.
Looking I mean not just standing around, but standing around
Mary Oliver
As though with your arms open.

Hi!
I love your watercolor over the print. Please can you tell me what ink you use? I’m having a hard time with the oil based ones I’ve tried. They don’t penetrate the paper well.
Thanks!
Tracy
Hi Tracy, I love both Akua Intaglio Inks, mixed with modifiers to use in relief prints, and Cranfield Caligo Safewash Relief inks, which I get online from McClain’s: https://imcclains.com/catalog/ink/CaligoProcessSet.html
Hi Belinda, I am going to be attempting my first “real” lino block carving/printing soon (I made a tiny one YEEEARS ago at a workshop at the local arts center, thus the reason I say “real”). I have to say I have done a ton of research and you have by far been the most inspiring and helpful.
I have one question for you. The print I’m going to do has clouds that have a pen dot texture to them (going from light scattering to more dense). Is there a way to get this texture in the carving or is it just too tiny to accomplish? Would adding the texture with Pigma Micron waterproof pigment ink after printing be a better option?
* Apologies for the novel. *
Thank You for all of the inspiration and education you provide.
Hi Amy,
Based on your research investment, I suspect your expectations for this linocut will be pretty high? Maybe consider making small, sacrificial lino plates (cut an 8×10 down to 20 2″ x 2″ test “swatches”), so you can practice a wide assortment of linocut textures (for example, here is a Pinterest Board dedicated to just that: https://www.pinterest.com.au/kunzsuzsa/linocut-textures/ ). You’ll have them forever to refer back to when looking for a good texture to incorporate into your designs. As a newish devotee to the art of relief carving, I recommend that you keep the linocut as a print, and not venture into adding mixed media, to “force” your hand to get better at creating the look and feel you’re after with the plate and your tools. Does that make sense to you?
Yes, it all totally makes sense. Thank you so much for reply and recommendations.
Hi there, Kim! Thanks for the feedback, and I hope you really DO pull out your carving tools! But then again, you’re on fire with your beautiful watercolors, so maybe that’s the bestest road for you this season!
You are so inspiring! You are making me want to get my carving tools out again
Hi Belinda. I’ve been teaching myself (and have watched some of your youtube videos – very helpful, thank you.) My issue is that I can’t draw. I’m heavily dependent on photographs and struggle a bit simplifying an image for the linocut. Any suggestions? Thank you.
Hi Anna, Thanks for the feedback! I’m glad the video tutorials are helpful to you! On your reference photos, have you tried making xerox copies of them in black and white, slightly “posterized” to remove details?
Hello there Belinda. I really enjoyed you first video (I think) on linocut printing (How to make a Linocut for Beginners: Set Up Tips). I am just getting started with linocut printing. In your blog above you mention “making a transfer with acrylic varnish from a print-out from a home computer”. I’d love it if you could explain your process! Thanh you for all your help!
dAle woOd
Hi Dale, Thanks for the compliments. And welcome to linocut printmaking! You’re going to have a blast! To transfer a photo to your block, print an image (black and white) on your home printer that will fit the block. Paint an even, thin coat of liquitex gloss medium on the block, and while it’s wet, lay the photo printout face down on the wet surface of your block. Press all air bubbles out and then weight the paper to the linoleum with a stack of books using a layer of tin foil or something to keep the medium from leaching through the back of the paper onto your books. So the sandwich sequence goes: block at the bottom, face up, coated with medium, then printed b&w photo face down, then tin foil, and then heavy books. Leave it for 24 hours or so, till the medium dries completely. Remove books and foil, and use a kitchen sponge to wet the back of your printout paper – being careful to *not* get any moisture on the burlap back of your linoleum. It shrinks and will curl the plate. Once the paper print out has been moistened, start rolling the paper away by rubbing your fingertips against the back of your adhered photo printout. All the paper will clear from the block, leaving just the printout ink, attached to the surface of the linoleum. 👍🏼
You can also use carbon paper to transfer the photo to the linoleum. I use a brightly colored pencil, so I know what I’ve already traced.
Hi Belinda, when you print, it looks like you put the paper down first and then the block down on top? Why do you do that instead of the reverse, which is more common? I put the inked plate down, then the paper and a thin piece of plexi (akua brand) on top. I also register the paper. How do you register your prints?
For registration, I usually just “eyeball” it, visually. 🙂
The plate was soft, rubbery e-z cut and the cylinder on the press sunk into the surface of the plate, which expanded the plate farther than the paper was able to stretch as it rolled through. That left a repeated skip in the print impression. I had to cut a stabilizing jig from matboard and sandwich the plate face down inside it to get a clean print. Normally, I print face up too. 🙂
Belinda, When I use permanent marker on my lino it transfers to the print when I am printing, how do you avoid this?
I have had that happen too. You can seal the plate after you finish your drawing with a coat of poly-laquer (https://amzn.to/33mrCnA). Your marker will eventually be covered with ink when you’re finished printing all your colors, so it shouldn’t be an issue at the completion of the print edition. You can see how mine was doing the same – but got resolved with layers of ink in this video: https://youtu.be/lRy5lvrWsa0