
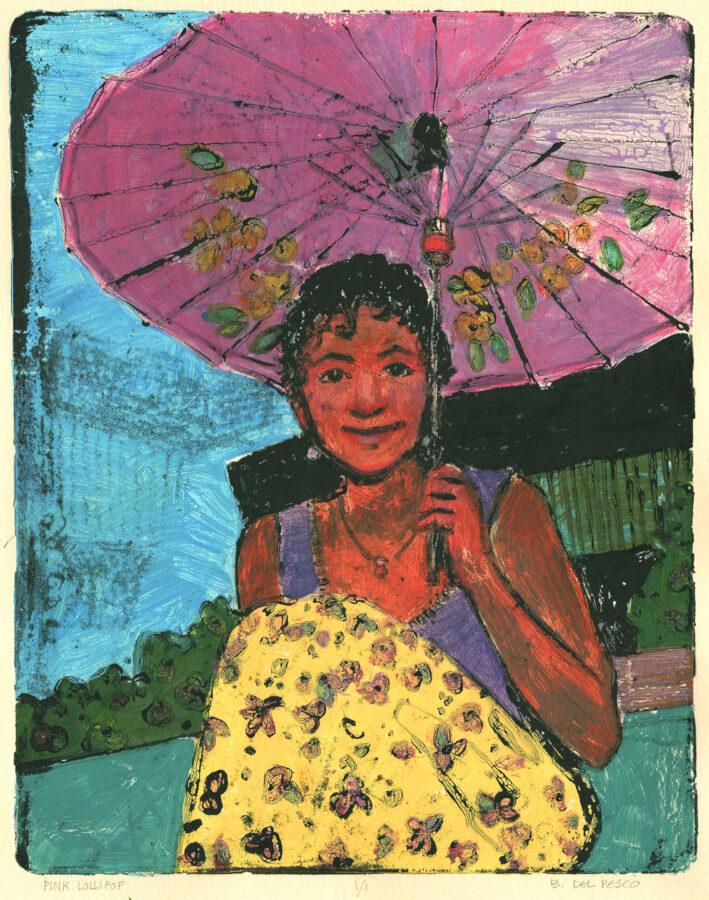
Gelli Plate Monotype Portrait Print
Experiments with gelli plate monotype portrait prints have been underway in my studio, and they are FUN!
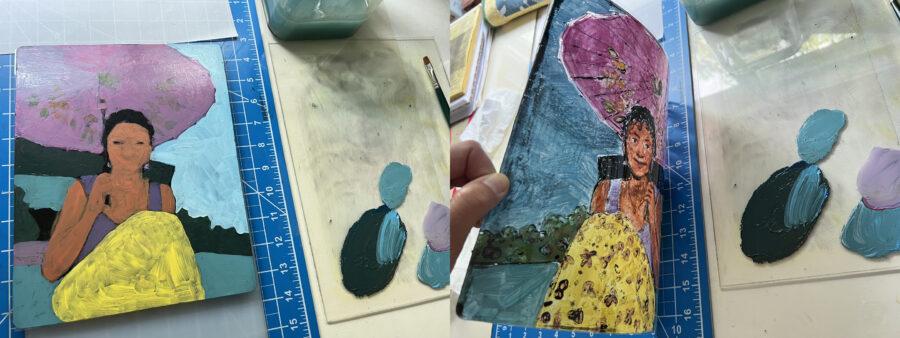
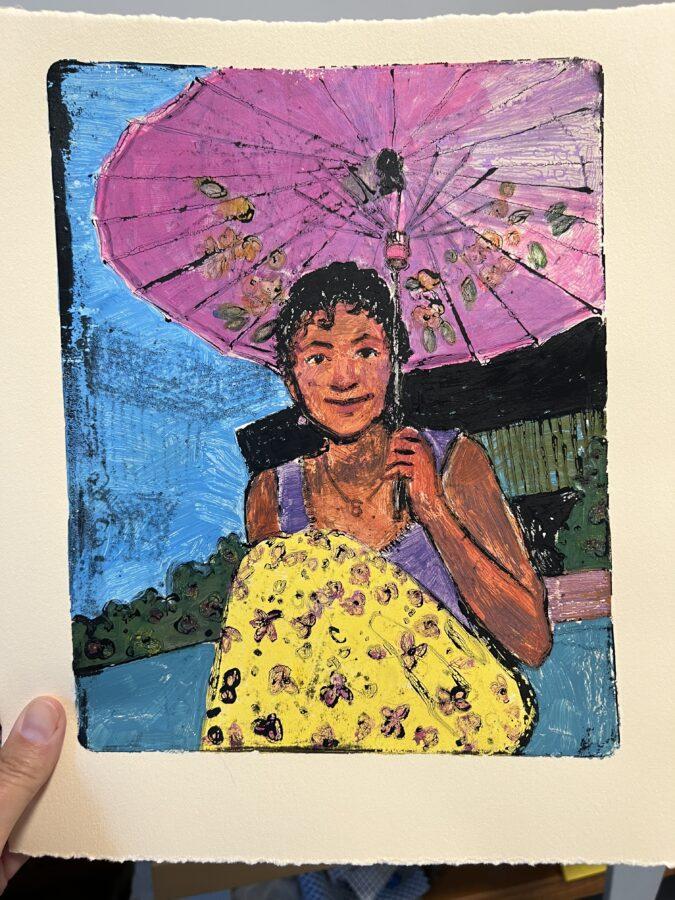
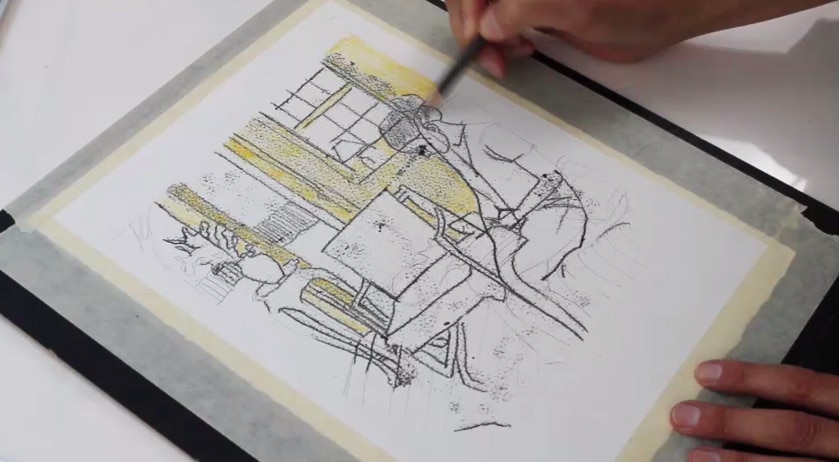
The first test was reminiscent of storefront window paintings, layered by sign painters on the glass from inside to display on the outside.
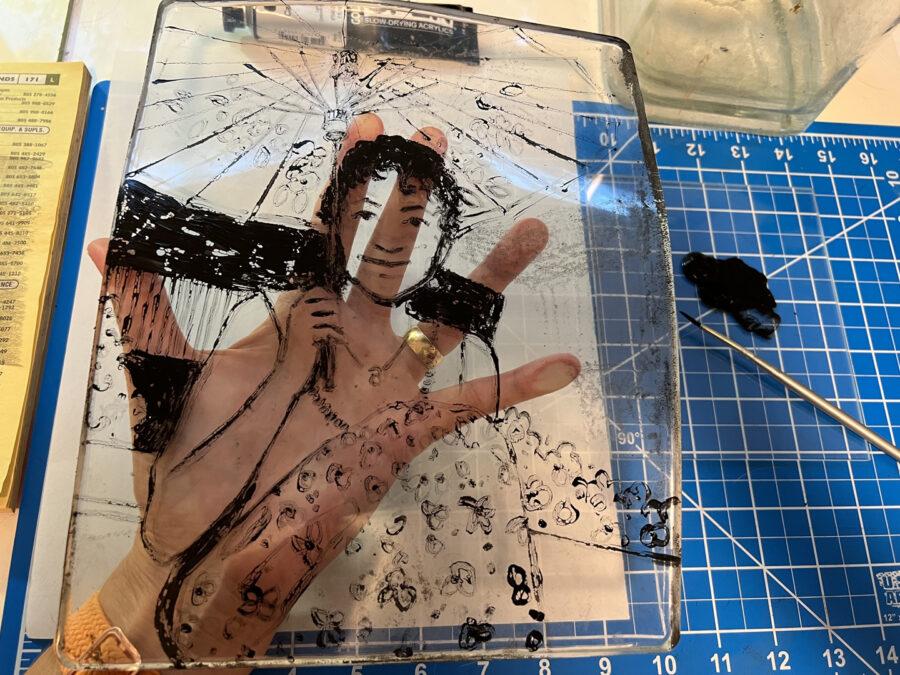
You begin by applying your darkest, most detailed line work first, and then layer lighter colors in sequence on top of previous layers.
Gelli Plate Monotype Painting Order
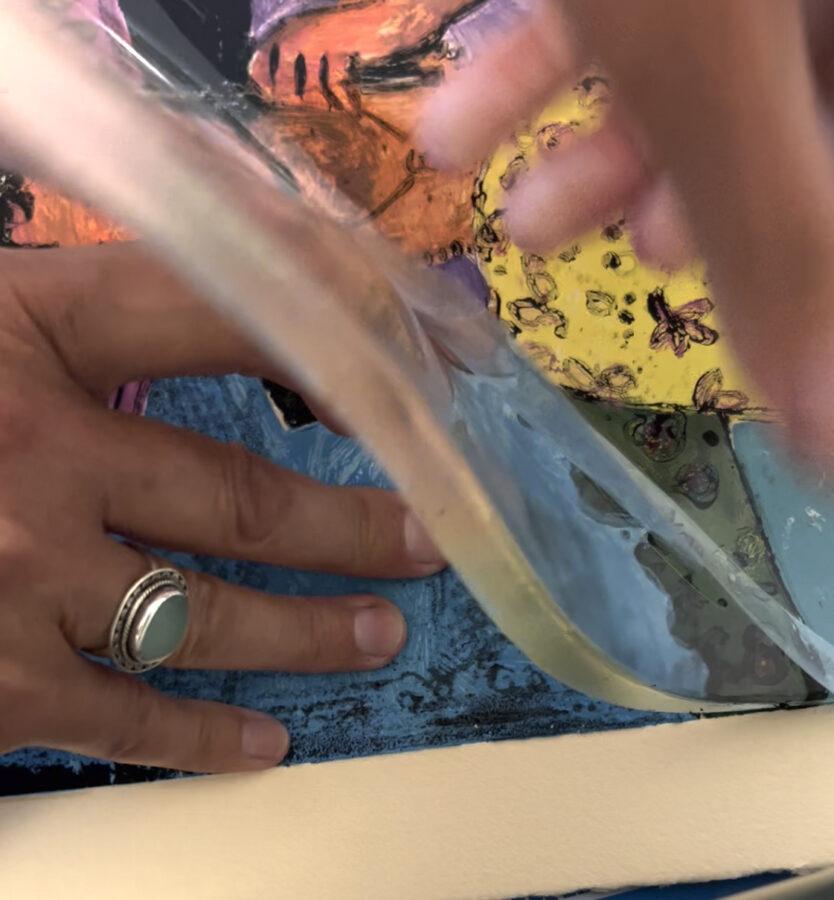
One of the (sort of) tricky aspects of monotype prints from a gelli plate using this printmaking method is sequencing. The first layers of color on the plate – in this case – the black lines – will be the uppermost pigments on the finished print.
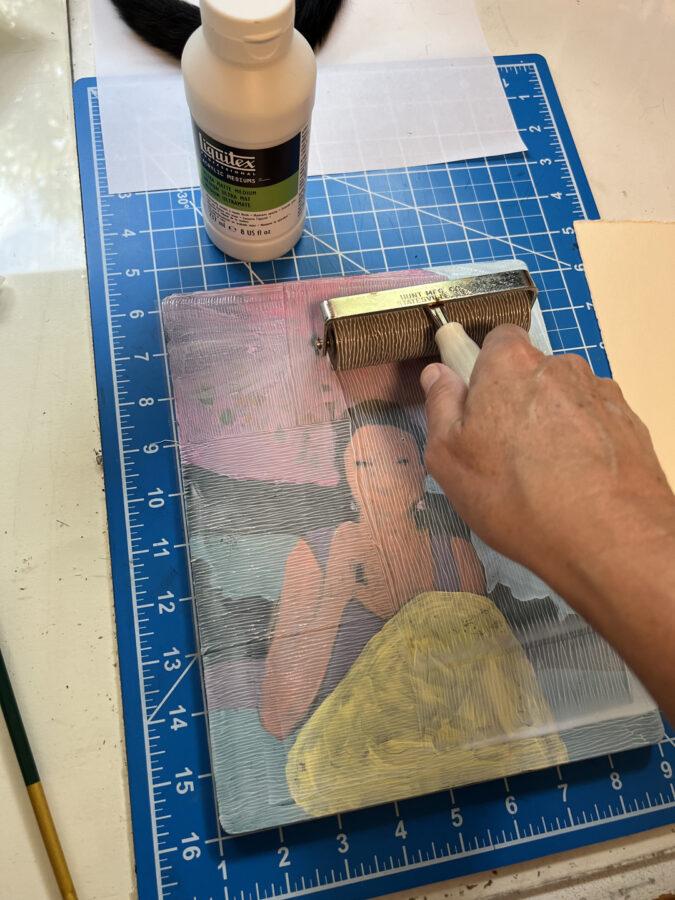
The gelli plate also causes a bit of repelling when you brush pigments onto the surface, but that’s okay, since you’re adding subsequent layers after each paint application dries.
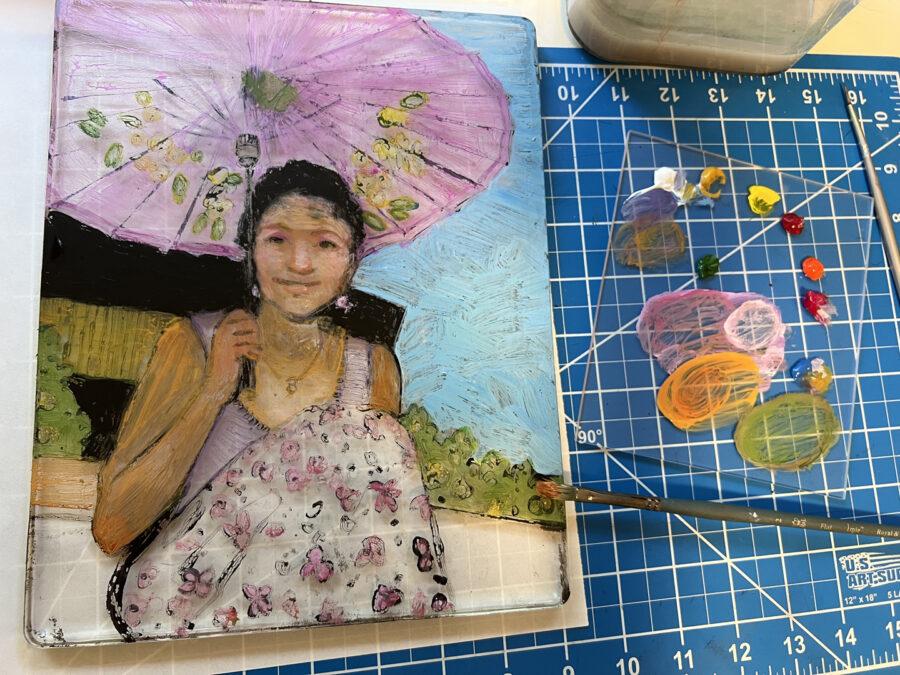
In the photo below, you can see a lot of brush marks and open places where pigment didnt stick in the blue sky. But that’s okay. (There’s a video close up to see the textures on this monotype print in my Etsy listing.)
In the next photo down, I’ve added a few more layers (standard, quick dry acrylics work great for this), and I peeked under the see-through gelli plate frequently to see how the print would look. You should do that too.
Monotype Prints – Many Ways
he first class I attended on monotype printmaking was in 2005, and I’ve been in love with all the variations of monotype and monoprint ever since.
Even though I’ve probably made a thousand monotype prints by now, I think I’ve barely scratched the surface of this painterly, accessible printmaking method.
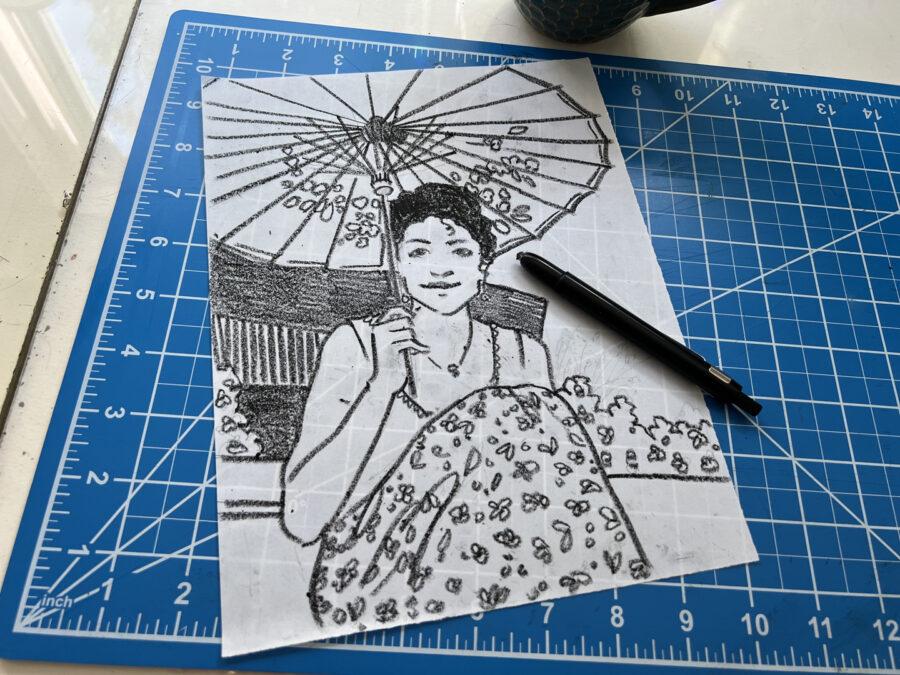
There’s no need for carving, or sharp tools, no chemicals, no drawing skills required (tracing!), and you don’t need a press to make monotype prints.
I’ve collected a few of the previous posts on this blog about monotype prints for your perusal below. I hope you feel inspired to make one soon. (And you can join my monotype group on Facebook if you want over here.)
Monotype Printmaking
- Here is an example of adding colored pencils to refine a single-color monotype print.
- Demonstration of dark field monotype print from a vintage family photo on a sheet of plexiglass without a press.
- Have you ever added watercolor to a single-color monotype print?
- Making monotype prints from plexiglass using water-soluble crayons and watercolor
- Handy tools and tips to make a light field monotype in full color, printed from a beveled sheet of plexiglass
If you have any qustions about this approach (one of many) for making monotype prints from a gelli plate, leave them in the comments. I always love hearing from you, and the questions you have might match the same ones other readers are pondering, so ask away!
Thanks for stopping in, and I’ll see you in the next post –
Belinda
P.S. One of my favorite printmaking books related to intaglio etching and engraving by Crown Point Press is now available as a digital download here.
Art Quote
Manners are a sensitive awareness of the feelings of others. If you have that awareness, you have good manners, no matter what fork you use.
Emily Post
Thanks for this link Belinda. Will look forward to giving it a go. Really does give an attractive printerly effect..
Belinda thank you for this post and all the others I have read over the years. I am painting landscapes on gelli plates. It is very difficult for me to think in reverse order. Your explanation is going to help me tomorrow when I tackle the next one.
Hey Belinda, I love your blog and have learned so much from you. I use a gelli plate, but I use ink, not acrylic paint. I’m wondering if I can get the same effect with a quick drying ink like speedball. If I succeed, I’ll let you know.
cheers, April
Hi April, I’d be very interested in the results of your pigment test! I recall that Speedball water soluble block printing ink dries super fast, and it will re-wet when it comes into contact with any wetting agent. I’m curious if it will respond/re-wet from an application of acrylic varnish, or if it will release – once its dry – from the gelli plate the way acrylic pigments do. Please keep us posted!
Such a brilliant approach! Thank you so much for all your posts.
Hi Shelley – Thanks for the feedback… I’m so glad you’re enjoying the details shared here. Happy printmaking!
Starting with the details and moving along to big blocks of color is like a reduction block print in reverse. This is so cool.
Hi Kirsten, Good point, this really is a “working backwards” approach to monotype printmaking, just like reduction prints. Happy Autumn to you!