
Gelli Plate Monoprint with Ballpoint Emboss Drawing Transfer
Gelli plate monoprints offer a festive and varied approach to printmaking without the need for a press. I’ve barely scratched the surface of all the innovative printmaking methods shared online with these gelatinous squares of potential. And I’m on a roll with gelli plate monoprint with ballpoint emboss drawing transfer this week. I know – it’s a mouthful.
In this post, I’m sharing my first (squealy fun) tests of gelli plate ballpoint drawing transfer monoprints. A good source to see the step-by-step details of this method in motion is on Mark Yeates’ youtube channel: Yeates Makes.
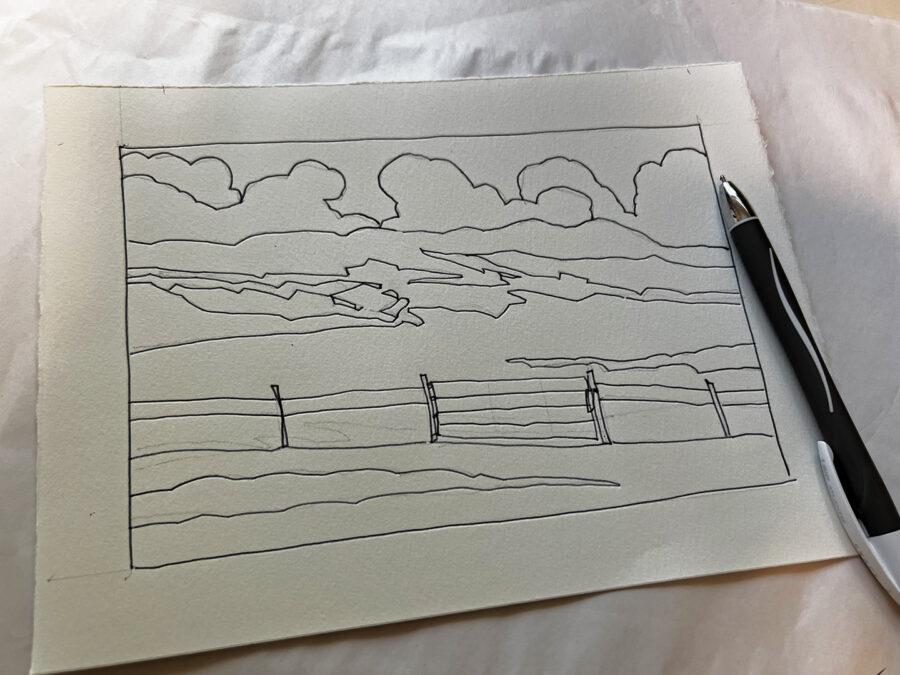
Drawing Paper
I tried a variety of drawing papers to see which ones gave me a cleaner line in the gelli plate transfer monoprint.
Everything worked – from standard printer paper, scraps of smooth bristol paper, and sheets of different branded drawing papers, so that was a plus.
One paper, in particular, delivered a slightly better emboss, with just the right amount of tooth to pull the acrylic away around my linework, and that was Strathmore 300 series Medium Surface Drawing Paper.
Embossed Drawing Gelli Plate Magic
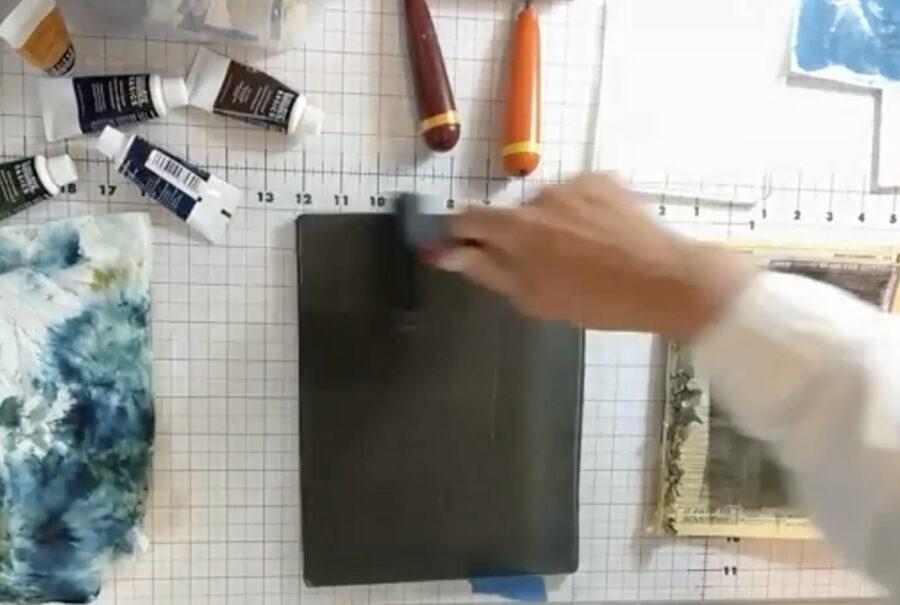
Once your drawing is laid face down on the wet acrylic-coated gelli plate, each drawn and embossed line on your paper is like a miniature tunnel whose ceiling is too high to make contact with the pigments.
All the flat, un-drawn areas of your drawing paper make full contact with the acrylic, so the pigment transfers from the gelli to the paper.
The embossed linework doesn’t touch the pigment or the gelli plate, which leaves the acrylic untouched along all the embossed drawing lines.
Acrylic vs Printmaking Ink
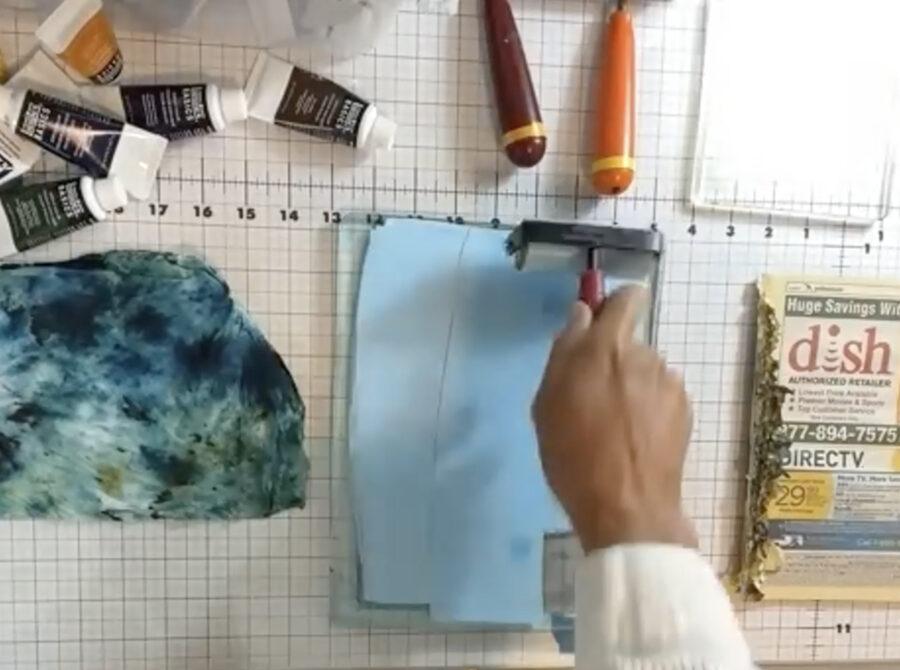
If you only have printmaking ink, I don’t think this exact method will work as well, since it requires the pigments to dry. The first step; transferring the ballpoint pen drawing is done with freshly rolled out, still wet acrylic paint.
The second step requires the pigments to dry completely – while pressed firmly against the printmaking paper, so you can peel all the pigment off the gelli plate.
I haven’t experimented with anything other than standard acrylic paint, so if you try this with other pigments, please leave some notes about your results in the comments.
Ball Point Pen Selection
Since the embossed drawing can be re-used to make another print, I re-embossed the linework with a different color of ballpoint ink so I could see where I was drawing.
I used a medium ballpoint pen (like these) instead of a fine point, to make a slightly wider indentation in the paper.
It’s interesting to note that these fragile sheets of drawing paper – when used this way – are essentially printmaking plates. And they’re made more sturdy with each layer of acrylic paint pressed against them.
TIP: When rolling out your layer of acrylic paint on the gelli plate to lift the drawing transfer, be sure to use a very light color for best contrast, and take care to reduce any lap marks from the brayer, or color shifts.
More Ballpoint Drawing Gelli Plate Transfer Monoprints to Come
The results of this ballpoint drawing transfer gelli plate monoprint experiment fluffed my creative mojo to make more. (Of course.)
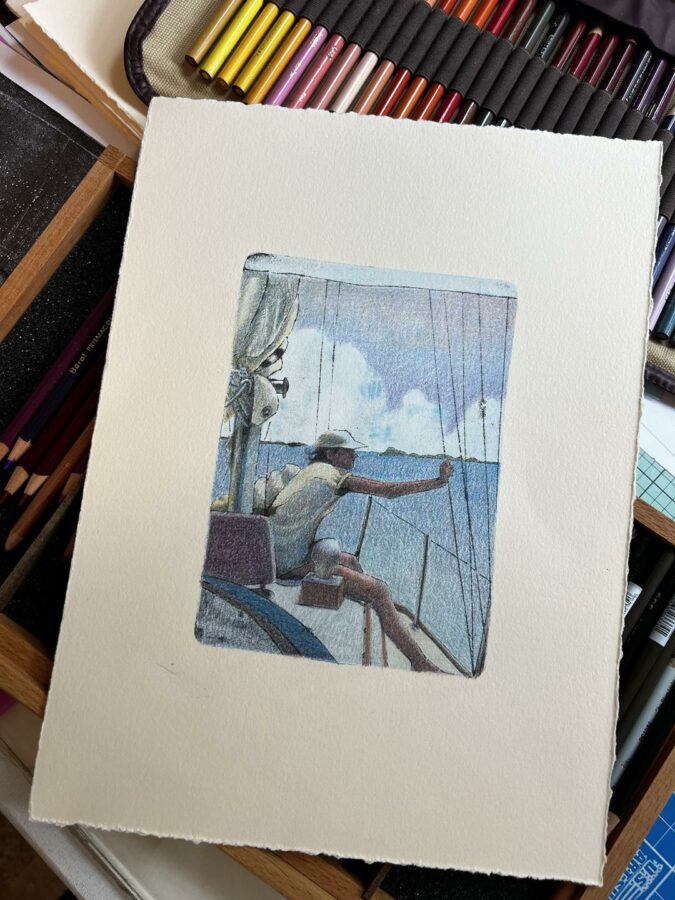
I spent 10 minutes gathering reference images from my photo library. The next day, I made a soft stack with newsprint as padding to help emboss my paper, and I started drawing.
Over the course of an afternoon, I made eleven ball point transfer monoprints from my gelli plate. This process is fast. If you work small (I used a 5×7 and an 8×10 – and I preferred the smaller plate), and you create your drawings ahead of time, you can have a very fruitful afternoon of making gelli plate drawing transfer monoprints.
TIP: Have your printmaking paper torn down to size (just a little larger than your gelli plate), so it’s ready while the acrylic is still fully wet for that final transfer.
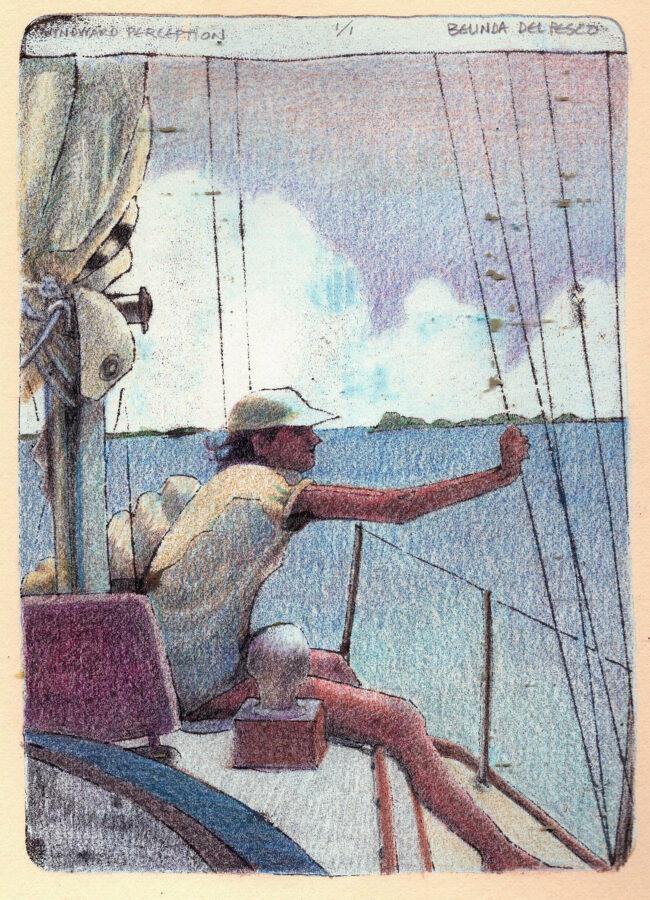
Windward Perception – 7.5 x 5.25 Monoprint – Available in my Etsy Shop here.
Art & Creativity Links for You
- In Los Angeles, California, there is an old brick building visible from the freeway that used to be a Pabst Blue Ribbon Beer Brewery. Now, the complex houses an Artist Colony, with several hundred studios, and a thriving community of painters, musicians, sculptors, photographers, and printmakers. This short documentary features several residents of the Brewery, including printmaker Dave Lefner. I watched him carving and printing a neon sign reduction linocut at the LA Art Show several years ago, and it has remained with me ever since.
- The Jack Richeson company is holding another online art competition, and you can submit your landscape art for the show, and the prizes. Richeson’s Landscape, Seascape, and Architecture competition has an entry deadline of May 19th, so if you jump on it now, you’ll have plenty of time to submit your work. See the details on the show here.
- If you’re wondering whether to include prices for your art on your website, Clint Watson – Bold Brush and Faso websites founder – has written an in-depth essay in three parts on the subject. You can read it here.
If you are interested in more of these gelli plate monoprint experiments I’ll be writing about next, you can subscribe to get each blog post via email (free) here.
Thanks for stopping by today, and I’ll see you in the next post –
Belinda
P.S. Winsor and Newton featured a quick tutorial for mixing watercolor and stitching in this short video.
Art Quote
Listen to your life. See it for the fathomless mystery it is. In the boredom and pain of it, no less than the excitement and gladness: touch, taste, smell your way to the holy and hidden heart of it, because in the last analysis all moments are key moments, and life itself is grace.
Frederick Buechner
Hi Belinda, This is by far my favourite Geli print post thank you so much – I had put away my geli plate – though I am now inspired to try more of this drawing technique.
I have just tried this and on third attempt seemed to have got the idea of the process. It was the pen tip size I needed to explore then the pressure of printing – then the having a book to put weight on final print was perfect.
I always use acrylic paints for printing.
Thank you once again.
Hi Catherine, Thanks so much for your feedback, and your tips on the particulars that made your prints work better. Those details may help other blog visitors experimenting with this process. We get better – together. 🙂
Thank you for sharing all your tips! Your work is so beautiful and inspiring. I look forward to your email posts.
Hi Beverly – Thanks for your compliments and encouragement. Happy creating to you!
Hi Belinda, thanks for sharing this❣️
Tried it today and I’m quite happy with this first trial, dying to do some more now! I ended up using pastel pencils for the colour…
Hi Christine – I’m so glad you’ve had success with your gelli plate and ballpoint experiments. I love the idea of the pastels to add color. Carry on, and make a ton of fun monoprints!
Thanks so much, Belinda. My students use ballpoint pen for their Daily and Weekly sketches and this could be a wonderful way to take the drawings to a new level.
Hi Kathleen – I hope your student’s experiments are fruitful, but keep in mind that the pen has to really *emboss* the paper. Traditional sketches tend to be light-handed, and this type of transfer works best when the pen creates a ‘tunnel’ in the paper so it doesn’t touch the paint when it’s laid face down on the wet pigments. Experiments would be fun, for sure though.
I really phrased that last comment poorly! Of course, if you frame under glass then it’s okay ;). I should’ve asked if that’s what you do 🙄.
Hi Nancy, regarding framing these monoprints – yes, I would mat and frame them under glass or plexi, exactly the same as I would any other print or watercolor. Matboard will prohibit the glass/plexiglass from making contact with the acrylic and whatever additional media you use on the prints. And they look incredible when framed. 👍🏽
Hi Belinda – as always, so inspiring, and I cannot wait to try this. When you frame these monoprints, with your ballpoint Gelli plate technique and colored pencils, I assume you frame them under glass to protect the paper. Is this okay for the acrylic line work since the paint is not very dense? Thank you for sharing your expertise and talent!
Oh , Boy! Can’t wait to read this! Giddy with excitement!
Hi Shelley – Oh good, I’m glad you’re excited to try this. It may take a few tests to get it right, so I’d suggest starting with a sheet of different marks, rather than a time-invested drawing. That’s what I did first (swirls, parallel lines, cross hatches, etc.),to understand how much pressure was required in the initial drawing, which type of mark transferred the best, and how much acrylic to roll out, etc. Happy printing!
Read it. Loved it. Thank you so much for the suggestion. Will do. Excited.
Belinda, I’m always amazed with the things you show us that challenge our little gray cells. I’ve played around with Gelli plates, but you take it to a whole new level with your printing expertise. Now there is something else to try on my artistic “to do” list. Thanks for the inspiration.
Mickey
Hi Mickey, Thanks so much for the feedback. I encourage you, and then you turn around and encourage me. It’s the Creative Boomerang of friendship. I hope you give this approach a try. It sure is fun. 🙂
Belinda, so glad you have found the magic of the gelli plate. I became enamoured with these things over a year ago. I have even taken the plunge of making my own plates with glycerin and Knox unflavored gelatin which can then be formed into all sorts of shapes by using cookie cutters and remelting the left over. Then you can also make larger gelli plates on clean and totally flat cookie sheets. What a miracle invention! I have yet to try the ball point pen & crayon resist or Yaetes other idea of making soft pastel transfers on the gelli plate. Guess today will be taken up for that. Thanks again, Belinda, for all the great info.
Hi Cathy, Thanks for your nice note. I’ve heard about making gelli plates into customized shapes on cookie sheets in the kitchen, and it sounds like an exciting Mad Scientist afternoon of fun. I hope you do feel inspired by the tutorial video Mark Yeates posted, so you can begin further experiments very soon. Thanks for stopping in!