
Making a Small Still Life Etching
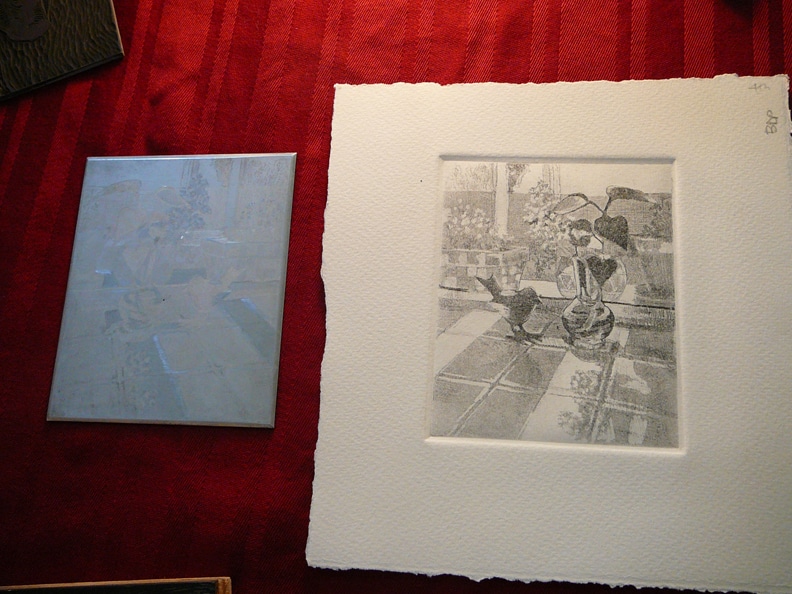
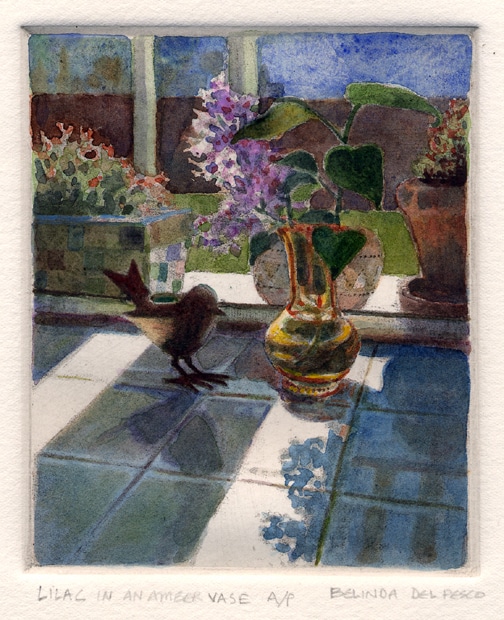
This etching is from an artist’s proof in an unprinted edition. (An Artists’ Proof is a test print, and they’re used as a reference to make adjustments to the plate. Subsequent proofs will be printed till the final print matches what the artist had in mind for the etching.)
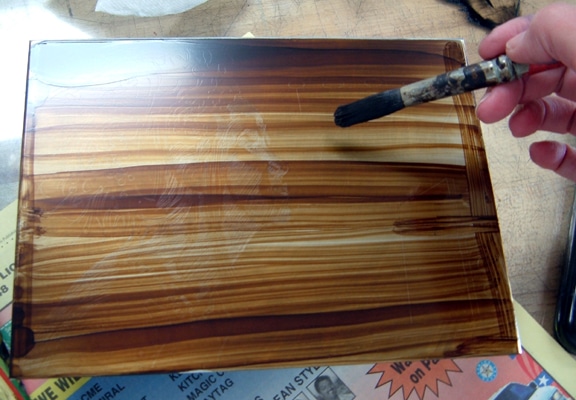
The zinc plate for this etching (see the photo below) needs a few more dips in an acid bath to darken areas on the print. I don’t use acid in my studio, so the remaining work will require borrowed time in a fully equipped print studio.

The Sequential Nature of Printmaking Methods
Etching can be a process-intensive rotation of successions, particularly if you have a specific image in mind.
Compare the value of the lilac leaves in the vase and the bird figurine in the proof print above with the next-stage proof print below, and you’ll see evidence of my adjustments to the plate in acid to render darker values.
Changes are made subtly, with repeated-but-short intervals in the acid, until the print is ready to edition.
Printmaking Forces Us to Slow The Roll
When an artist’s proof print meets the artist’s vision for what the edition should look like, the mark of A.P or Artist’s Proof is replaced with B.A.T. – bon à tirer; translated from french: “ready to pull”.
Artist Proofs and B.A.T. prints are not usually included in the final edition made available for sale, but some print collectors search for these mid-process pieces exclusively, because they show evidence of the artist’s process, they differ from the distributed and numbered edition, and they’re more scarce.
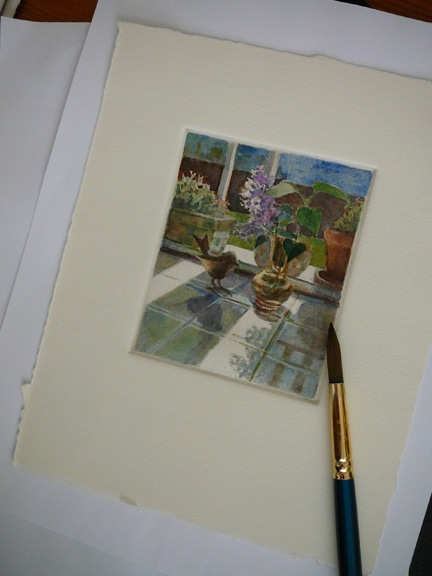
Adding Watercolor to an Artist’s Proof Print
When I paint a proof with watercolor, and then photograph the altered proof with my phone, I can look at the photo in black and white and get a preview of where I want darkest darks and lightest lights.
Doing this before I manipulate the ink-holding parts of the plate makes me more certain of my instincts.
You can do the same with your paintings: take a snap shot, switch the image to black and white in your image editor, and if you’re feeling really adventurous, flip the image so you’re seeing a mirror image of your work in process. This will give you fresh eyes to see where adjustments are needed, and you can jot down a list of alterations and fixes in your painting for the final stages.
Watch artist Candice Bohannon ink and wipe her beautiful copper plate of this persimmon still life in her newly posted video (and note that her lovely, limited edition prints are available for sale here). I’ve just subscribed to her channel with hopes that she’ll be posting more process footage from her studio.
Metal Plates for Acid-based Etching
Etching plates can be made from copper, aluminum, steel or zinc; you’ll see copper in Candice’s video, and zinc in the images from this post.
Different solutions are used to etch the plate, depending on which metal you’re using (ferric chloride or nitric acid, etc.)
Etching from a metal plate is one of the methods of printmaking referred to as intaglio. The word intaglio (intal’yo) is from the Italian word intagliare, to engrave.
Intaglio generally refers to prints made from contact with ink sitting below the surface of the plate, hiding in the incised line-work either etched with acid, engraved with a tool, or built into the plate with layered cut-outs attached to the matrix, like a collagraph print.
This style of printmaking requires a lot of pressure to push the paper into recessed line work to grab the ink, so a press (or a small craft embosser) is often necessary to pull a good print.
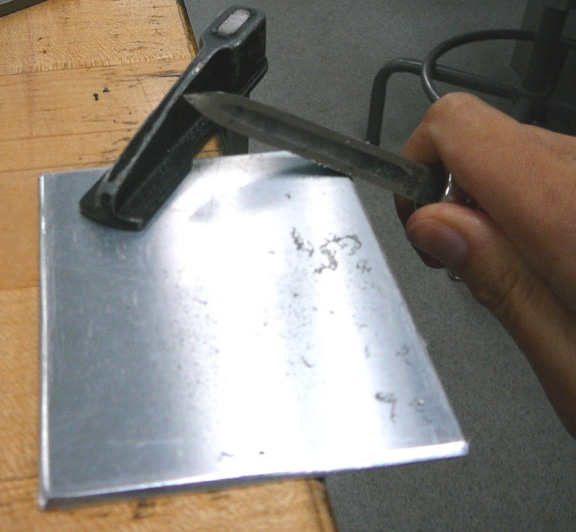
Preparing a Zinc Etching Plate
There is some important prep work to be done to a plate before making an etching.
The sharp, upper edges of the plate are beveled to avoid cutting through the paper (and the press blankets) while going through the press.
The 45 degree angle imposed with the bevel facilitates getting the tightly adjusted cylinder on the press up onto the plate by acting as a “ramp”.
The surface of the plates are polished to a mirror finish by sanding with 320, 400, and then 600 sandpaper, followed by printmaker’s polishing compound, and then a degreaser, before being coated with a waxy ground.
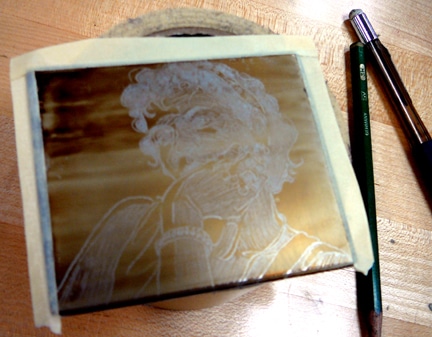
Drawing through Wax Ground
The artist uses an etching needle to draw an image into the ground, which exposes the metal. The plate is dipped in acid for a set period of time, so the acid can bite into the metal along the exposed line work.
The plate is removed from the acid, the ground is cleaned off, and then the plate is inked, wiped, and test proofs are printed.
The plate is again covered with ground, drawn on some more, and dipped into the acid again. Once the proof print is ready to edition, the inking and printing process is repeated for the final edition, as you can see in Candice’s video above.
A Brief Survey of Acid Bath Etching
So that was probably more than you ever wanted to know about intaglio printmaking, Right!?
But now, when you look at a lovely etching, perhaps you’ll have visions of the artist’s hands working the plate, inking and wiping, and pulling the print.
Etchings are hand-made, original works of art, and unless you know a printmaker who invites you to hang out in their studio, or you’ve taken a class in etching, it’s a little hard to grasp the process.
We’ve all seen (& loved) etchings by Rembrandt, Whistler and Cassatt; printmaking has been around for hundreds of years, and I am so very grateful that artists today are still using it to make and share editions of their beautiful work.
Hat tip to Candice Bohannon for inspiring us and sharing the process for her beautiful persimmon print! 🙂
Thanks for visiting today! I’ll see you in the next post –
Belinda
P.S. You can subscribe to this blog and get each post as an email here.
Art Quote
Train the people to be lovers of what is best in their own particular work, and Art will again become as near and dear to the people as it was when the great men of the Renaissance came trooping from the workshops of Italy to fill our galleries with the immortal results of their splendid labor.
~John White Alexander (1856-1915) from a speech – cir 1901-1912
What a labor of love that process is! Thanks to your blogs, I am appreciating and understanding the print process so much better than I did years ago. The big reveal must seem like a birthing process – and the way printmakers handle the newborn print has a sacredness to it! No inkjet, laser or fancy 3D printers can replace craft-people unless humans evolve into robots!!
Hah! Gayle, you are so right! It really is a birthing process, and the lesson in it is always to Let Go of expectation, because every single print you pull is a surprise. Even after painstaking work and attention to detail. You lift the paper off the block while holding your breath and wondering what it will reveal. So many good lessons in that. Thanks very much for visiting and always leaving such lovely insight. xo B.
Great description of the intaglio process (and I enjoyed every bit of information) and beautiful work. I have to admit to loving the B&W version of your lilacs. The values you achieved with the acid baths are just wonderful.
Thanks for that, Gabrielle! I’m glad the details on etching process didn’t make you crave a nap. 🙂 ANd thanks for the compliments on the lilac etching – I have a vision for it with more contrast, and I’ll share it on the blog for comparison when I get it finished!
I think your print looks perfect as it is, without any additional work.
You are a bowl of cherries in a hammock with a good book, my friend. xoxo