
Drypoint Printmaking without a Press
I took my first printmaking class in 1983. I bought my first press in 2012. Three decades with no press.
During the press-less years, I borrowed time on friends’ presses, and audited classes at a junior college with a print lab. And I did a lot of hand transfer experiments. Does this sound familiar?
Experimental Printmaking
Back in the day before I bought my etching press, I tried every method I could think of to make prints without a press, and that lead to some aha-moments. Subscribers to this blog (and my youtube channel) have asked for tutorials on printmaking without a press. So let’s take a look at how to transfer a drypoint etching without a press, shall we?
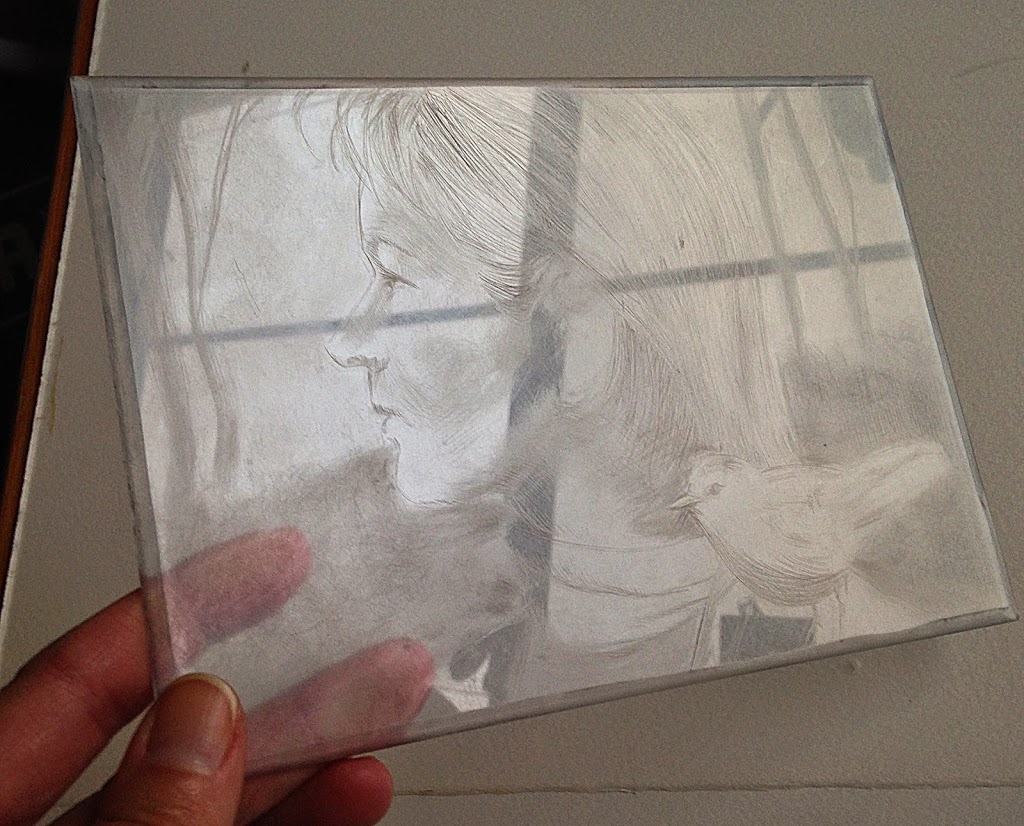
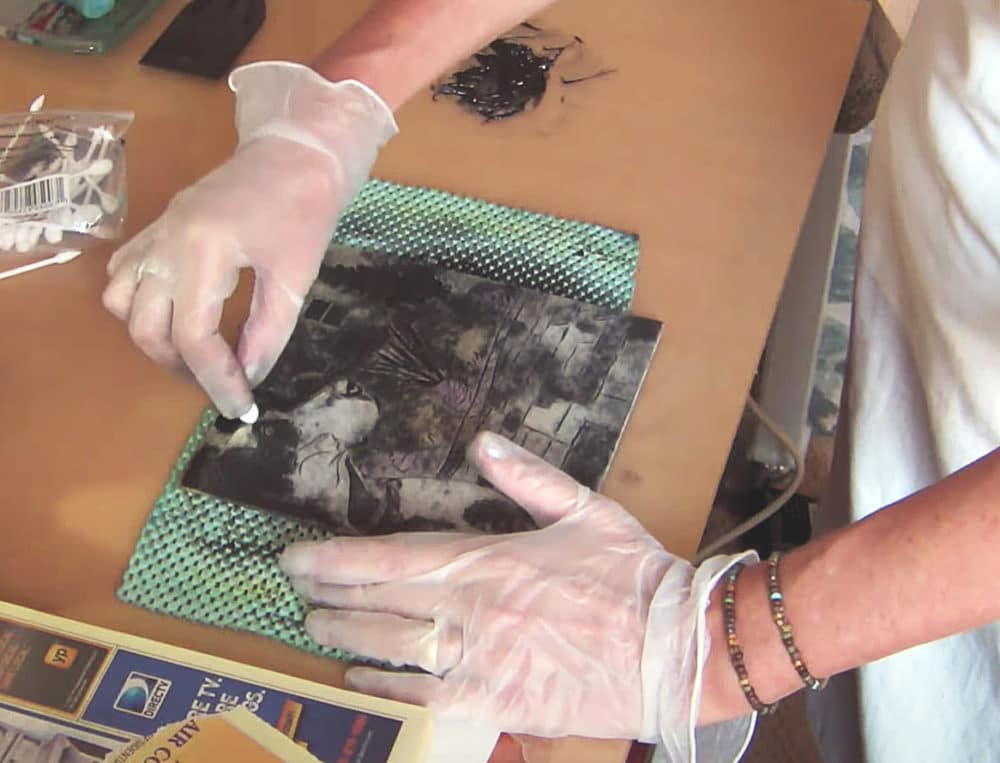
Drypoint on Plexiglass
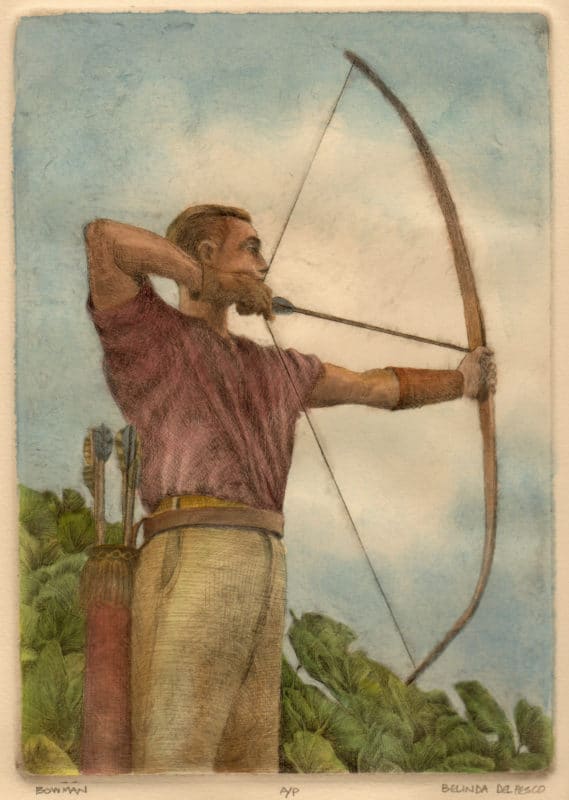
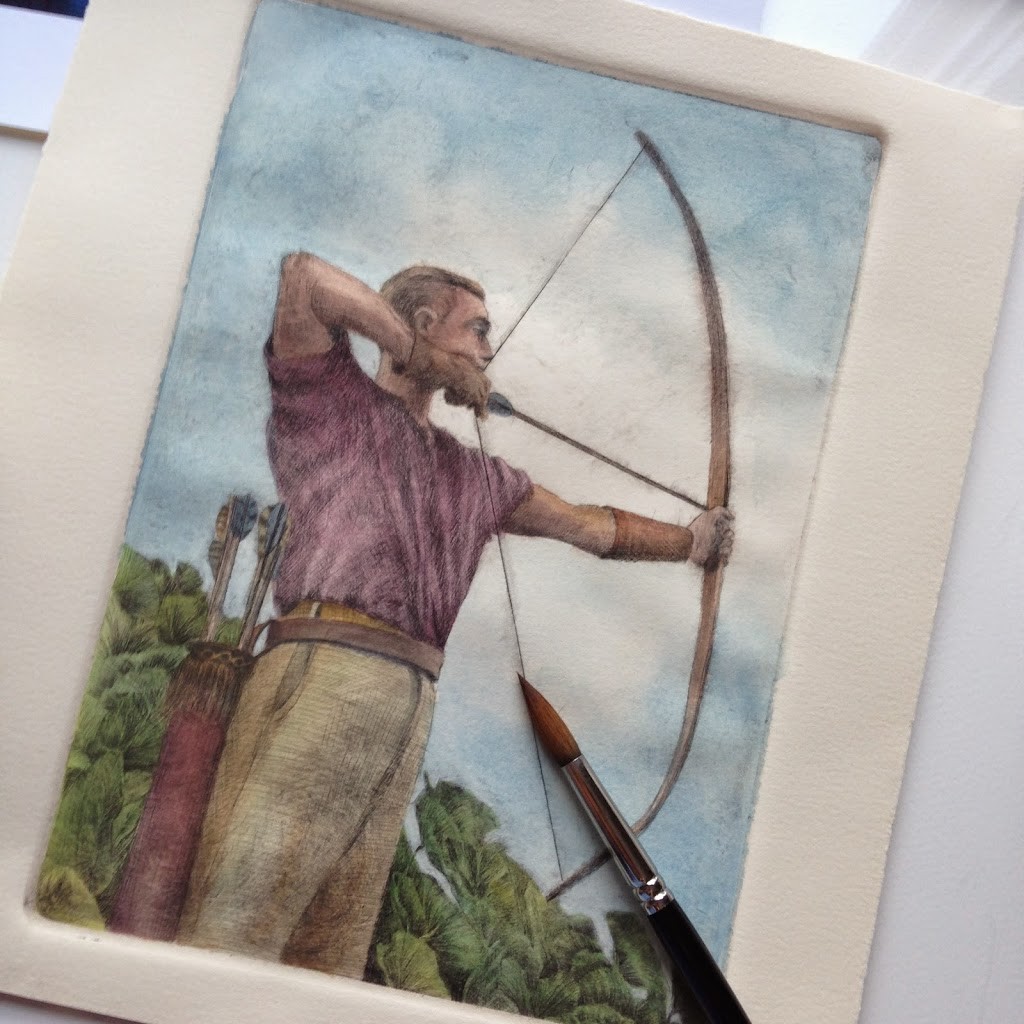
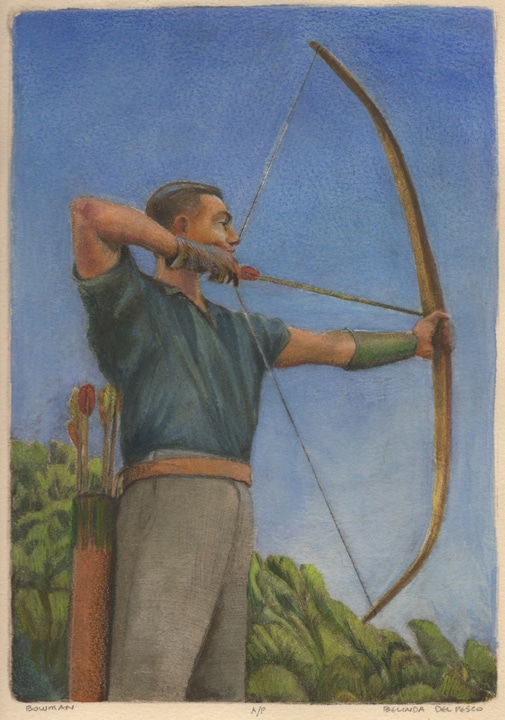
I used the drypoint engraving of the archer (above) to demonstrate how to print an intaglio style plexiglass plate without a press.
If you’d like to see a video of that process, click here.
But here’s the thing: there’s no secret sauce, no dragon-guarded, confidential method to printing without a press. It just takes time, an absolutely stable, unmoving sheet of paper held against the inked and wiped drypoint plate, and lots of pressure.
An Investment of Time
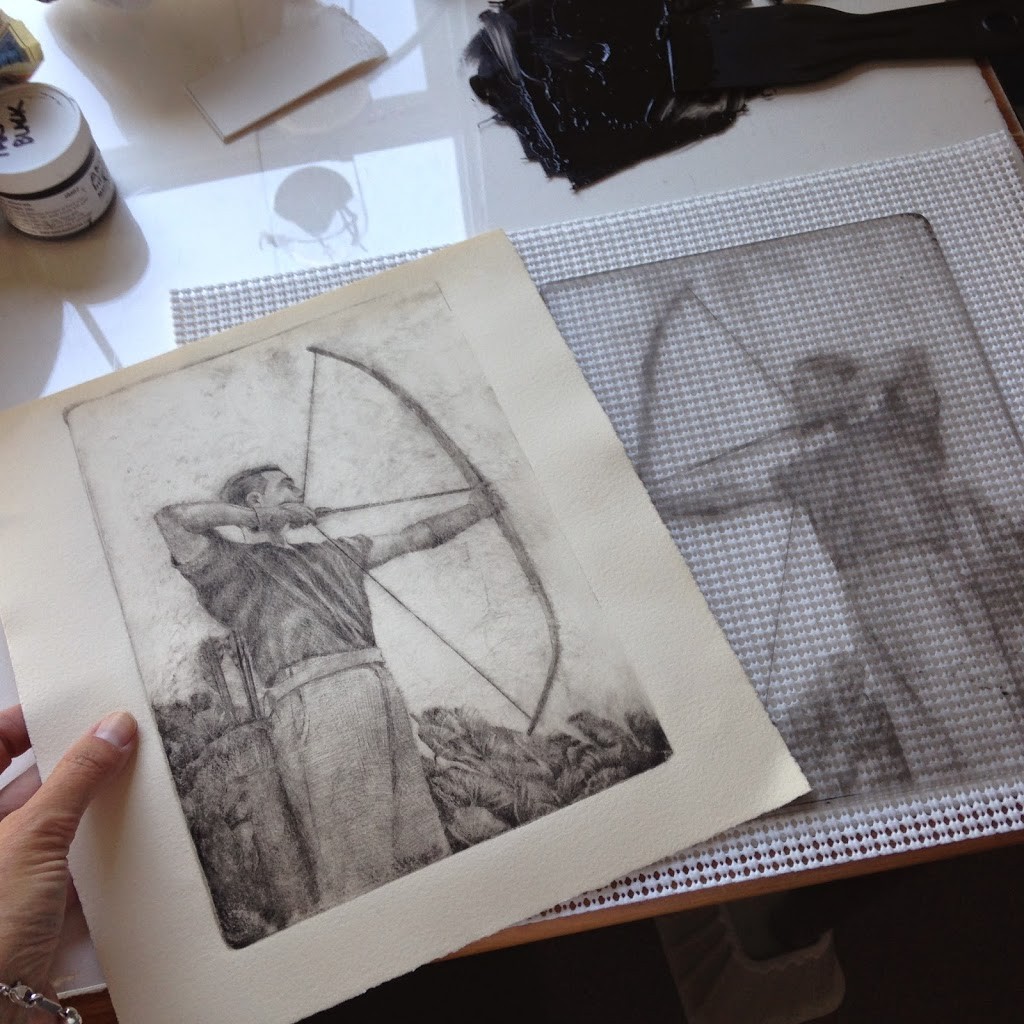
With an etching press, after inking and wiping the plate, I can print this engraving in about 45 seconds… as much time as it takes to run the paper against the plate under the cylinder on my press bed.
With my hands, some non-skid and a cereal spoon, I can print the same drypoint, but it might take 45 minutes.
The line work might not be quite as sharp, because the soaked and blotted printmaking paper will begin to shrink as it dries during the process.
That minuscule movement of flexing, drying paper fiber moves the surface in teeny steps away from the incised line you’re trying to collect ink from. Each pass of the spoon pushing the paper against that line might kiss a slightly adjacent spot of ink, leaving a bit of a stepped or staggered line.
But it can be done. What do you think? Have you printed without a press?
Step by Step Instructions
You can watch a video demonstrating inking and printing this drypoint without a press on my YouTube Channel. (If you don’t see the video window below, you can watch it here.)
Round-up of Drypoint Resources
There are a number of other drypoint and intaglio printing tutorials and posts in the archives of this blog. If you’d like to harvest tips and tricks, visit these posts:
- Mylar, or drafting film, is a semi-sheer paper made from polyester. It’s used in architectural and commercial illustration, and it’s super tough. Here is a drypoint etching portrait from a sheet of mylar.
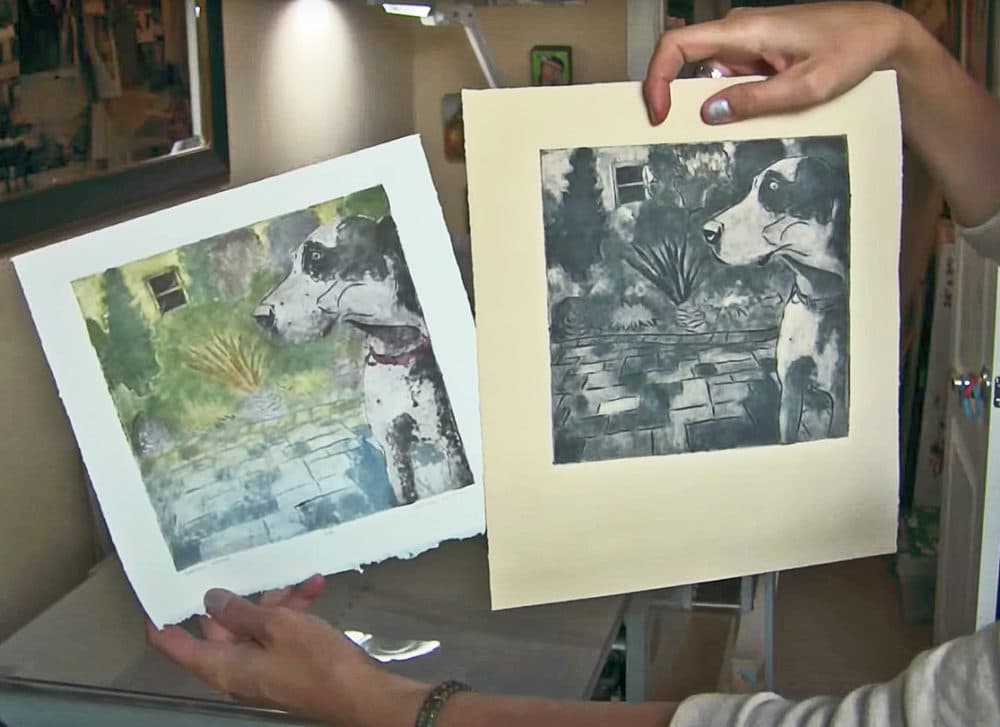
- Watch a demonstration of a combination of two printmaking methods – a drypoint and a collagraph. The result is a vintage style, illustrative print of a mermaid swimming with a whale. The color was printed using a collagraph plate made from mat board, and the line work and texture was printed from a plexiglass drypoint, with a bit of carborundum.
- Lucky for us, there are experimental, resourceful artists out there who have discovered small press alternatives. Here is a teeny portrait drypoint from plexiglass, and a fantastic list of printing press alternatives, including pasta machines and stencil and embossing machines.
Make a Drypoint Engraving
I hope you’ll give hand-transferred drypoint printmaking a try. Keep your first print small, and not too fussy. Simple lines, with not a lot of crosshatching – no bigger than about 5×7 should do the trick.
Understanding which paper, ink and pressure works best in your region will be key, so put your experimenter’s hat on. Most of all, be sure to have fun with it.
Leave us a link in the comments if you post your results somewhere we can see.
Thanks for stopping by, and I’ll see you in the next post!
Belinda
P.S. You can subscribe (free) to get each new post of tips and tricks as soon as they’re published by signing up here.
(Available in my Etsy Shop)
Art Quote
If we have plain old ordinary fear, then we are within reach of a solution.
Fear has been with humankind for millennia and we do know what to do about it — pray about it, talk about it, feel the fear, and do it anyway.
“Artistic” fear, on the other hand, sounds somehow nastier and more virulent, like it just might not yield to ordinary solutions — and yet it does, the moment we become humble enough to try ordinary solutions.
Julia Cameron
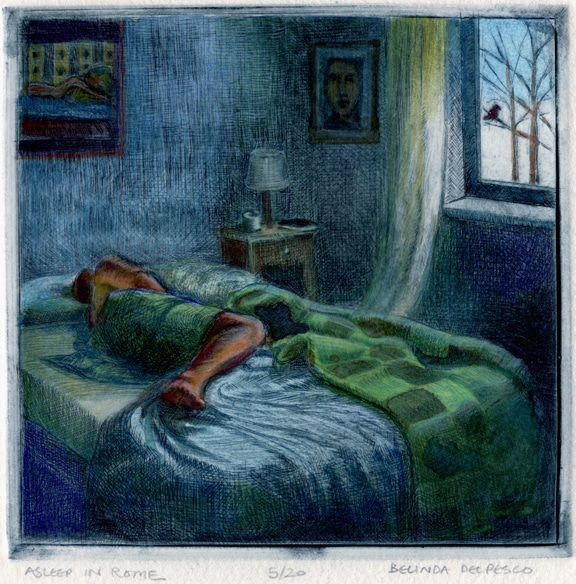
Drypoint Examples


Art Supplies and Tools Collagraph printmaking colored pencil How To Interiors in Art Landscape Art Painting Small Portrait and Figurative Art Still Life Art Travel with Watercolor video Video Tutorial Watercolor Glazing Watercolor Painting

Hi Holly, etching and engraving are terms that are used interchangeably in the world, but in an American printmaking studio, etching refers to a plate (usually copper or zinc) etched in acid, and engraving is a manual process done by hand with tools to incise lines in a plate.
Pressure to engrave a drypoint will vary depending on your plate material and tools. Test print a few lines of your design to see how they transfer. Or better yet, make a test plate of simple lines, cross hatching, stippling and assorted mark making and then print it to see what you get.
The ink you choose, your wiping material and skills, and your type of paper, whether you soak and blot it, and The pressure to print are all variable factors, so play with the materials before you expect mastery. It’s a lovely process that gets more fun as you get familiar with each part of the sequence.
Here are some video tutorials: https://www.youtube.com/playlist?list=PLpicUVTRQqwc8Kn1ZUYtsvUEa3ntXW5lb
What’s the difference between an etching and an engraving? And how much pressure do you typically use when making the lines in the plexi?
@nancy, thanks for your compliments. In my opinion, a press does result in a sharper, more saturated print, but you *can* transfer a drypoint by hand, if you’re slow and deliberate in the process. I’m glad you liked the video. 🙂
Love this, and the quote. Ordinary solutions. Whatever you use, you create extraordinary art. Your major fan this side of the border knows. Me!
XOXOXOXOXO Barbara
I really love the soft colors you get with your watercolors on your prints. They’re beautiful.
Thank you for sharing your video. I’ve done wood block prints by hand but always assumed that you needed much more pressure for an engraving.