
Printing a Drypoint Engraving without a Press
In this series of printmaking projects using stuff around the house to make art during the Pandemic, we’ve explored drypoint etching (also called drypoint engraving):
- Printing a Drypoint Etching from a plastic Trader Joe’s biscotti container with a stomp-method (hint: your feet are the press)
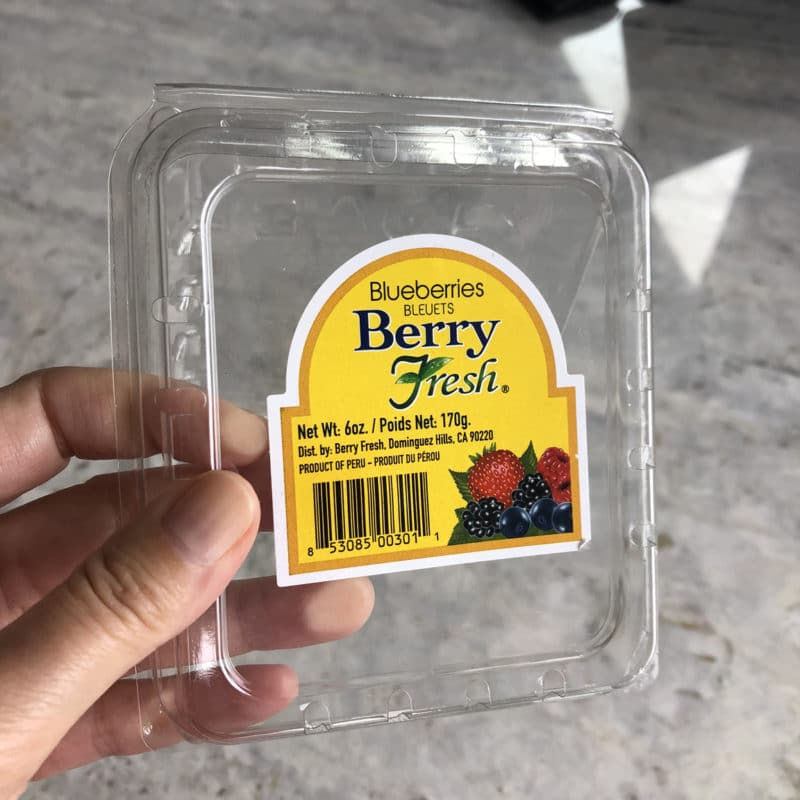
- Making a Monotype without a press, from a blueberry container using acrylic paint and watercolors (hint: this one is great if you don’t have inks)
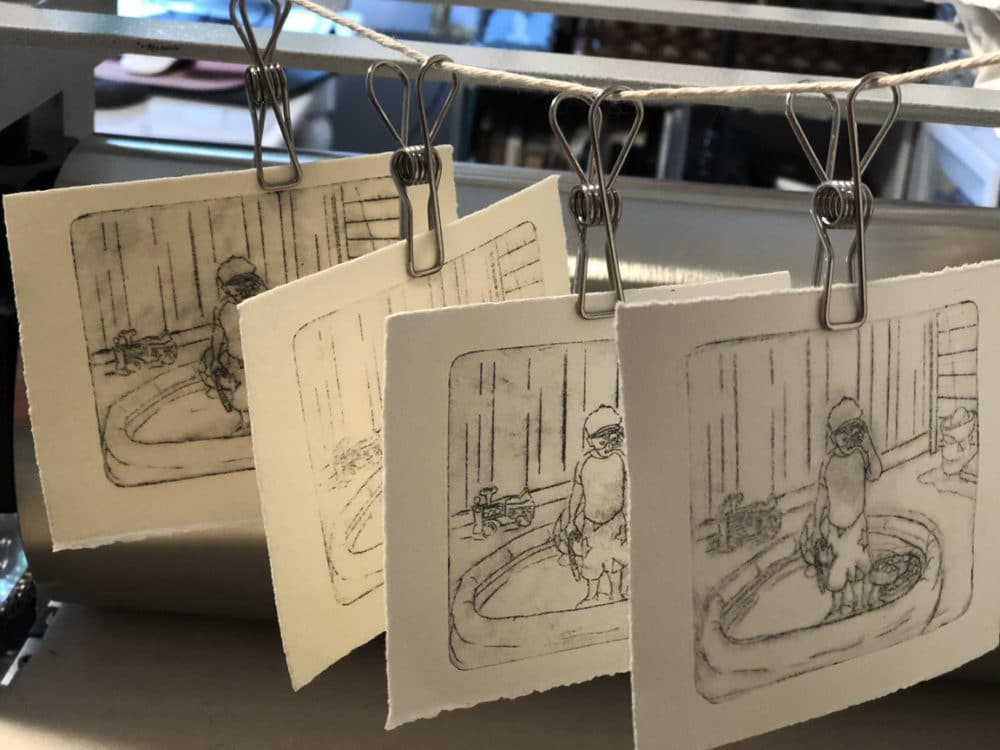
- Print a Drypoint Engraving without a press, from a plastic lettuce box, using a spoon, and then adding watercolor (hint: this one has a tutorial video)
- Transferring a Drypoint Etching at Home without a Press can be done, but there are some considerations to keep in mind. Here is part 1 of two experiments on recycled plastic to demonstrate what to avoid.
Recycling Plastic in the Art Studio
Once you start snipping plastic to make art from your produce, nut and baked goods containers, you may never stop. I’m speaking from experience. As you can tell. Since this is my forth recycled plastic printmaking project. And there’s more to come. (Do I need a printmaking intervention?)
When my husband observed me studying the lid from a plastic container of tomatoes, he said “No! Put that in the recycling bin!”. I did.
Later, I tried to explain. “Here’s the deal with the plastic containers….” He eyed me doubtfully. I forged on: “When you buy plates to make drypoints, whether it’s copper or plexiglass, you’ve paid money for that little rectangle of material. There’s a subtle pressure to ‘get it right’ so you can justify the cost.”
He was still listening, so I rambled more: “When you’re snipping plastic from a lettuce box, it’s no additional cost, and you just rescued the material from the dump! There’s a freedom in that. A whole pantry to experiment in.”
(The next day, he left a plastic deli lid near the sink for me.)
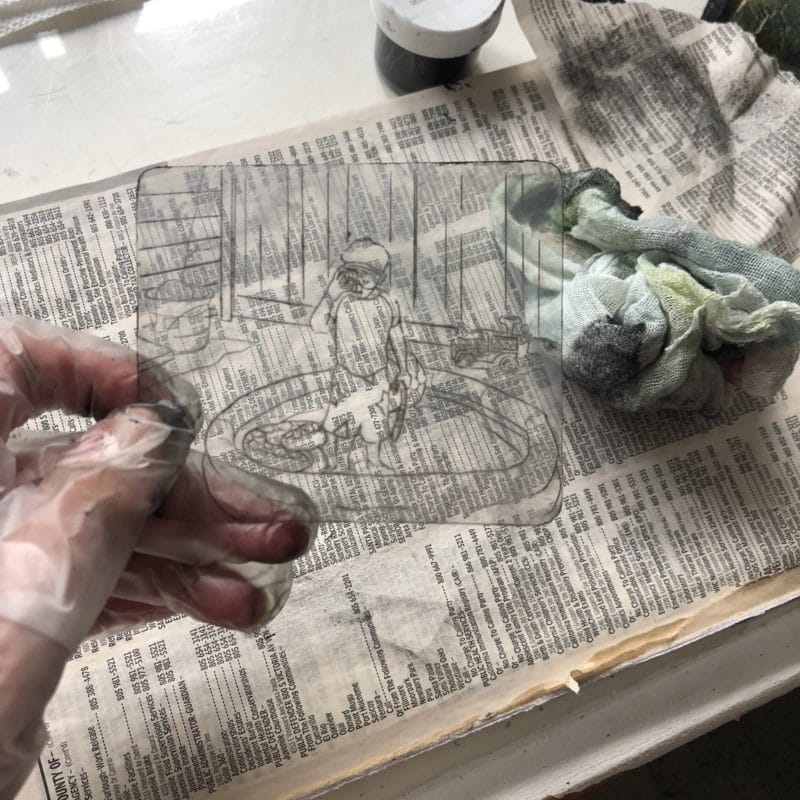
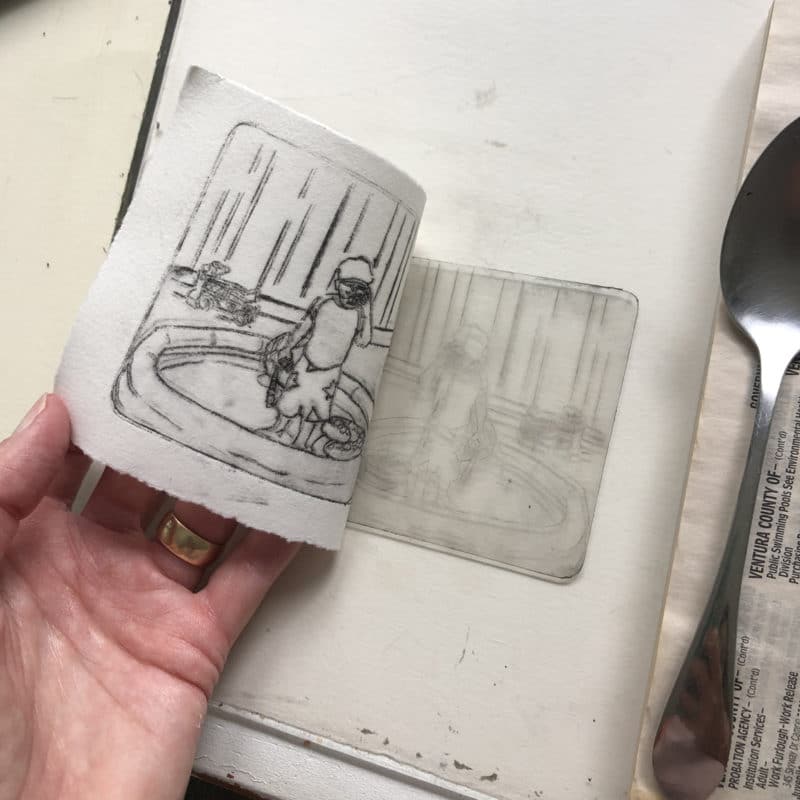
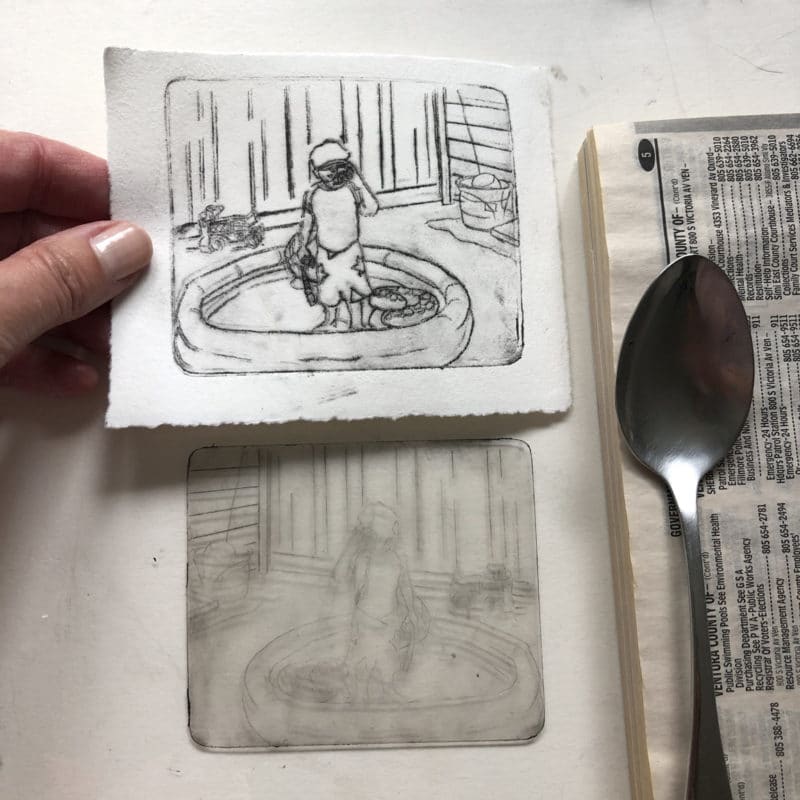
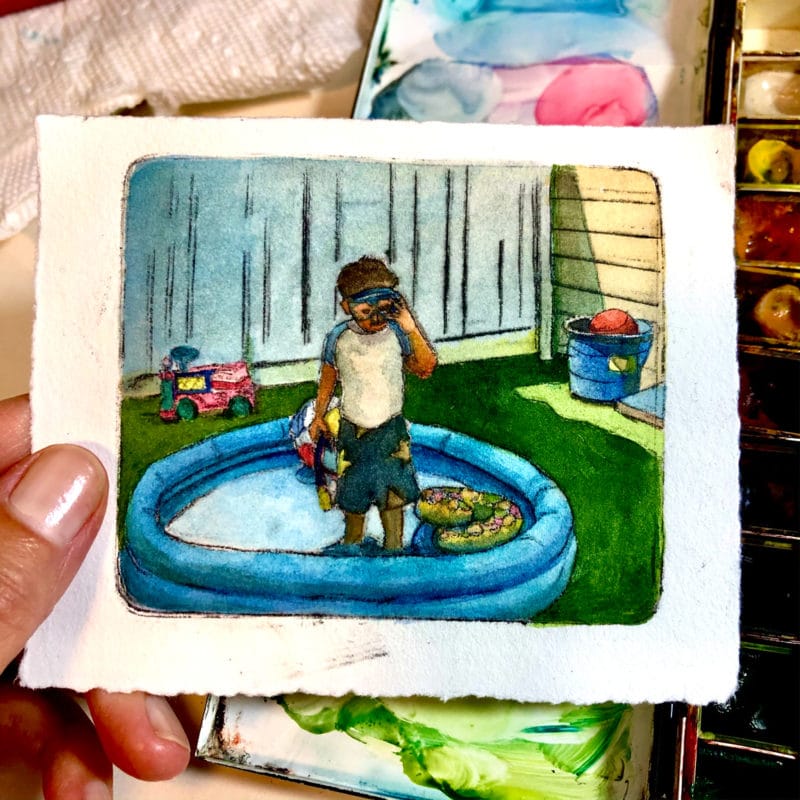
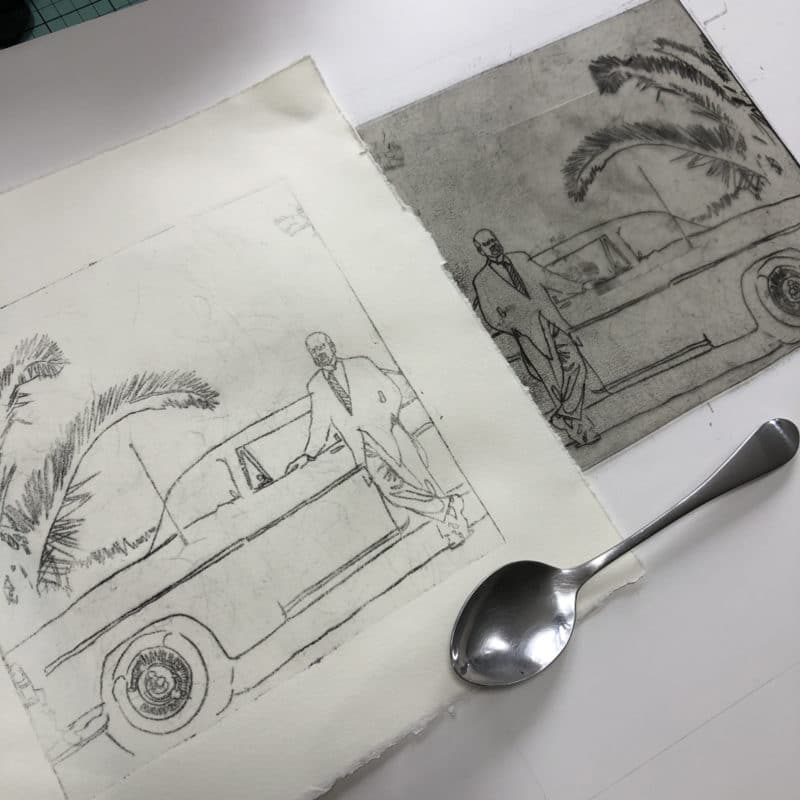
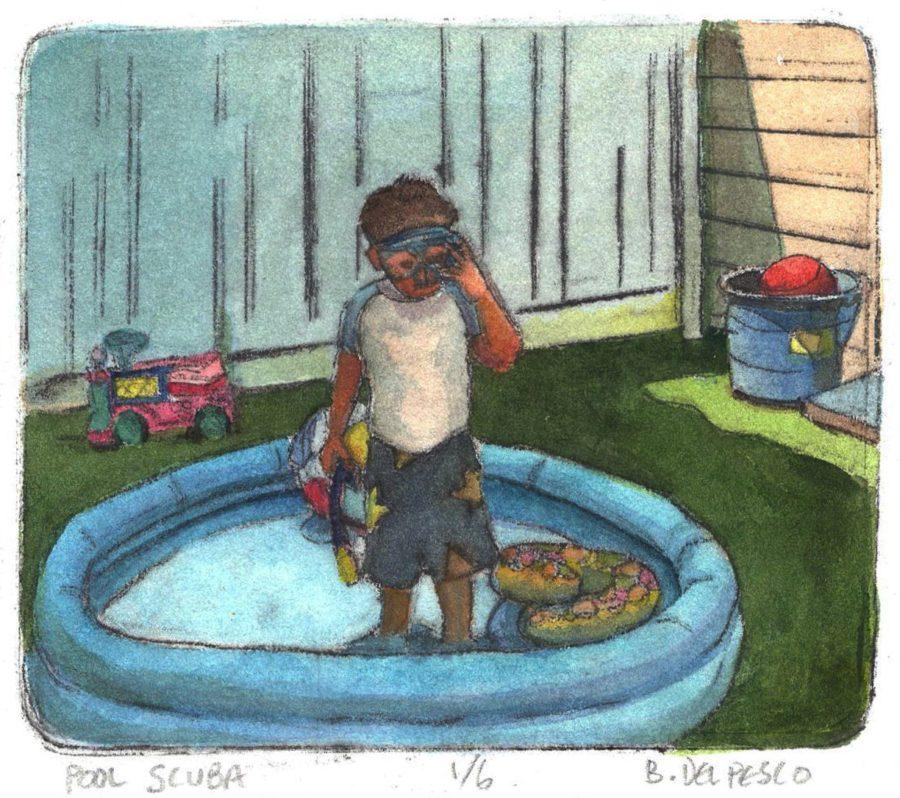
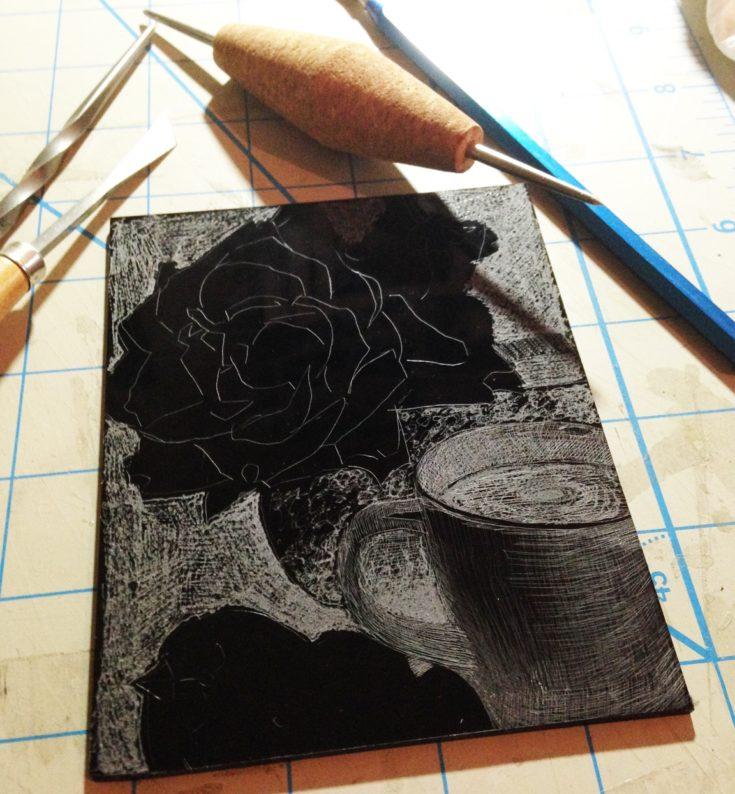
Transferring the drypoint without a press by rubbing it with a cereal spoon.
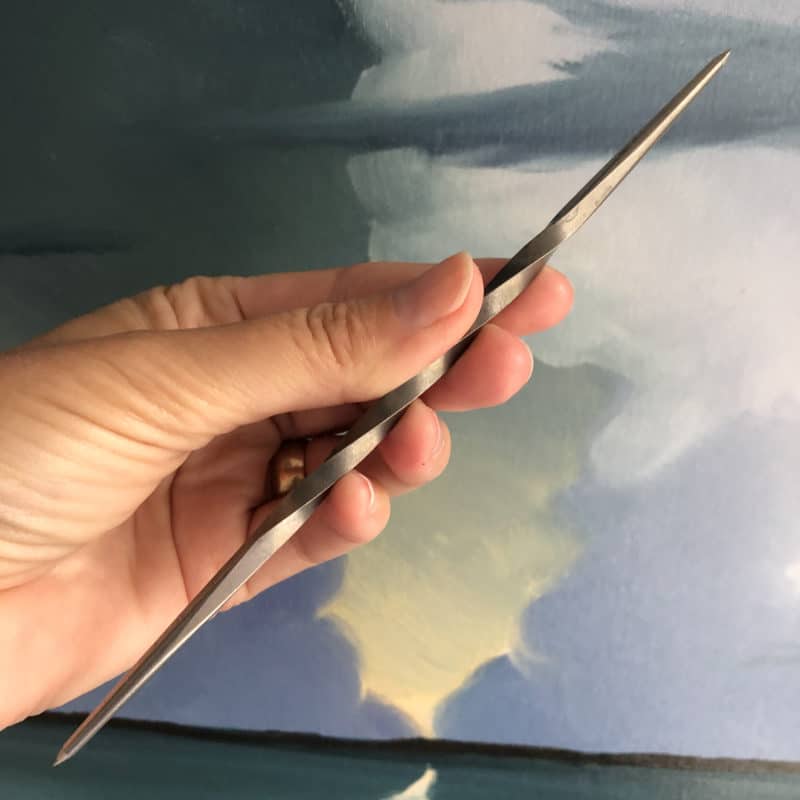
About Engraving Scribes
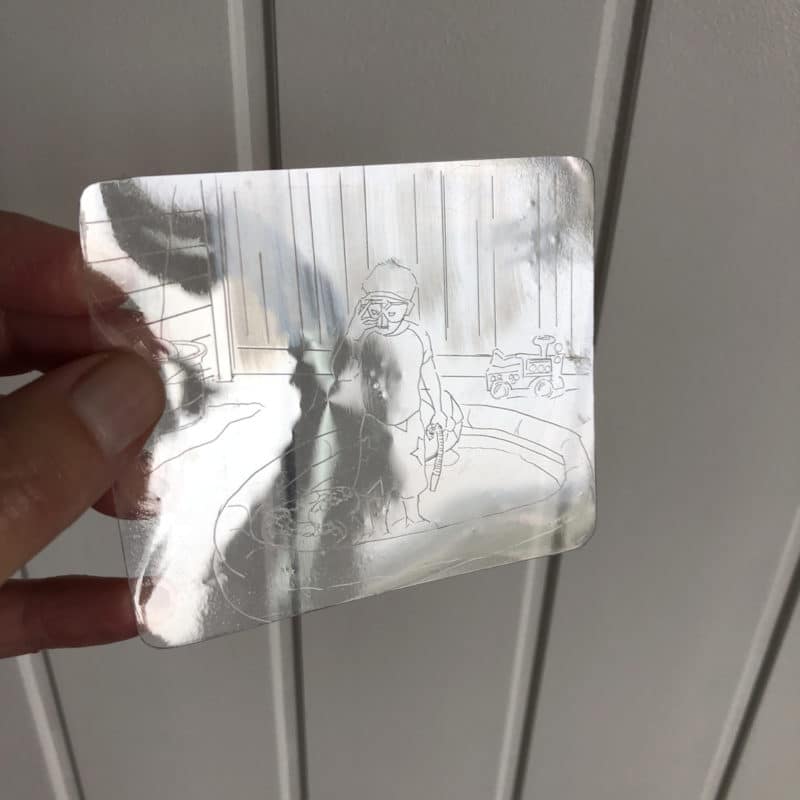
Choosing an etching scribe can be confusing if you’ve never used one. The process to scratch, cut grooves or engrave logos, designs or words into a hard flat surface has been around for hundreds of years. Think of the word inscription – the word scribe is tucked into it.
I have three different scribes for drypoint in my tool box. My favorite is the twisted scribe (below) and a cork handled scribe. I like that the point is long enough to go a little deeper if I want to – especially for crosshatching. There are printmakers who swear by the carbide tipped scribe, or the diamond tip scribe, and still others who prefer an electric engraver.
I’d recommend that you start with the twisted scribe, because it works well, its inexpensive, and one will last you a lifetime. If you wish it was the cork handled version (which can be hard to find) you can wrap the middle of the tool with rubber pencil grips, layers of cloth, yarn or yoga mat rubber for a softer grip.
Etching vs Drypoint vs Engraving
You’ll hear the words engraving and etching used interchangeably, even though printmaking nomenclature assigns them to different methods.
Engraving is usually referring to a dry process. Engraving with a sharp scribe into a hard surface. There is no acid involved. The resulting print is called a drypoint engraving.
Etching is done by coating a metal plate with a waxy sealer, and then a scribe is used to draw an image into the wax, which exposes the metal. The plate is submerged into acid for a period of time, and the acid bites into the metal all along the drawn lines. When the plate is removed from the acid, and cleaned. When it is inked, wiped and printed, that’s called an etching.
Engraving Terms
Engraving – to the rest of the hand crafts out there – is done on leather, marble, whale bones, glass and rock. Tools like scribes, awls, hammer and chisels and hydraulic water cutters are used. Etching is done with acidic gels on glass, laser cutters on wood, and rust-eating baths on large machinery. The words engraving and etching mean the same thing to the general public. Most people refer to the method in this post as a drypoint etching, so we’ll just go with that, because we aren’t Terminology Police.
However, this term-mixing matters to you if you’re interested in learning more about drypoint engraving, because searching google for examples about drypoint engraving works best when you expand your search terms to include:
drypoint, dry point, engraving, etching, intaglio, a la poupee, scribing, scrimshaw and grabando, etc. Capiche? Think about all the ways other artists, even in other languages, refer to this printmaking method. Use those search terms to see the widest variety of examples.
Drypoint Printing FAQ
We are all staying inside a lot more than usual. A few art projects may be just the thing to lighten moods, busy fretful hands, and sweep a little satisfaction into your day.
My intent with these posts is to encourage you to look for items around the house that you can make art with. After the last few drypoint printmaking posts, a river of emails arrived with common questions, so I’ll answer a few of them here.
- Can you make drypoint etchings with oil paints? I’ve never tried it, but I’d say give it a go, and see if it works. You *can* use water soluble crayons on your incised lines, and print them to the same soaked and blotted BFK Rives printmaking paper I used. And if you make drypoints with water soluble crayons, be aware that painting them with watercolor will re-wet the crayon, so keep additional media dry – like colored pencil.
- What if the plastic in my grocery stores is super thin? That will work too. I’ve made drypoint etchings on sheer sheets of mylar drafting film, which is .005 inches thick. (Akin to a sheet of printer paper.) You can still make a drypoint very successfully on very thin plastic. Be careful not to press so hard you go through the material. Consider the pressure with your scribe to be just a skosh harder than a scratch.
- I have a printmaking baren. Can I use that to transfer a drypoint etching? You can, but I’d recommend using a metal spoon, especially for a nice small print. If your printmaking baren is the speedball teflon version, the pressure is distributed across a broad surface, so it won’t be firm enough to get a transfer. With a spoon, all your pressure is concentrated in an area the size of a pea. Keep the paper steady (see this video for an example of paper that got away from me during the transfer), and peek often to see that your lines are coming across nice and clean.
Printmaking Married Recycling and Made a Drypoint Etching
I hope you’ll give drypoint printmaking a try. With a cookie lid, you could make a small set of cards, or a series of petite comic strip stories about your family from old photo albums. Just cut your plastic the same size as the photos, and then trace the photos onto the plastic. Then, ink and print the images! No drawing skills required.
If you plan to paint your drypoint prints, be sure you’re using a printmaking ink that dries permanently. (Akua intaglio ink and Cranfield Caligo Safewash Etching Ink will work, but Speedball water based ink will re-wet.) If you are using ink that will re-wet, use dry media like colored pencils or pastels to color your drypoints.
Have a ton of fun, and come back to share links where we can see your new work.
Thanks for stopping by today, and I’ll see you in the next post –
Belinda
Art Quote
I have touched with a sense of art some people – they felt the love and the life. Can you offer me anything to compare to that joy for an artist?
Mary Cassatt
Drypoint on Plexiglass or Recycled Plastic Printmaking Supplies
Here is a list of supplies to help you prepare to make a drypoint print from plexiglass, drafting film (mylar), or recycled plastic.
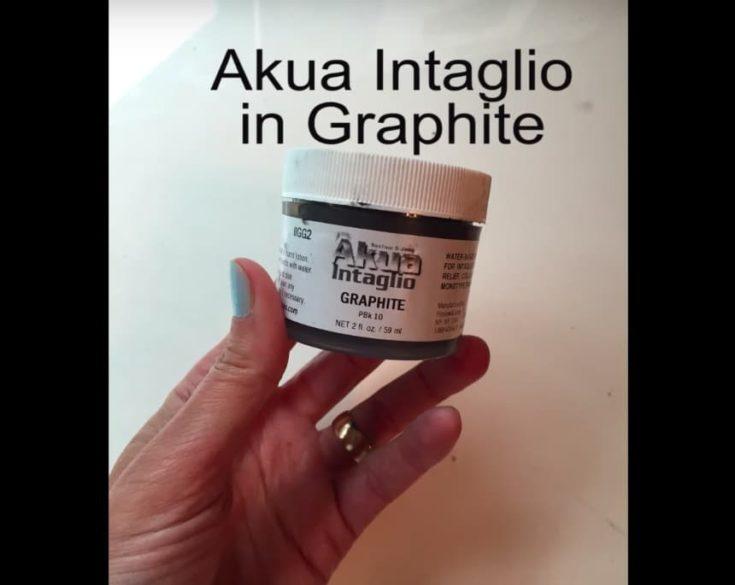
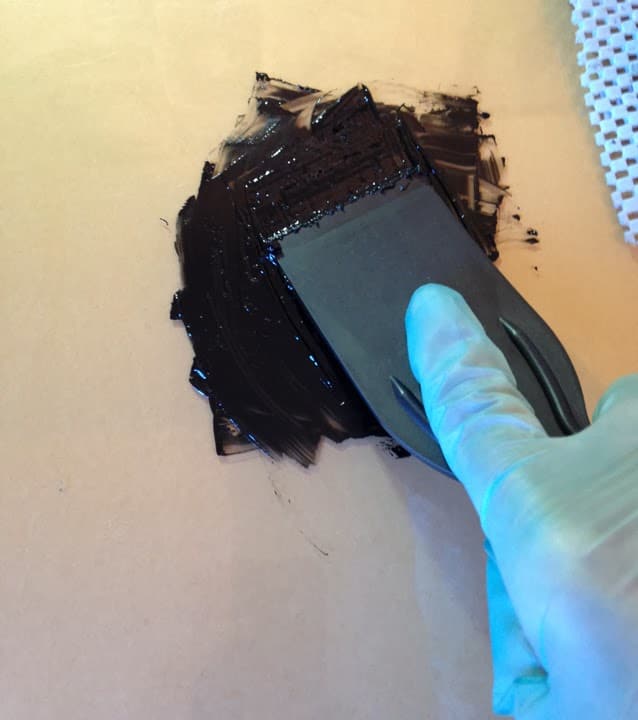
This is the ink I use in my studio when I want to clean things up with soap and water. There's no need for solvents to clean your plates and tools with this ink. Carbon Black intaglio ink is a nice, rich black for great line work. And you can use watercolor on the print after the ink dries - it will not re-wet!
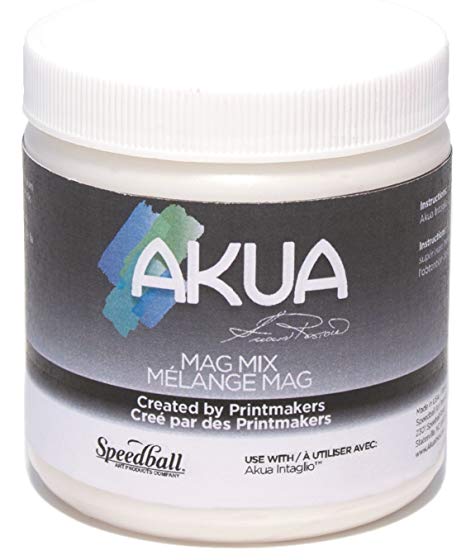
This is a thickening agent to mix with Akua Intaglio Inks. If the ink on your plate wipes out of the grooves and incised lines you've engraved with the needle, it might help to thicken the ink. Mag Mix adds a little more "sticky" to the ink. The pigments stay embedded in your line work a bit better with this ink modifier. You can see how I use it in many of the intaglio and drypoint tutorial videos on my youtube channel.
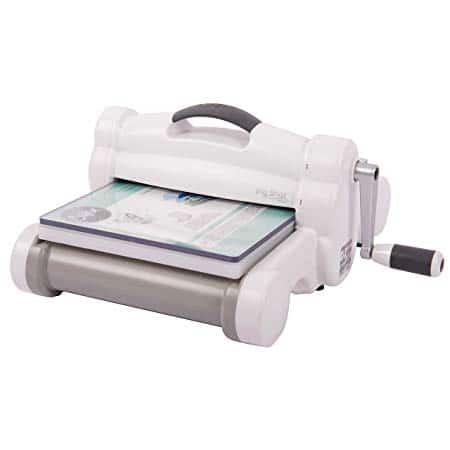
Sizzix Big Shot Plus Embossing Machine (small printing press alternative)
This is an example of the embossing machine artists and printmakers are using to print lovely, small scale drypoint and intaglio prints, as well as linocut prints. Be sure to visit the Facebook group called Craft Press Printmakers. They are doing amazing things with small die cutter and stenciling machines transformed into small printing presses.
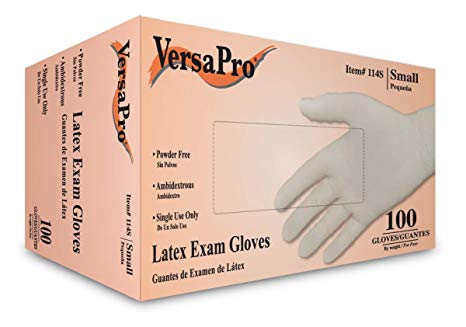
There should always be a barrier between your skin and pigments. Wear rubber gloves (be sure to select the right size) when you mix ink, apply ink to the plate, wipe ink from the plate, and clean the ink up after you're finished printing.
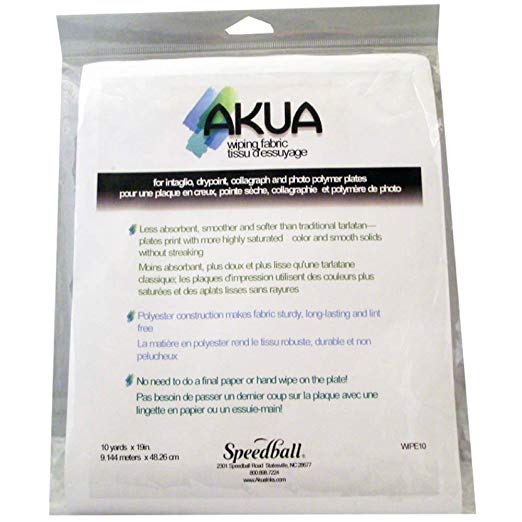
This is starched cheese cloth, or open-weave muslin fabric - also known as tarlatan. It's used to wipe ink from the uppermost surface of your intaglio drypoint or etching plate.
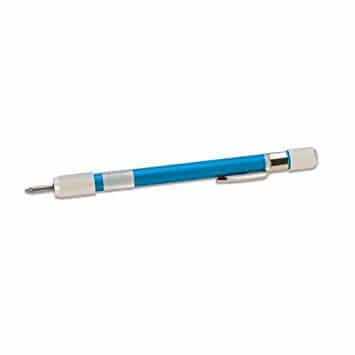
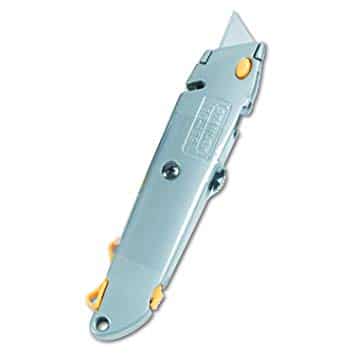
The tip of this scribing pen will carve a narrow groove into plexiglass or recycled plastic.
This is the tool I use to pull ink from containers, and manipulate it on the slab to mix colors, or warm it up with the friction of smooshing and smearing before adding it to the plate. It's also used for scraping leftover ink together, and scooping it into little containers to use in later projects.
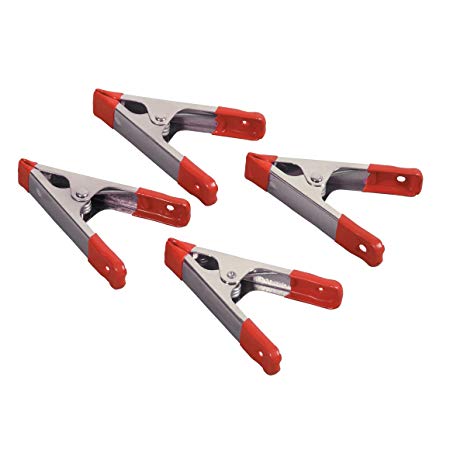
These spring clamps will hold your plexiglass plate steady while you score and snap it into smaller sheets. They also work perfectly for securing the plate without marring the surface while you bevel it, which you can see in a video tutorial on my YouTube channel.

This material works very well to hold your plate steady while you engrave your lines, or add cross hatching with the needle. It also works to steady any printmaking plate while you apply ink, wipe the plate, and clean it after you're finished printing. You can see it used throughout the relief and intaglio videos on my blog and on my youtube channel.
Utility Knife to score and snap your plexiglass material to the appropriate plate size
When your plexiglass arrives, you'll want to score and snap the sheet into smaller pieces to make multiple plates. This is a great tool for that process.
This 12 x 12 plate of opaque black plexiglass can be scored and snapped into smaller plates. Create four 6x6 plates from this sheet. See how to score and snap the plexiglass in the videos that are linked in this post.
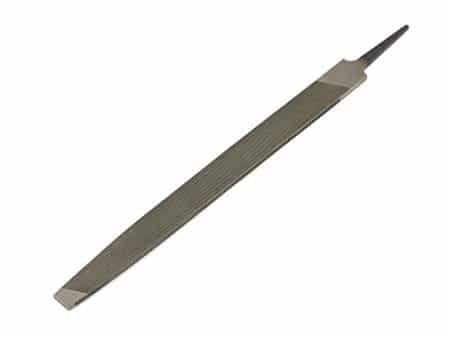
This 8 inch rasp can be used to file the sharp edge of the plexiglass plate down to a 45 degree bevel. This is an important step to prepare the plate before you begin your design, if you plan to print on a press. One rasp will last you a lifetime.
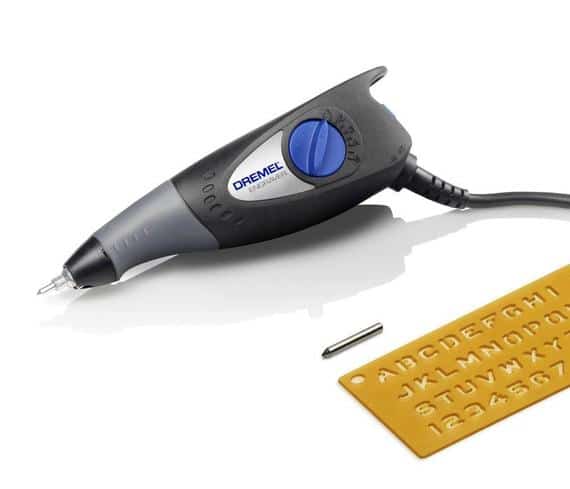
If your hands get tired when doing repetitive motions like cross hatching, or pressing hard on narrow tools to incise lines in plexiglass, you can etch your plexiglass plate with this small electric Dremel.
Hi Belinda, I have been following your blog and printmaking videos for a couple of years now and this series on making drypoint prints with recycled packaging is the one that made me fall (happily) down the printmaking rabbit hole. I can’t thank you enough.
You are right about the appeal of using recycled packaging. Low risk, big reward. Your link to the Craft Press Printmakers group was the further inspiration I needed to buy a small craft press. Now I am looking forward to trying out collagraphs and monoprints as well with your how-tos as my guide.
Below I posted a link to my second only recycled plastic drypoint print on the Craft Press Facebook page. And for anyone else out there thinking about giving this a try, I say go for it! It has been lots of fun.
Hi Liz, I just visited the Facebook Craft Press Printmaker’s Group [ https://www.facebook.com/groups/1544918272204523 ] and saw your first recycled plastic drypoint. (Insert big eyes and wow-face here.) What a wonderful launch to your printmaking adventure!Oh my goodness, that tree and the landscape around it are phenomenal! I’m so glad you’re having fun, and I love how responsive the group has been to your post! Keep swimming!
Like you, Belinda, I was hooked on these small plates and prints from the first one. I’ve engraved some, some have been sanded smooth so they can be drawn on with Neocolor wax pastels. I use an Evolution letterpress/ embossing machine for printing and it works great. Getting the right thickness for the correct pressure was the hardest part. My husband made me a base plate and I bought three standard press blankets and cut them to the size needed. It works like a miniature press and I’m delighted with the results. Well worth the effort. I use Anaheim 1867 paper dampened. Thanks for being such a great role model! Sorry, I’m not on social media so can’t post pictures.
Hi Mickey, Thanks very much for sharing your images via email (they’re lovely) and your feedback on this fun process. I’m so glad drypoint is working for you, and hearty congrats on your acquisition of the embossing machine to pull your prints! That’s going to make *such* a difference in your output, and the amount of detail you can pull from a plate! I hope this leads to a very creative winter, wiling the days away, sipping tea, making new designs, printing them in small editions, with a variety of colors and motifs. You’re on a roll, and I’m so glad for you. And yes, your Dad (and mine) are both smiling that we’ve got printmaker’s badges. Keep up the good work!