
Color Landscape Light Field Monotype Print
Here is a quick video demo (below) to show you the steps to make a full color landscape light field monotype print without a press.
There is also a list of all the supplies (below) I used in the demo, with links if you’re looking to source some of them for your next monotype project.

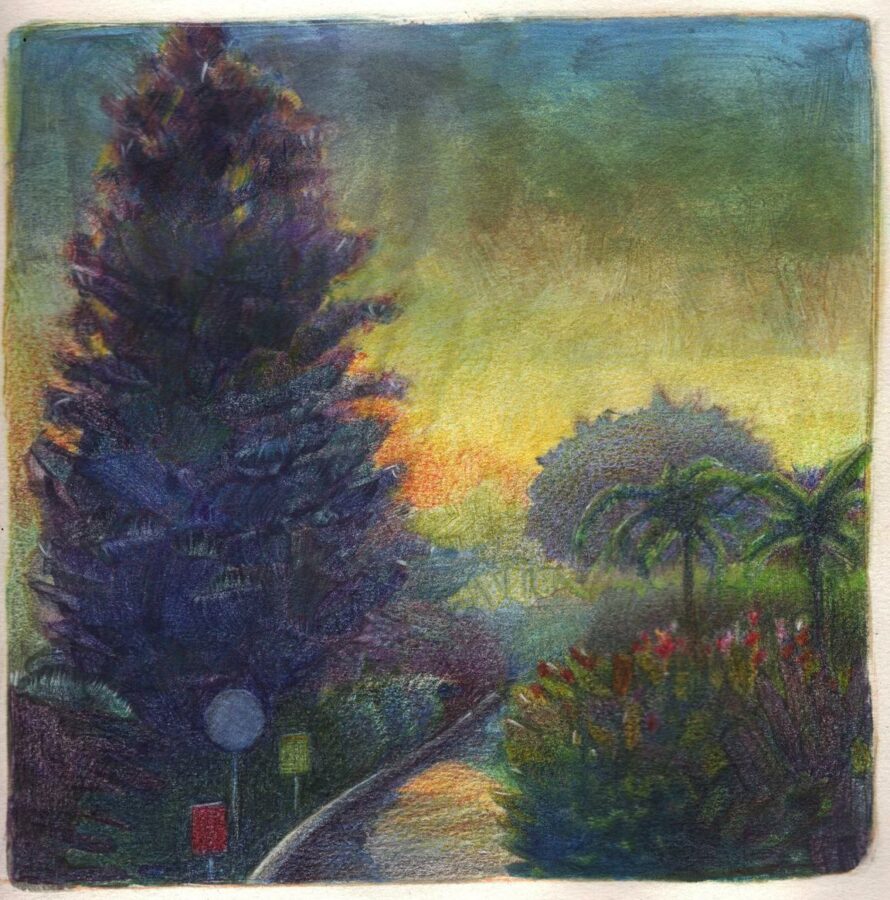
Light Field Monotype Print without a Press
Most of my friends don’t have a printing press. I didn’t have one either for a few decades, so any tutorial I could find with tips for printmaking projects without a press were valuable to me. That’s why I’m posting this demo, and I hope you find it helpful.
This monotype print demo uses pretty basic materials – all listed below. Part of what makes this project basic is the printmaking method. Are you familiar with monotypes?
What’s So Great About a Monotype Print?
To make a monotype print, you don’t need carving tools, or a sharp scribe to gouge into a block. There’s no cutting, and no caustic solvents like the ones you’d use to make an etching.
With monotype printing, you don’t need a press, and you can make one with acrylic paint or watercolor if you don’t have inks (with a few caveats).
Your printmaking plate can be a sheet of plexiglass, or polyester drafting film – like Mylar – which is used in this demo.
Barring that, you can use a plastic report cover, a sheet of glass (only if you’re not using a press), a piece of aluminum foil or a sheet of tin, etc. As long as the plate is smooth, un-scratched, and slick enough to release ink when paper is pressed against it, you’re good to go.
Painterly Printmaking with Monotypes
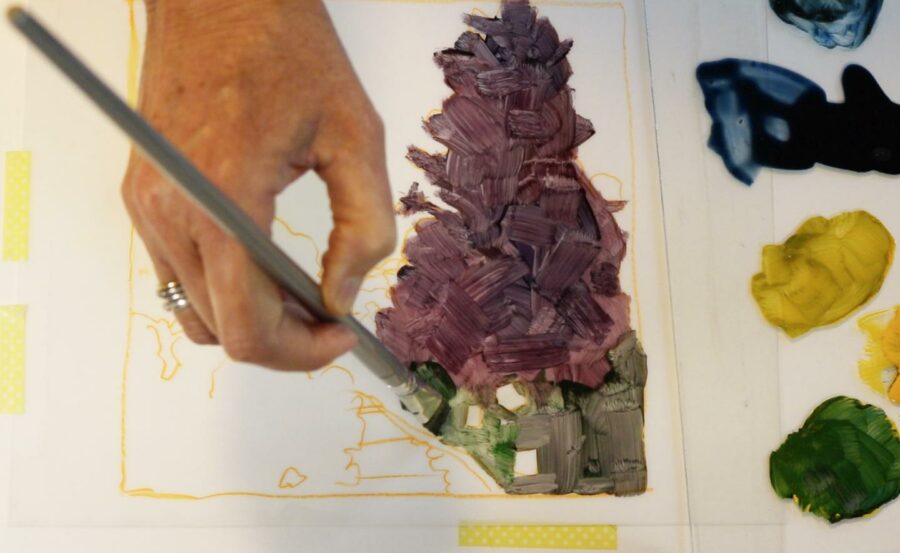
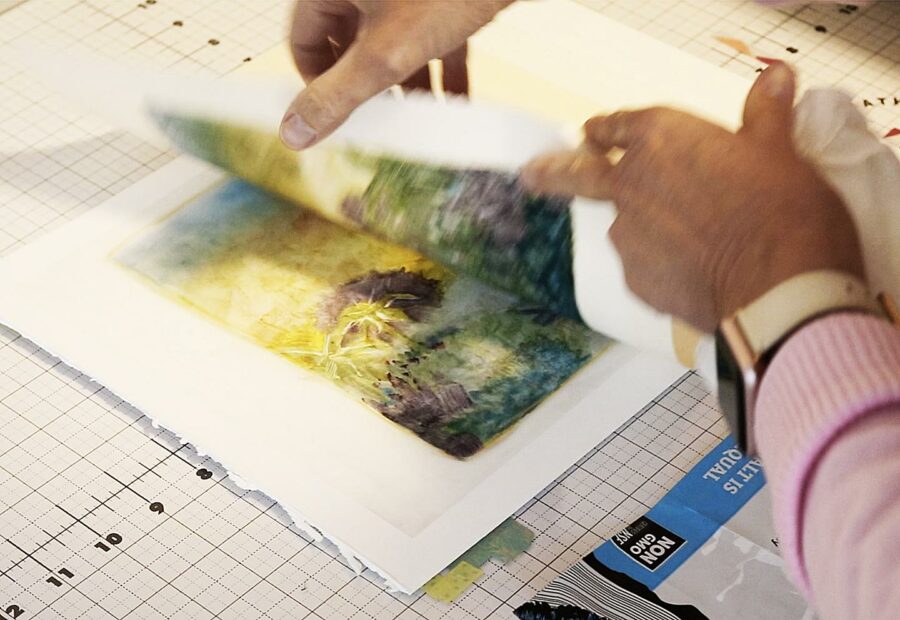
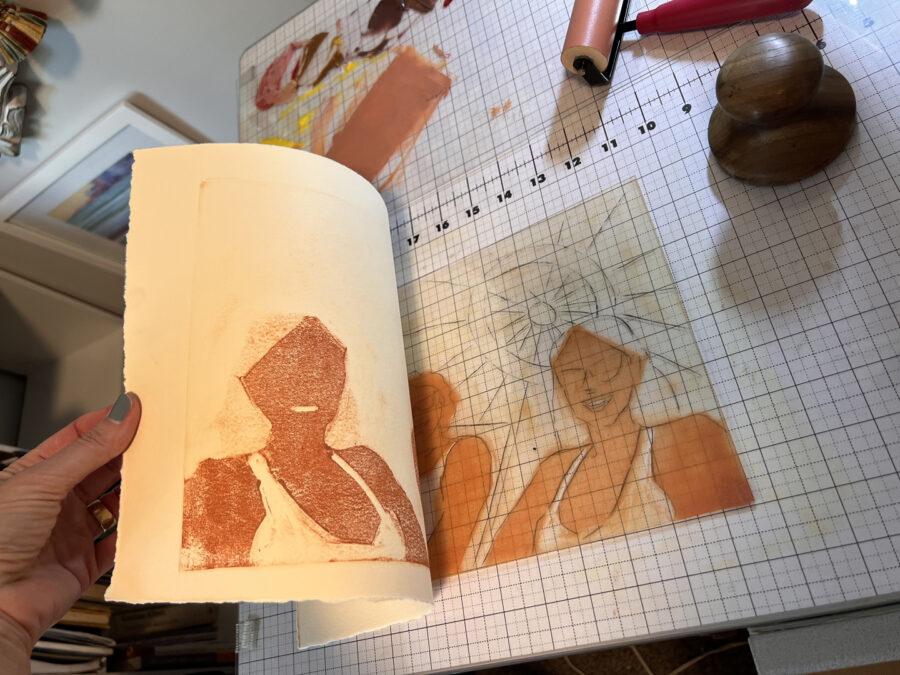
The basic premise is that you paint an image on a smooth, un-etched plate, like a sheet of plexiglass. And while the ink is still wet, you press a sheet of printmaking paper against your inky image to transfer the wonder from the plate to the paper.
Now, you might be scratching your head and wondering – ‘Why don’t you just paint on the paper and call it a day?’. The reason you press it rather than painting directly, my grasshopper, is because the pressure of pushing good paper into ink arranged artfully on a smooth plate creates MAGIC.
The squish of your hand pressing paper into the pigments makes new marks, entirely new colors, and a brand new image you didn’t even know you were making.
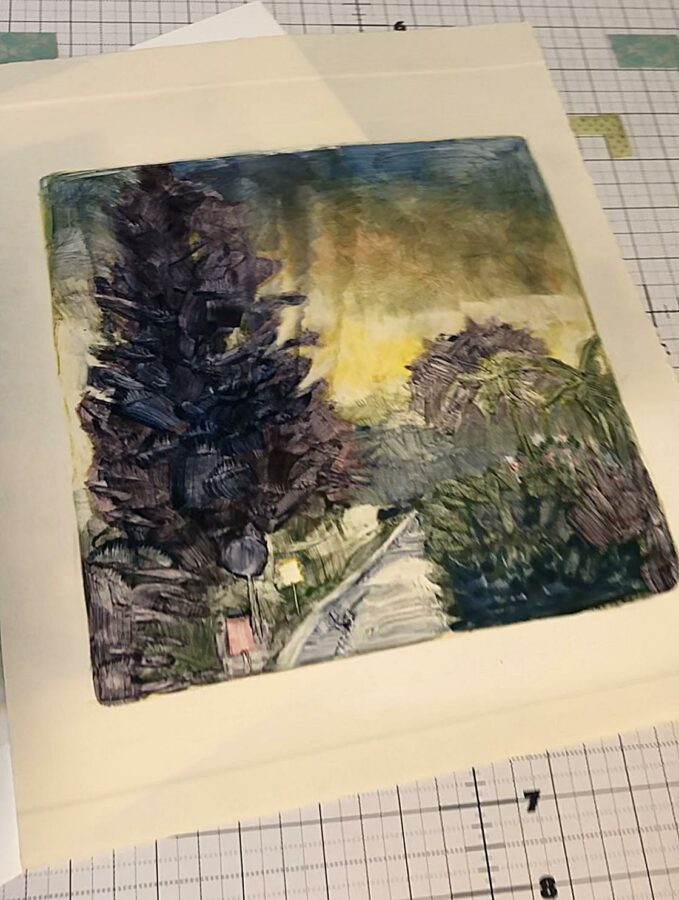
When you pull the paper from the inked plate, its a mark-making menagerie surprise every single time. It will take your breath away.
Light Field vs Dark Field Monotypes
When you roll ink onto the entirety of your plate, and cover the whole surface with pigment, you’re starting with a dark field. The plate is covered, so it’s “dark”. Then, with finger tips, cotton swabs, rags and such, you wipe ink away, like you’re carving light. See this post with a dark field monotype demo.
When you begin with a clear, clean plate, and you add pigment, just like you would with a blank canvas while creating a painting, you’re starting a light field monotype, because there is nothing on the plate; its a light field.
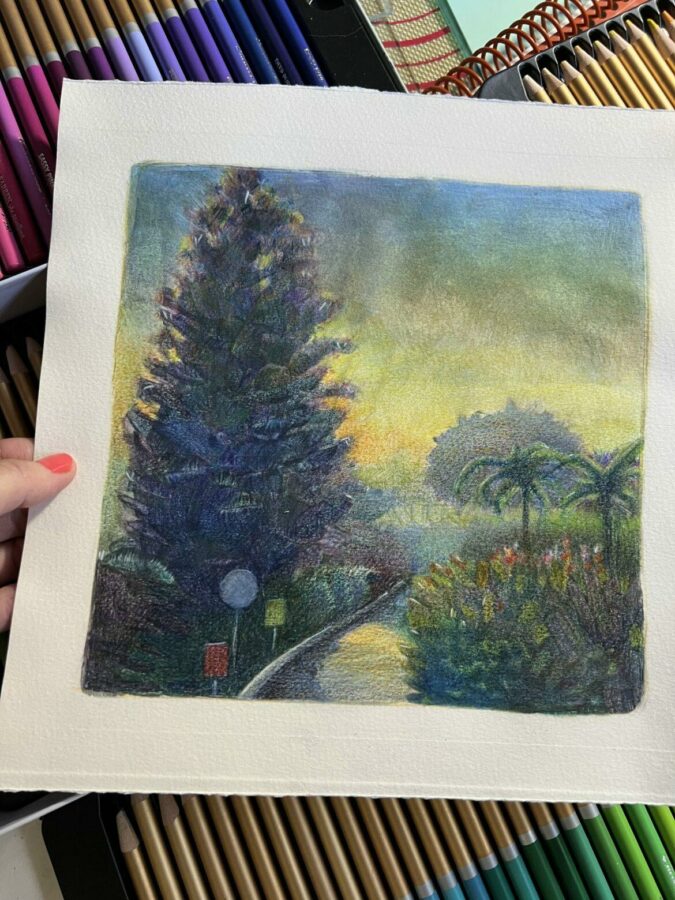
The landscape demo in this post is a light field monotype. Here’s another light field monotype print in a larger format. Capiche?
Adding Other Media to Your Monotype Prints
I’ve waxed on and on over the years about adding colored pencil and watercolor to monotypes. Degas did that with pastels on his dark field monotypes, so it’s not new, but it sure is fun.
Another reason monotype printing is so great is that you can repair your prints with other media. There’s permission to mess up in that approach, so for artists who are struggling to “loosen up”, you have a double layer of Go With the Flow.
First, there is the surprise image after the squish of paper into your pigment, so no matter how tight and controlled you get in the making of the image on the plate, the pressure will have it’s way with the art. That’s the first Loosen Up Permission.
And second, as soon as the pigment is dry, you have the option to re-work that finished print with other media. You can use watercolor, gouache, colored pencils, pastels, oil paint, etc. That’s two reasons to Let Go, and just play with your art supplies in monotype printmaking.
Monotype Printmaking Demos on Mastrius
My group in Mastrius is playing with monotypes right now (see above), so I’m doing a few demos on zoom with them to show various methods of making full color monotypes without a press. (There is still room in the group for you if you’d like to join us. [its about $79 American/$107 Canadian dollars a month]
If you have tips for making monotype prints, or favorite artists, or books, please share them in the comments. Monotypes are one of my favorite forms of printmaking due to their accessibility and simplicity. Have you ever made one before? What did you think?
Thanks for stopping by, and I’ll see you in the next post –
Belinda
P.S. You’re invited to join my Monotype Print Group on Facebook over here.
P.P.S. You are also invited to subscribe to this blog to get each new post via email (free) over here.
Supply List for this Monotype Print Adventure
Color Monotype Print Supply List
This monotype print supply list includes everything you'll need to follow along with the corresponding demo video (here) and the blog post (here).

This polyester drafting film works beautifully as a monotype plate, as well as a pigment mixing and rolling palette

If you prefer a "stiffer" monotype plate or ink palette, try using this PET Plastic instead of the drafting film
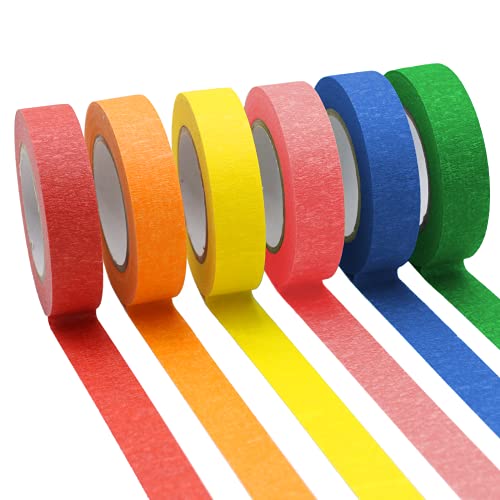
Colored Masking Tape works well to create a space to put your inked plate so it's centered and then a second application of tape marks where to align your printmmaking paper over the plate before you begin transferring the ink to the paper.

In the demo video, I marked a loose drawing of my landscape with these water soluble crayons, directly on the plate before applying the inks. You can use them to trace your reference photo through the transparent drafting film or plexiglass too.

Good printmaking paper makes a world of difference on the success of your prints. This paper works well for monotype prints, and you can also spritz it very lightly with an atomizer, and then blot it thoroughly just before printing to make the paper more pliable, and receptive to inks.

This is the paint brush I used in the demno video. It's right in between soft and firm, and the flat edge worked very well to create textures on the trees and to scumble hard edges to soft in the sky and receding background.

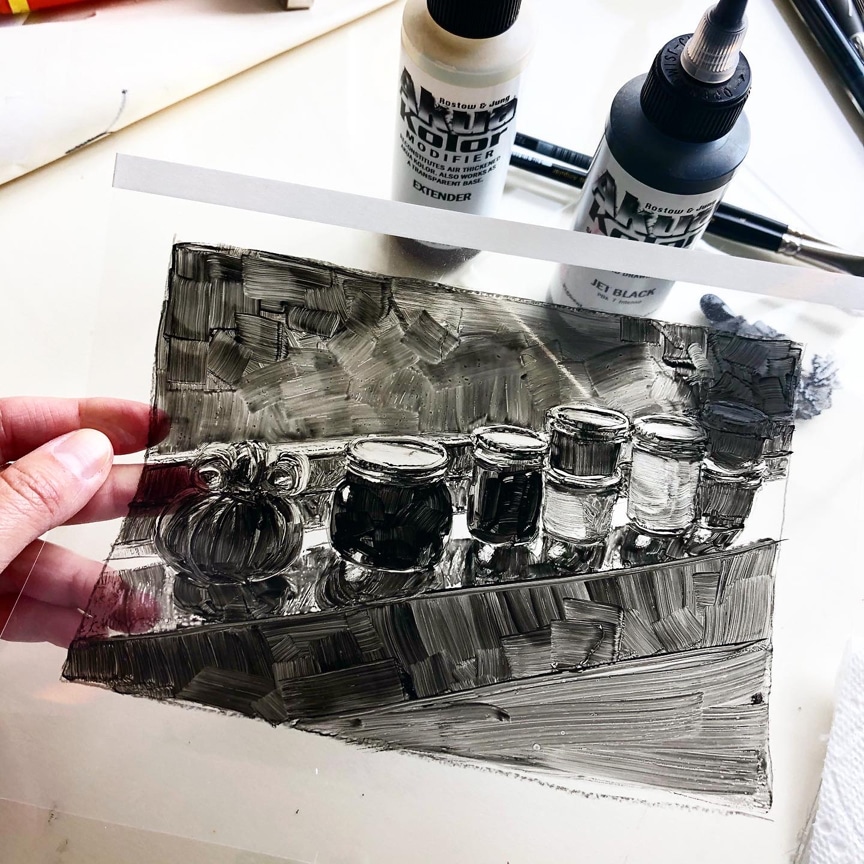
This is the Akua ink I used in the demo. This link will take you to a page on Amazon that features a variety of colors in 2, 8 and 16 ounze canisters.

This Akua transparent base is the ink modifier I use the most. It is a wonderful way to layer transparent colors, one on top of the other, to get gorgeous new colors, or subtley transitioning ombres. You'll see me using it in the demo video.
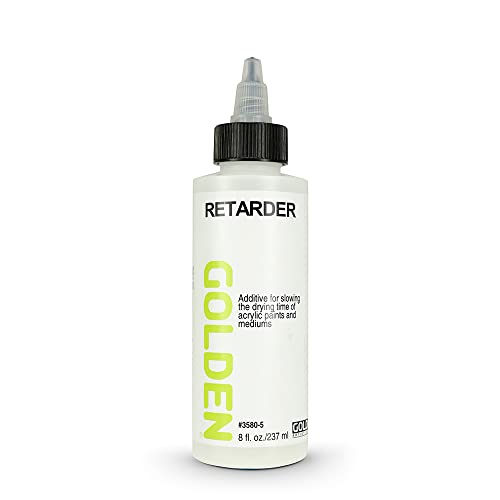
If you're making a monotype or monoprint with acrylic paint, this modifier works beautifully to slow the drying, which gives you more time to complete your application of paint to the plate - and keeps the pigments wet enough to transfer, before printing your monotype. Highly recommended.

These are my *favorite* mini brayers for detailed work on monotypes and linocuts, made by the same folks who built my etching press. Takach products are made with precision, quality materials, and their custiomer service is superb. Plus, they are family owned.
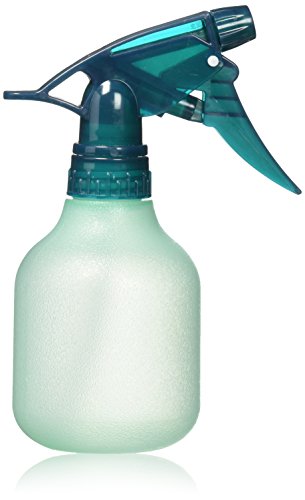
Rather than soaking paper when making monotypes where I'll be transferring by hand (without the use of a press), I find that using an atomizer with cool, clean water works best. This bottle works well for a light spritz, followed by a thorough blot, just before printing.
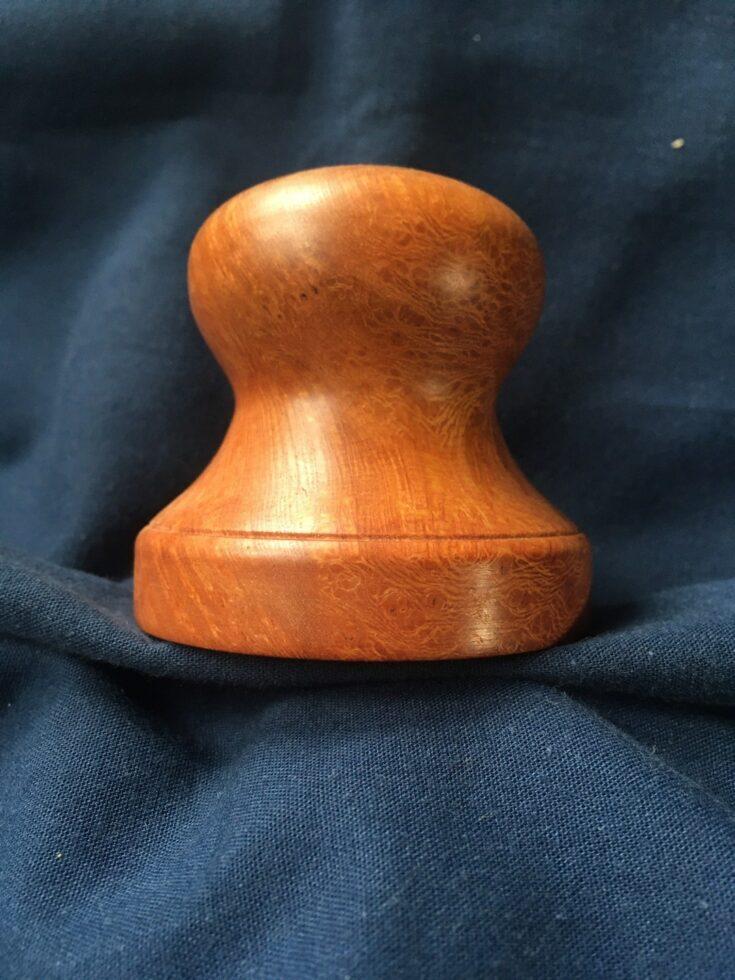
My favorite little wooden baren, out of all the barens I've ever tried, is made by Ian Whyte, usually from felled trees around his property in the UK, or from his travel in the Scottish Highlands.. It fits perfectly in the palm of my hand (his daughter in law is printmaking Hester Cox, so he had some help designing these), and I like that the downed tree he sourced the wood from is most probably old, wise and repurposed in my studio.

I buy these paper towels to use in my studio for their absorbency, their low lint, and their thickness, which allows me to re-use them over and over again. I either let the ink dry, and then continue to use them or I rinse them out (if I'm using Akua, which cleans up with water), and re-use them the next day.

The texture on cotton terry rags works very well to pull ink off your paint bush, and your monotype plates. I use small rag washcloths, rather than larger shop towels, and these rinse out beautifully, and dry quickly.
Art Quote
It does seem that it is often in those years between 8 and 13 that a tiny spark is lit by a teacher telling you or showing you something, and that if you’re lucky, that spark keeps alight and gradually becomes the glowing fire of your lifelong passion and career.
Ysenda Maxtone Graham
I’m back. Scaling down looking for process help again. Happy you are still sharing thank you. XOA
Hello Anne, It’s nice to see you again. Welcome back. I hope you find answers to your questions, and solutions to your process around here. 🙂
Beautiful work and instruction, as always!
Hi David, Thanks for the kind and generous compliments, as always. 🙂
Thank you so much for this great video!!
Hi Gabriele – Thank you for the feedback, and I hope you have a grand printmaking adventure with monotype prints!
Wow, stunning piece.
matthew
Hello there, my friend. Thank you for your encouragement. 🙂 XO Hello to Karen.
Such a clear explanation and beautiful work, Belinda! Really appreciate the supply list and all the nuances you reference- I am fairly new to Akua (worked with oil based inks my whole art life!) so the little tips you give are very helpful.
I am the founder and retired director of The Creative Center, a non-profit based in NYC that supports people with cancer and their caregivers through the arts- our tagline: “medicine cures the body, but art heals the spirit…”. After 28 years, finally getting back to my own art practice- painting, drawing and printmaking. Love the Facebook group you moderate- I have learned so much and connected with people around the world. Many, many thanks!
Hi Robin, Thanks so much for your feedback and your encouragement. And welcome to your very own art-life! I hope you find a great deal of respite in your process, and the fruits of your creative adventures keep you coming back for more. Your good work to heal the spirit with art must be incredibly satisfying. You’ve got three decades of changing lives to rest upon. I hope there’s all kinds of time for you now.
Wonderful comment, Robin and saying.
Thank you, David. You are very kind.
Belinda,
You continue to inspire and amaze me with your beautiful work! Thank you so much for sharing your work, your process, your experiments, and what you learn! It is truly inspiring and I look forward to your posts and emails so much! Thank you, thank you, thank you!!!
Hi Julie, Thanks for your very kind note. I’m so glad the process details resonate with you, and I hope your experiments with monotype are so fun, they lead to compulsively repeatable printmaking sessions. Put your experimental lab coat on, and sally forth with all due haste towards the inky wonder!
Happy printing!