
How to Make a Collagraph using Carborundum
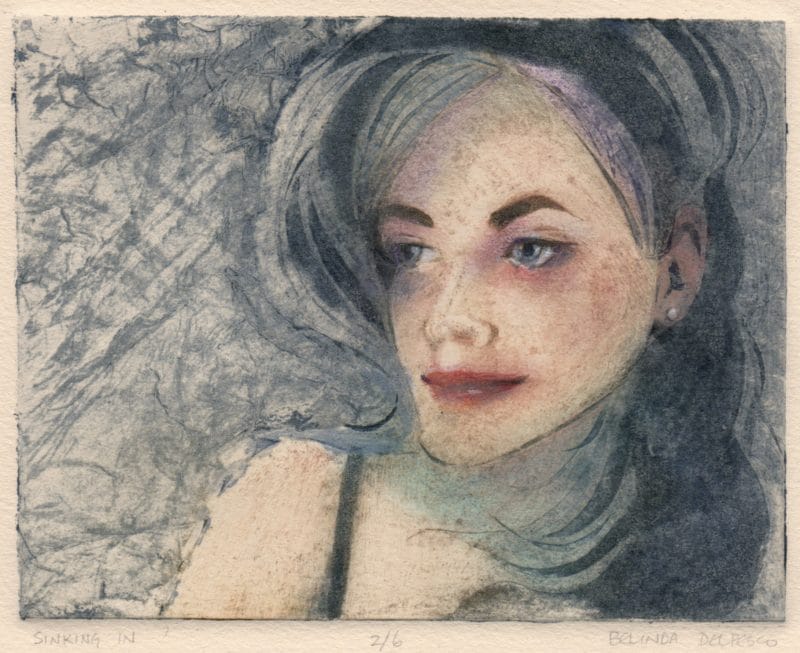
This collagraph was build on the back of a piece of mat board. Wanna build one too? (If you’re new around here, and you’ve never seen a mat board collagraph, here is a playlist of tutorials on my YouTube channel to help you get started.) Read on….
How to Make a Mat Board Collagraph Plate
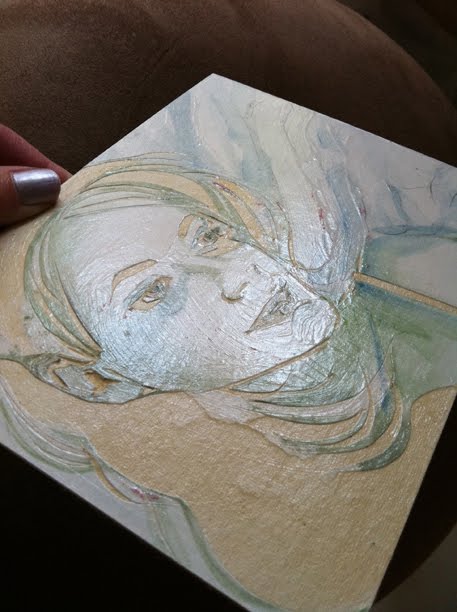
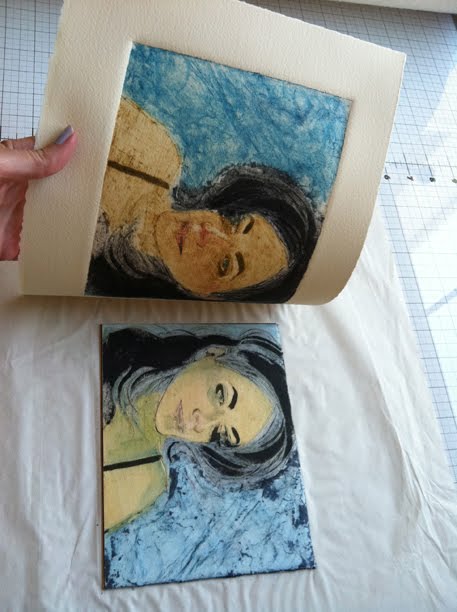
After sketching a young woman’s face and hair with watercolor on the verso of a scrap piece of mat board, I used a standard #11 exacto knife to incise lines around shapes I wanted to print as dark areas. Each shape was outlined in a very shallow cut, and I peeled the uppermost layer of mat board away, leaving a shallow well to hold ink. When the cutting was finished, I sealed the matboard front and back with *three* layers of Liquitex Gloss Medium & Varnish and let it dry overnight. This blocks moisture from absorbing into the matboard and turning it into mush once we start inking and cleaning and wiping, etc.
Adding Carborundum to a Collagraph
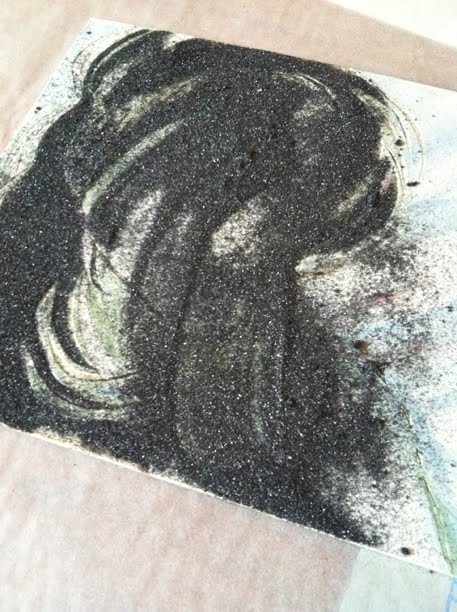
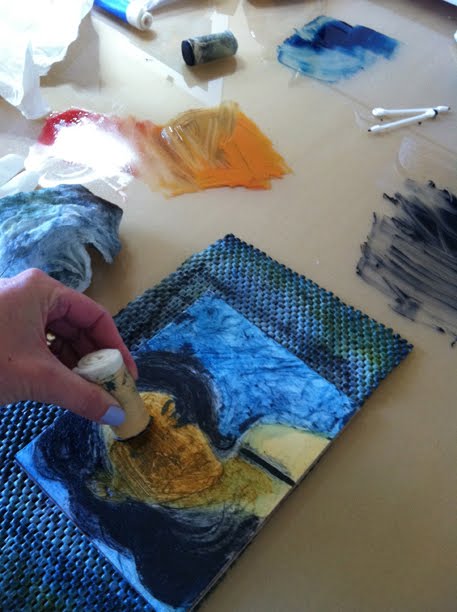
The next day, I added more Gloss Medium to the hair and brows, and before the gloss had a chance to dry, I used a small sieve to shake Carborundum (#120) powder onto the plate. What is printmaker’s carborundum? It’s sandpaper grit, and it comes in a couple of grit sizes, just like sandpaper. You can use fine grit carborundum (#220) or Medium Grit Carborundum (#180) or Coarse grit carborundum (#120). You can find it at Takach Press in New Mexico – the same folks who made my etching press. (Amazing company – highly recommended.) Carborundum is often listed as Silicon Carbide, and it’s sold to folks who use it in rock polishing tumblers, and industrial applications. You can also get a new product from Akua/Speedball that has carborundum in a paintable (less messy) gel, like this.
Back to Collagraph with Carborundum
When using the grit dry, it feels like beach or desert sand. Loose carborundum will adhere to the wet sections of your varnish on a printmaking plate, and once dry, it creates ink-grabbing areas that will hold lots of pigment, even after wiping the surface of the plate clear of all color, intaglio-style. In the photo below, after letting it sit for a few hours with the grit covering the plate, including my re-varnished recessed areas, I tilted the plate and poured the carborundum onto a sheet of paper and then back through the sieve suspended over the carborundum container, so any grit and varnish clumps would be kept from the clean stuff in my canister.
Here’s a Mat Board Collagraph Plate Building Tutorial Video:
Alternatives to Carborundum
One of these days, I’ll try using old coffee grounds as an alternative to carborundum; dry your used coffee grounds on newsprint in the sun, and then attach them to your plate the same way you would with the carborundum I’ve described above. I understand the texture and absorption of printmaking inks in the grounds result in a velvety, rich dark when printed, and the plate smells good too. 🙂 I’ve also heard about artists using corn meal for the same effect. #culinaryprintmaking
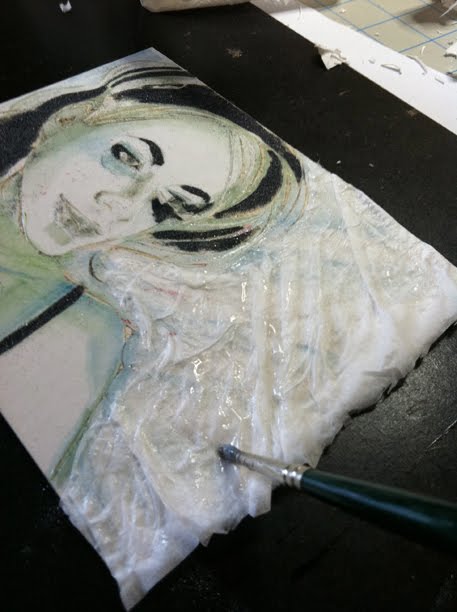
Collagraph Texture with Tissue
You can see the black carborundum on the collagraph plate adhered to areas in the hair and brows in the photo above. Now, I’m using Gloss Varnish again to attach a bit of tissue to the background for texture. I want this area to resemble a cross between bed sheets and water. After this was completely dry, I added one more coat of Gloss Medium & Varnish, front and back over the entire image.
When Not to Wing It
If you’re going to make a mat board collagraph plate, it’s very important that the sealer you use is slick enough to release ink when you press paper to your inked plate. I’ve heard countless stories about artists trying this with matte finish sealer, or random coats of canned items found in the garage, only to find that ink didn’t transfer to the paper at all, or the combination of ink on the fugitive sealing material melted together and ruined the plate. Don’t wing it on the sealer. Get the right stuff. Out of everything in the non-toxic arena of plate sealers that I’ve tried, this one works the best for me on mat board.

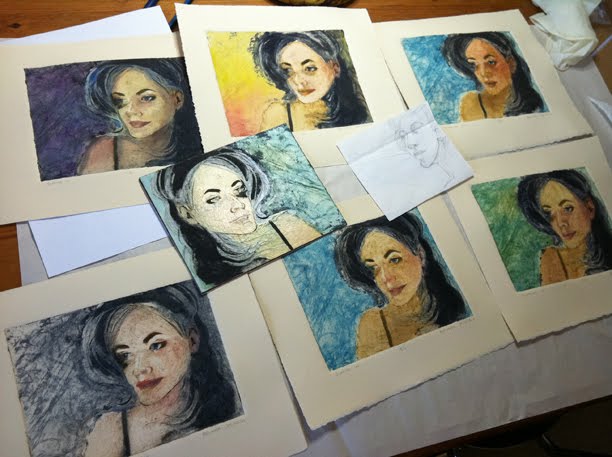
Hand Coloring Collagraph Prints with Other Media:
Collagraph with Carborundum Resources
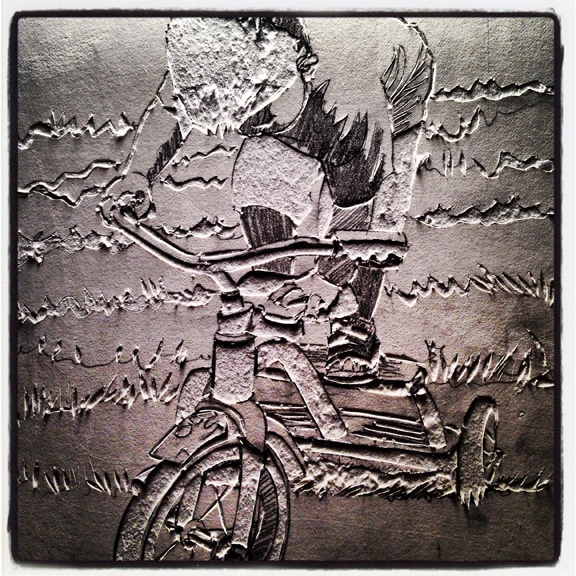
- Printmaker Brenda Hartill has a great book about collagraph printmaking, and this little video snippet (7 minutes) show’s how she uses carborundum on a collagraph plate.
- Susan Rostow, the creator of Akua Inks demonstrates a dark field reductive collagraph using Akua’s Carborundum gel in this video. (13 minutes)

Off to the Collagraph Races!
Do you want to make a collagraph now? Doesn’t it look fun? It really is! If you decide to dive in, scour the net for resources, videos and images of collagraphs to get your creative juices going. I’ve listed a bunch of supplies with links below, and that playlist linked at the top of this post, along with the videos inserted here, should give you a good idea of the basics in action. If you have any questions, don’t be shy; leave them in the comments, and I’ll get back to you as soon as I can.
Thanks for stopping by and I’ll see you in the next post!
Belinda
P.S. Get on the list to be notified when new online courses are published over at Belindatips.com
P.P.S. You can get each new post via email by subscribing (free) here.

Art Quote
During the early years of the Depression in Philadelphia, [Dox] Thrash found part-time work as a graphic designer, while also beginning to make a name for himself as a painter. But it was as a printmaker that he would leave his most lasting mark. In the late 1940s he received national attention for his role in the launching of a new printmaking technique, the carborundum print, developed in late 1937 in the Fine Print Workshop of the Federal Art Project, a branch of the government-sponsored Works Progress Administration (WPA).
Dr. Kimberly N. Pinder
Collagraph Supplies & Resources
Rubber Pencil Grip (I have one on a #11 xacto knife to help with finger-fatigue – you’ll see it in a few of the tutorial videos)
- Rubber Gloves
- Akua Ink starter set
- Akua MagMix (modifier to thicken the ink)
- Akua Transparent Base
- storage jars for leftover ink
BFK Rives paper Heavier Weight (for use with a press)
- BFK Rives paper (lightweight) for use with hand rub/transfer
(*recommended over the Kozo paper below if you plan to add other media*)
Kozo Mulberry paper (for hand rub/transfer – no wet media should be added to the finished print)
- Tarlatan cloth
Colored Pencil (optional media to add to your prints)
- Non-skid liner to secure your plate while inking & cutting
metal ruler with cork back for paper tearing
- spatula for mixing/laying out ink
Mylar sheets (tape one down to mix ink on, if you don’t have a piece of glass)
NOTE: If you’d like a downloadable four-page PDF of the supplies, with links and descriptions, you can order one here.
Thank you, so interesting.
Hi Linda, You’re welcome. Thanks for the visit.
Thank you for all of this information!
Hi Sue! You are very welcome! I hope you have all sorts of fun with it!