How to Make a Collagraph with Mat Board
Would you like to try some collagraph printmaking with scrap mat board?
Here’s a playlist of step by step tutorial videos on how to make a collagraph print posted on my youtube channel.
This blog post will show you – in photos – supplies and steps, how you can make an intaglio style mat board collagraph too.
You don’t need a press, and if drawing is a challenge, you can trace your image!
Scroll to the bottom of this post for a list of supplies with links, so you can see what they look like if you’re not familiar with this style of printmaking. Collagraphs are a versatile, fun printmaking process.
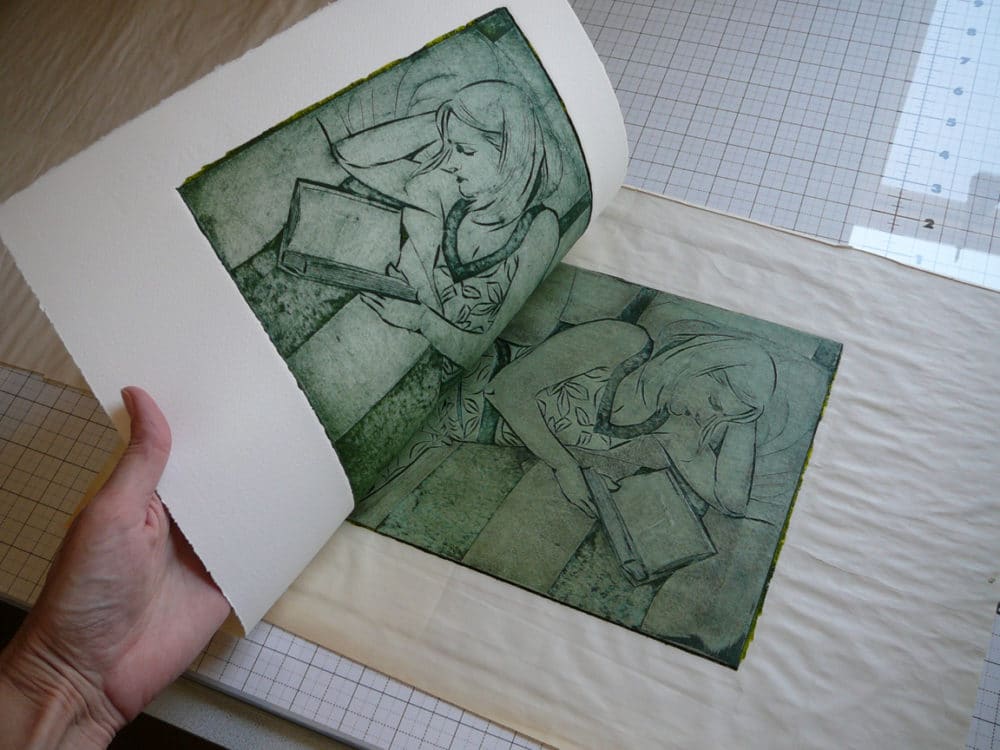
Is this the only way to make a Collagraph?
Collagraphs are printed in a variety of ways, with all sorts of materials in print studios worldwide.
In this post, I’ll show you how to make an inexpensive collagraph plate and print it, using scrap mat board, acrylic varnish, a blade and non-toxic printmaking ink. (All supplies are listed below.)
You’ll see a decade of mat board collagraph examples on this blog, and you can search for more inspiring examples on Google and Pinterest.
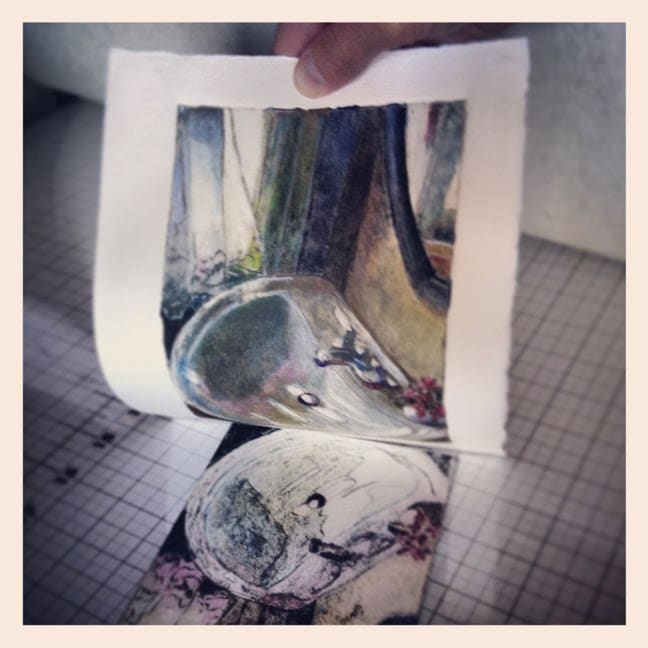
Gather Your Collagraph Plate Building Art Supplies
To make a collagraph print, gather your supplies and a simple design for your first print. (For the sake of perspective, the boat in the collagraph at the top of this post is *not* a simple design.)
This post shows a simpler collagraph design, so I’d recommend starting with less cut-outs, and focusing on straight or gently curving line-work.

Safe Carving Habits
I use non-skid shelf liner underneath the mat board, on my work surface. The non skid stabilizes the mat board plate during cutting and construction. (The non-skid also keeps the mat board plate from sliding around while I’m inking and wiping too.)
Any time you’re using a blade, or doing fine, detailed carving that requires concentration on your work, it’s very helpful to have your plate held steady with non-skid, or tape.
This frees your other hand from doing all the plate-stabilization un-assisted, which can put the holding hand in the path of your craft knife. Don’t cut yourself!

Light and Dark in Your Collagraph Design
After your collagraph design is sketched on the rear face of the mat board, look back at your reference photo and squint your eyes till the image dissolves into areas of light and dark shapes – no details.
Now, back on your mat board plate, use your pencil to shade in the same dark areas of your drawn design so it matches the darks in your reference image. This will give you a map to remind you where you want slightly recessed areas to hold ink.
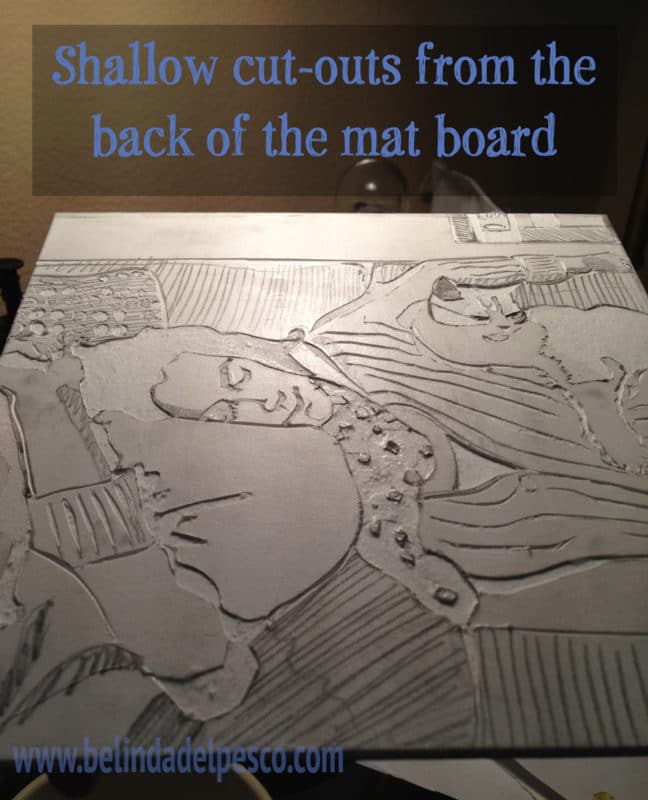
Before you begin to carve the lines from your design, seal the plate top, bottom and edges with Acrylic Gloss Medium and Varnish with two or three coats applied smoothly. Wait for it to dry completely before you start carving.
In the photo above, I’m peeling a shallow cut out of the uppermost layer of mat board to leave a textured shape in a slightly recessed “well” that will hold ink. These are going to be the darker areas of my design.
(By the way, you can enroll in my online art classes at BelindaTips.com – for free right here. Check out the courses currently available, and enroll to be notified of upcoming video courses in monotype, drypoint and collagraph printmaking, as well as watercolor basics and studio organization.)
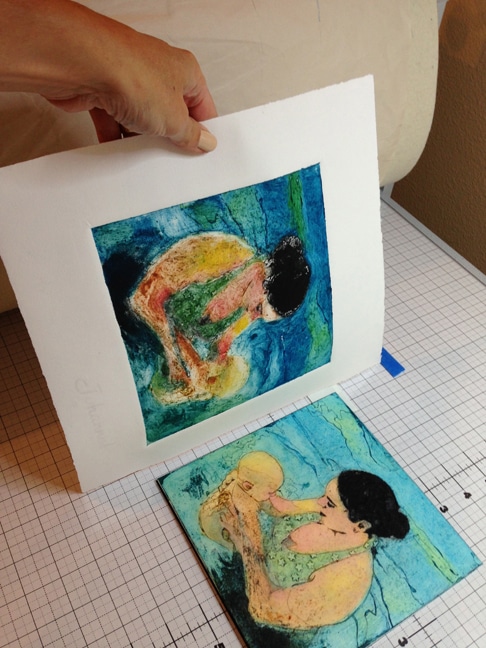
Visual Collagraph Inspiration
You can click on the images at the bottom of this post to read more collagraph print posts from the archives of this blog. You can use the search box on the top panel of this blog to search for the word ‘collagraph’ – and poke around the archives at your leisure.
Either way, I hope you feel energized and inspired to make a collagraph. They are so much fun! Okay, onward to the process shots! Are you still with me? Good!

How to Seal the Collagraph Plate
This is a very important step to the collagraph process if your plate is made from any paper-based product.
Ink is wet, and cleaning products are too. If you wet your mat board, the paper will swell, droop, absorb moisture and be ruined.
Coating the entire surface with a sealer – including the edges and back – will transform your mat board into a sturdy printmaking plate.
I use Liquitex Gloss Medium and Varnish. (Some artists use shellac or button polish, but the Liquitex cleans up with water, so I prefer this to something that requires solvents.)
In printmaking, you want the ink to release from the plate, and transfer, or adhere to the paper you’re pressing against it. The gloss varnish is an important part in that process; it’s slick, so it releases ink easily.
Your ink won’t transfer well if you’re using a matte-finish sealing product.

More Advanced Additions to Collagraphs
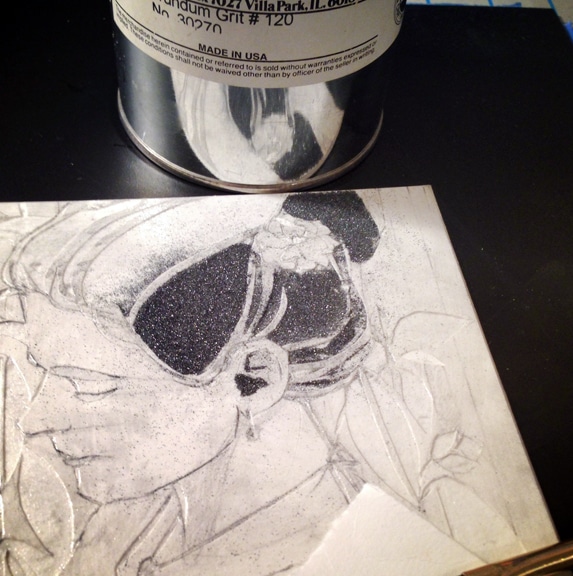
After adding gloss medium to the pencil marked and carved channels, and while the medium was still wet, I poured carborundum (sand paper grit) on those areas. (You can see more fun experiments with carborundum on this Sinking In collagraph.)
You don’t need carborundum in order to pull a successful print. The purpose of the grit is to hold ink, so that even after I’ve wiped inks from the plate to lighten shapes in my design, some of these carborundum-treated areas will remain rich with ink, because the pigments stay embedded around the granules of the grit.
If this is your first print, skip this part and scoot down to the process video below, and the inking section. 🙂
After pouring a thin layer of carborundum grit on still-wet, selected shapes, I let everything dry, and removed any excess grit. The entire plate got one more, final thin layer of Gloss Medium Varnish.

How to Ink a Collagraph Plate for a Full Color Print
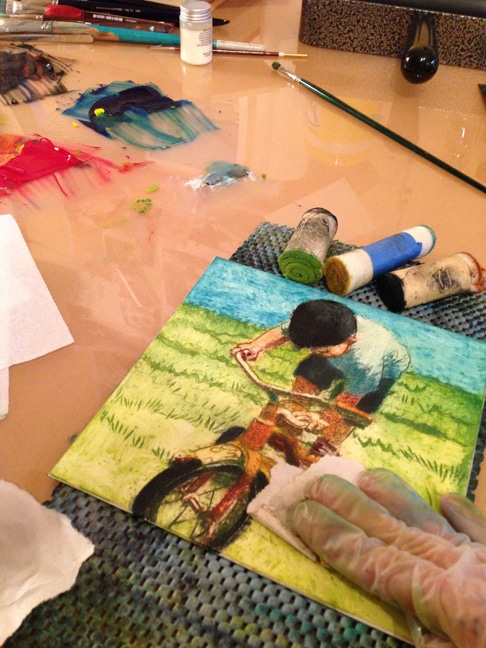
In the photo above, I inked the plate using the a la poupee method, with rolled and taped felt daubers, or “dollies” (poupee is a French word for doll).
The rolled end (see the dauber diagram below) is dipped into ink, and then rubbed on the plate in sections of color. Since you have two rolled ends of the dauber, you can use two colors with each one. I usually have 4-5 daubers ready for a full color print. This is a great way to do a multiple color print from one plate, with one press via spoon or hand, or one pass through the press. And the effects are often very painterly.
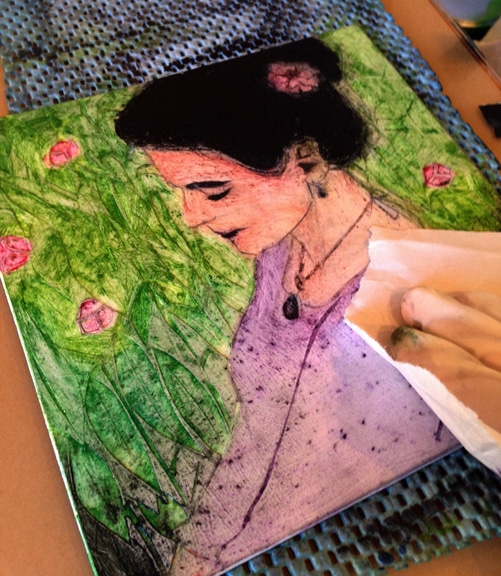
The photo above was taken after applying ink, and just before I started wiping the plate, to clear some of the uppermost surfaces where I want the collagraph print to stay light, in contrast with the recessed darker shapes.
(Watch the sink still life video below to see how wiping is done, and what the effects look like on the print.)


Using a Press to Print a Mat Board Collagraph
After a trip under the press, with soaked and blotted printmaking paper on top of the plate, you can see the results of the pressure (in the photo above); the paper is embossed with the shape of the voids I cut and peeled out of the mat board collagraph plate.
The soaked paper is flexible enough to drape and stretch down into the recessed areas I cut from the mat board.
If your line work prints white, it’s not making contact with the ink.
The paper makes contact with the ink I left in the recessed area of the plate, and the pigments transfer to the paper when pulled from the plate.

Examples of Collagraph Printmaking
This still life collagraph tutorial video below is another simple mat board collagraph plate, sealed with a few layers of Liquitex Gloss Medium Varnish. In the video, you’ll be able to see how the inks are applied, and then wiped to get a full color print.


It’s Your Turn – Make a Collagraph Print Soon!
Have you ever made a collagraph before? If you’re interested in trying one, and you don’t have a press, you can get started with just a few supplies.
Here is a play list of collagraph printmaking tutorials from my YouTube Channel. I hope they’re helpful to you, and I always welcome your comments and questions, so don’t be shy!
If you’ve made collagraphs, please share your tips & resources in the comments.
Thanks so much for stopping by, and I’ll see you in the next post!
Belinda
P.S. You can subscribe to get these posts via email. It’s free! Sign up here.

(Some of the links in this post are affiliates, meaning, at no additional cost to you, I’ll earn a tiny commission if you make a purchase. I’m grateful for your support. These gestures go towards art supplies so I can continue to share my experiments with you.)
Collagraph Printmaking Supply List (with links)
Mat Board (you don’t have to buy museum quality mat board, but the surface does peel a little cleaner, and the cottony centers hold more ink when you get stuff that’s just above craft quality mat board)
Pen (I use these Sakura pens to outline my pencil drawing. They stay affixed to the mat board even when I coat the surface with the gloss medium.
X-Acto knives:
Retractable #9 (small) blade knife
Fiskars Swivel Tip Finger Knife
Rubber Pencil Grip. (I put these on my xacto knives to help with finger-fatigue – you’ll see them in some of the tutorial videos)
Liquitex Gloss Medium & Varnish (this is used to seal the mat board plate. The shiny surface releases ink beautifully when paper is pressed against it.)
Paint Brushes (These can be used to apply ink to your plates, but the rubbing is a bit hard on the bristles. I use a combination of daubers and brushes: apply with the dauber, and move around with the brushes – because they leave nice marks in the inks)
Rubber Gloves (Regardless of the non-toxic titles in inks and modifiers, you should always wear a barrier between your skin and when handling ink, applying ink, wiping ink or cleaning your plates and tools.)
Ink Starter Set by Akua Ink (This is the most economical way to get started with akua inks. The set includes transparent base, so I would add a jar of Mag Mix [see below] to the order)
Modifier to Thicken Ink: Akua MagMix (I use a small amount of this in all of my Akua Ink to stiffen it, and add to it’s “stickiness”)
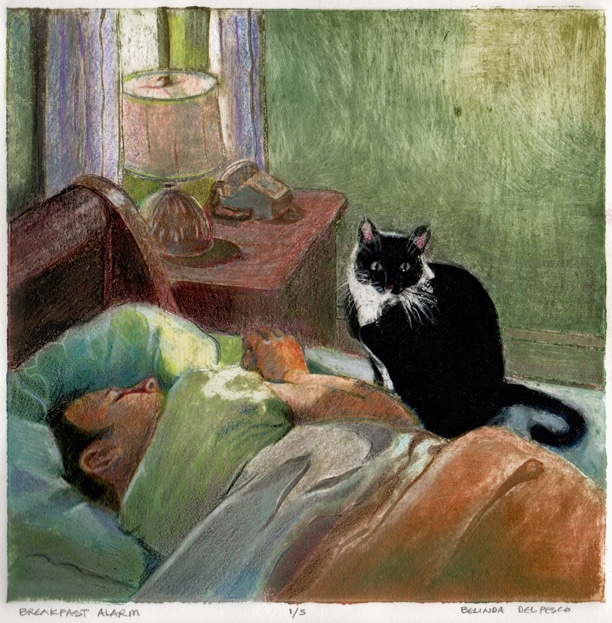
Akua Carborundum Gel (if you’re feeling adventurous, this is like petroleum jelly sand paper. When you paint it on sections of your plate, it Holds Ink, resulting in rich, solid color in your print, even after you wipe it. I used it on the cat in the print titled Breakfast Alarm below))
Akua Transparent Base (Akua inks are highly pigmented, so I mix transparent base 50/50 with all their inks to get more transparency in my prints. It makes the inks last longer too.)
storage jars for leftover ink (I like to keep my inks for other projects, especially after they’ve been mixed with other colors and modifiers. Label each color on the cap, or on a piece of masking tape around the belly of the jar)
BFK Rives paper Heavier Weight (for use with a press – absolutely beautiful paper, also great for drawing)
BFK Rives paper (lightweight) for use with hand rub/transfer (*recommended over the Kozo paper below if you plan to add other media*)
Kozo Mulberry paper (for hand rub/transfer – no wet media – like watercolor or alcohol inks – should be added to the finished printm as the colors will bleed beyond your brushmarks)
Tarlatan cloth (this is starched cheese cloth, traditionally used to wipe ink from plates in intaglio printmaking methods)
Pointed Q-tips (these are excellent for “spot cleaning of ink” for highlights in your plate, or when you need bright whites in tiny areas cleared of ink)
Self Healing Cutting Mat (I’ve covered half of my work table with these to accommodate cutting printmaking plates)
Colored Pencil (optional media to add to your prints)
apron (this is my favorite apron out of dozens I’ve owned – it’s 100% linen, soft to wear, and mine is a dusty rose color.)
Non-skid liner to secure your plate while inking and cutting
metal ruler with cork back for paper tearing – the corked back reduces sliding around while pulling the paper against the ruled edge, which helps you get straighter edges.
spatula for mixing/laying out ink
Mylar sheets (tape one down to mix ink on, and tape another right next to it to roll your ink out on, if you don’t have a piece of glass)
Takach etching press (This is the press I use in my studio, after trying out several makes and models in print labs and friends’ studios for a decade or so)
NOTE: If you’d like a downloadable four-page PDF of the supplies, with links and descriptions, you can order one here.
Mat Board Collagraphs Examples
Here and there on this art blog, you’ll find variations on watercolor painting, printmaking and drawing.
In the category of printmaking, there are quite a few collagraphs to look at (with links to the original posts and process photos in the titles), like these:
Art Quote
Study hard what interests you the most in the most undisciplined, irreverent and original manner possible.
Richard Feynman



Thanks for the inspiration! Do you think this would work with foam board and acrylic paint?
Hi Lori, no, the foam board innards are closed cell foam, so they’d likely not release the ink with all that bubble texture, even if you sealed the wells with shellac. You can try it with something that has a smooth inner structure, so the pigments will release from those incised lines when they come in contact with your printmaking paper. And acrylics dry too fast, so they wouldn’t work. I’m afraid you’ll need some real printmaking supplies (Ink, and printmaking paper) to make this work satisfactorily.
Love the “Sunday Morning” print with beautiful translucent curtains filtering the morning light.
Thanks very much, Hassaan! Happy printmaking adventures to you!
Amazing, Belinda!!
What a fascinating process… with beautiful results!!
Hi Carol, I could get quite a few, as the plate is plenty sturdy, but I’ll likely pull 15-20 in a variety of colors. Thanks for your compliments. 🙂
Wonderful, Belinda. How many prints will you get from this one?