
Making a Figurative Collagraph Print
Before we make a collagraph, let’s get inspired. Have a look at Alice Carter’s excellent book – The Red Rose Girls – An Uncommon Story of Art and Love.
The true story chronicles the lives, careers and friendships between famous artists Jessie Willcox Smith (1863-1935), Elizabeth Shippen Green (1871-1954) and Violet Oakley (1874-1961).
Their work ethic and resourcefulness is inspiring given they were making a living as artists when those skills were – at the time – considered a man’s job.
Their amazing work was created over one hundred years ago, and I wonder about their methods, materials, inspiration and daily routines. You can call their art sentimental, or as one of my friends says “sweet enough to give you a tooth ache”. I find their art to be so skillfully designed, with balanced compositiosn, and atmospheric color harmonies.
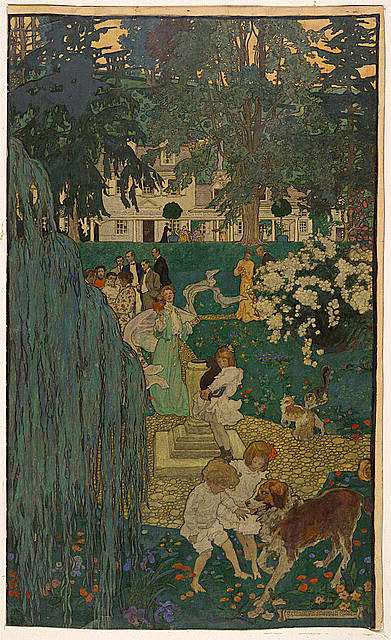
Below is a watercolor & charcoal (!!) that I love by Elizabeth Shippen Green – using her own garden and her room mates and friends as models – titled Life was made for Love and Cheer (image courtesy of the Library of Congress)
Tap Into Your Own Images for Inspiration
Now that we’re freshly inspired, let’s get into the studio and make something, shall we?
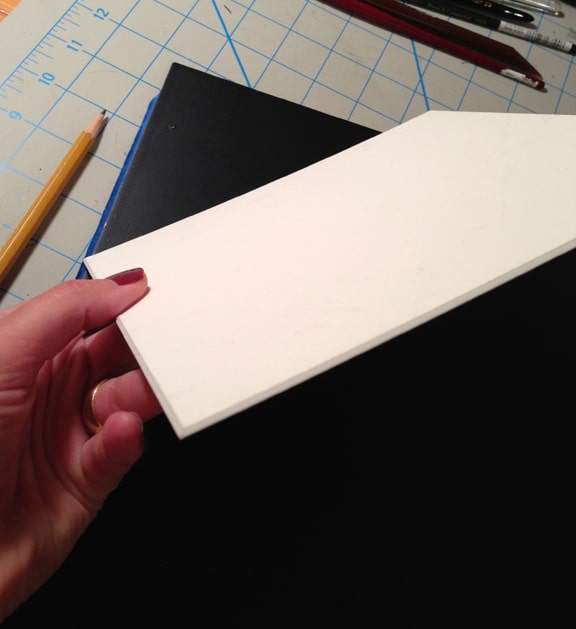
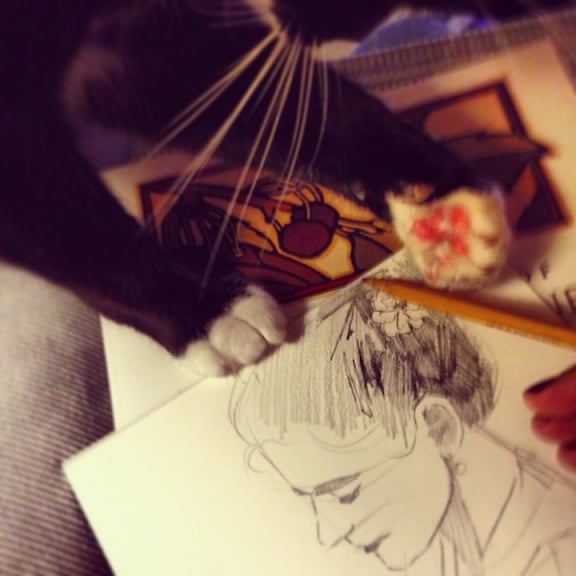
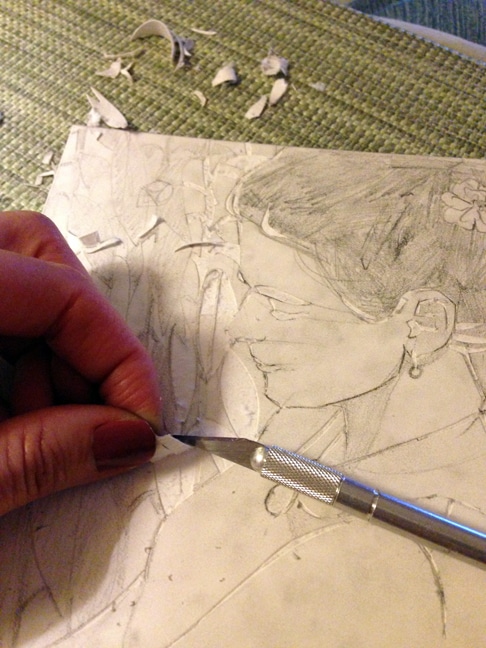
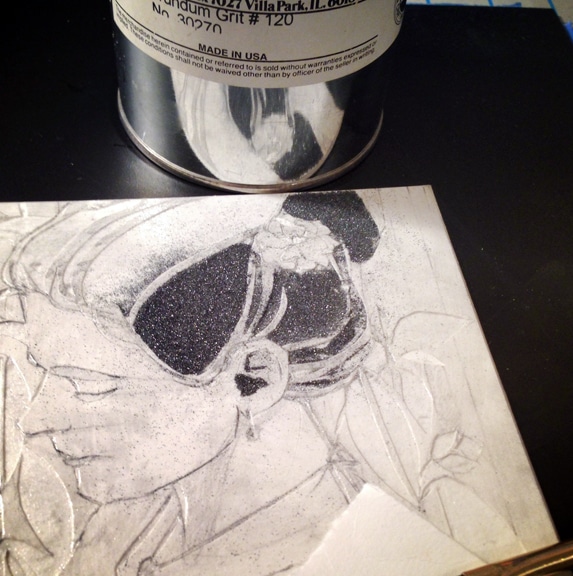
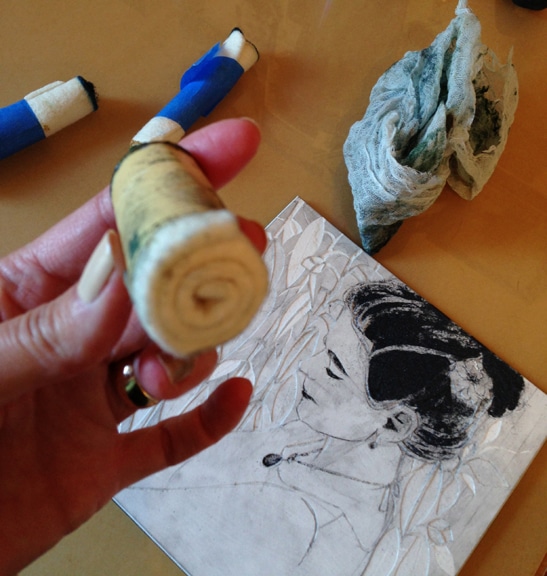
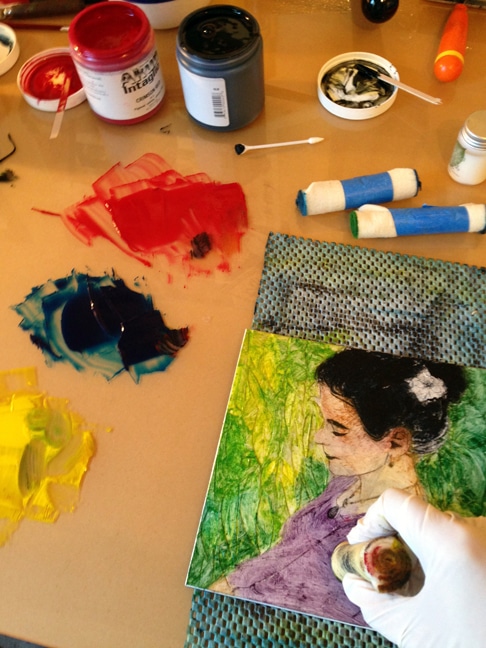
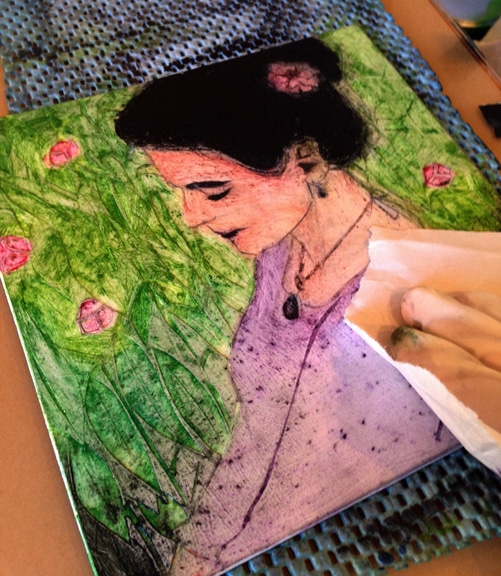
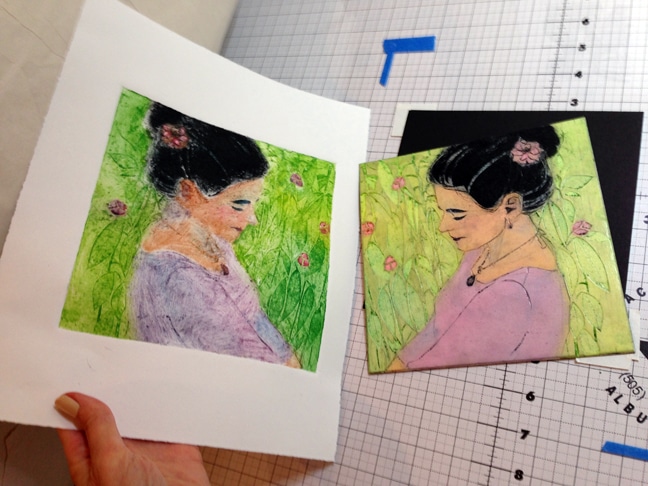
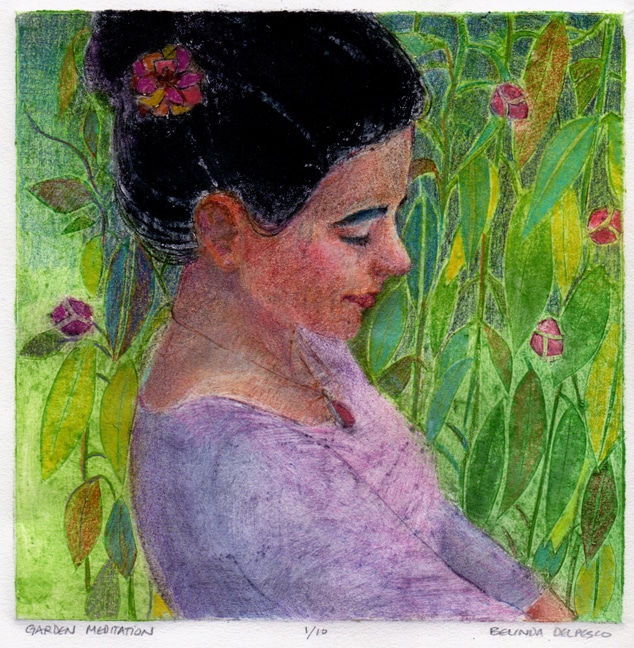
I’ve posted the photos of the process for this collagraph, Garden Meditation, below, and there are more details here. The root of the word – colla is derived from Ancient Greek κόλλα , or glue. In many collagraphs, texture and shape is glued to the plate, like a collage, to be inked and printed. Here is an example of material glued to the plate to make a collagraph print.
If you decide to make a collagraph, leave a link to your blog or social media post about it in the comments so we can see your results and cheer you on. Go ahead… Make something. 🙂

Mat Board Collagraph Printmaking
If you’re interested in making a collagraph print like this from mat board, here is a playlist of collagraph video tutorials from my youtube channel to help you get you started.
Under each video, in the Show More section, there is a list of supplies with links so you can order what you need online. If you want a printable list with links, you can find a collagraph Supply List here.
As always, you can leave any questions you have in the comments below, or in the comments under each of the tutorial videos on youtube.
Don’t be shy, because your questions might help another printmaker with the same issues after you’ve already become a master at this process. Keep your first designs very simple, go slow, and mostly have fun!
I’ll see you in the next post!
Belinda
P.S. You can subscribe to get each new post via email buy signing up here.
Art Quote
For middle and upper-class women interested in art and fortunate enough to be provided with a “fashionable education,” lessons were taught by private tutors. The curriculum, known as drawing from the “flat,” consisted of copying from the tutor’s own drawings or replicating engravings of works by well-known artists. Although amateur accomplishment in art was considered an advantageous social refinement, professional studies in life-drawing classes were feared to compromise a woman’s virtue by inflaming her passions and making her unfit as a wife and mother.In 1860, a group of female students at the Pennsylvania Academy, upset by their exclusion from life drawing, started their own classes outside the campus, posing for each other sometimes clothed, sometimes half draped. Although word of the renegade courses embarrassed the Academy, Ladies’ Life classes were not added to the curriculum until 1868, and they remained segregated for many years. In 1886 when Thomas Eakins lifted the loin cloth of a male model to reveal a little too much anatomy to his female students, he was fired.
Alice Carter – The Red Rose Girls: An Uncommon Story of Art and Love
@John, from a fellow printmaker, that’s a very nice compliment. Thank you. :o)
@Celia – I’m glad you’d like to try making a collagraph. If you do, be sure to post a link back here in the comments so we can see.
@Cristiane – I’m glad you like the art and I would encourage you to try the process. It’s *very* fun.
I just love this art piece.
John
Belinda, she is beautiful and women have come a long way in art! I love your process and think it would be fun to try-you give us all the information we need. Thank you!
Hi Belinda!
Your “Garden Meditation” is so peaceful…so beautiful…
Thank you for sharing your creative process, it’s very interesting. I didn’t know how to do the colllagraph.
I am impressed by the things you’ve told about the female painters in the nineteenth century.
Nowadays it’s hard to accept that this kind of segregation existed!